10 Day Yellowstone Itinerary
Explore America’s first national park with this comprehensive 10 day Yellowstone itinerary!
This massive property spans portions of 3 states and over 2.2 million acres, so you’ll need about a week and a half to truly experience it all.
With cowboy-led trail rides, hundreds of geothermal features, easy hikes, and incredible wildlife viewing, Yellowstone National Park offers up activities that the entire family will never forget.
My family and I have fallen in love with this incredible place, and I hope that this itinerary helps your family do the same.
Below, you’ll find everything you need to plan the perfect family trip to Yellowstone. I’ve included suggested hikes, activities, and road trip stops, as well as recommended hotels and restaurants for each leg of your trip.
Let’s adventure through Yellowstone—but remember, don’t pet the bison!

Herds of bison in Lamar Valley near the northeastern entrance to Yellowstone
This post contains affiliates. If you purchase through the links below, I will receive a commission at no charge to you.
Yellowstone Trip Planning Tips
This itinerary starts near Jackson, Wyoming.
Of all of the entrance towns, I personally prefer Jackson, thanks to the available grocery stores, activities, and shopping.
That being said, you can start this itinerary at any of the entrances; you’ll just have to shuffle the numbered days a bit. I have noted when you’ll pass each entrance to the park if you plan to rework this itinerary to start/end at other entrances.
For more information on each of the entrances to Yellowstone National Park, check out my comprehensive guide.
Think of Yellowstone National Park as having a road in a boxy figure 8.
Grand Loop Road makes up the outer ring, and Norris Canyon Road bisects it roughly halfway down.
On the top loop, you’ll find Mammoth Hot Springs, Tower-Roosevelt, the north entrance, the northwest entrance, Lamar Valley, and Tower Falls.
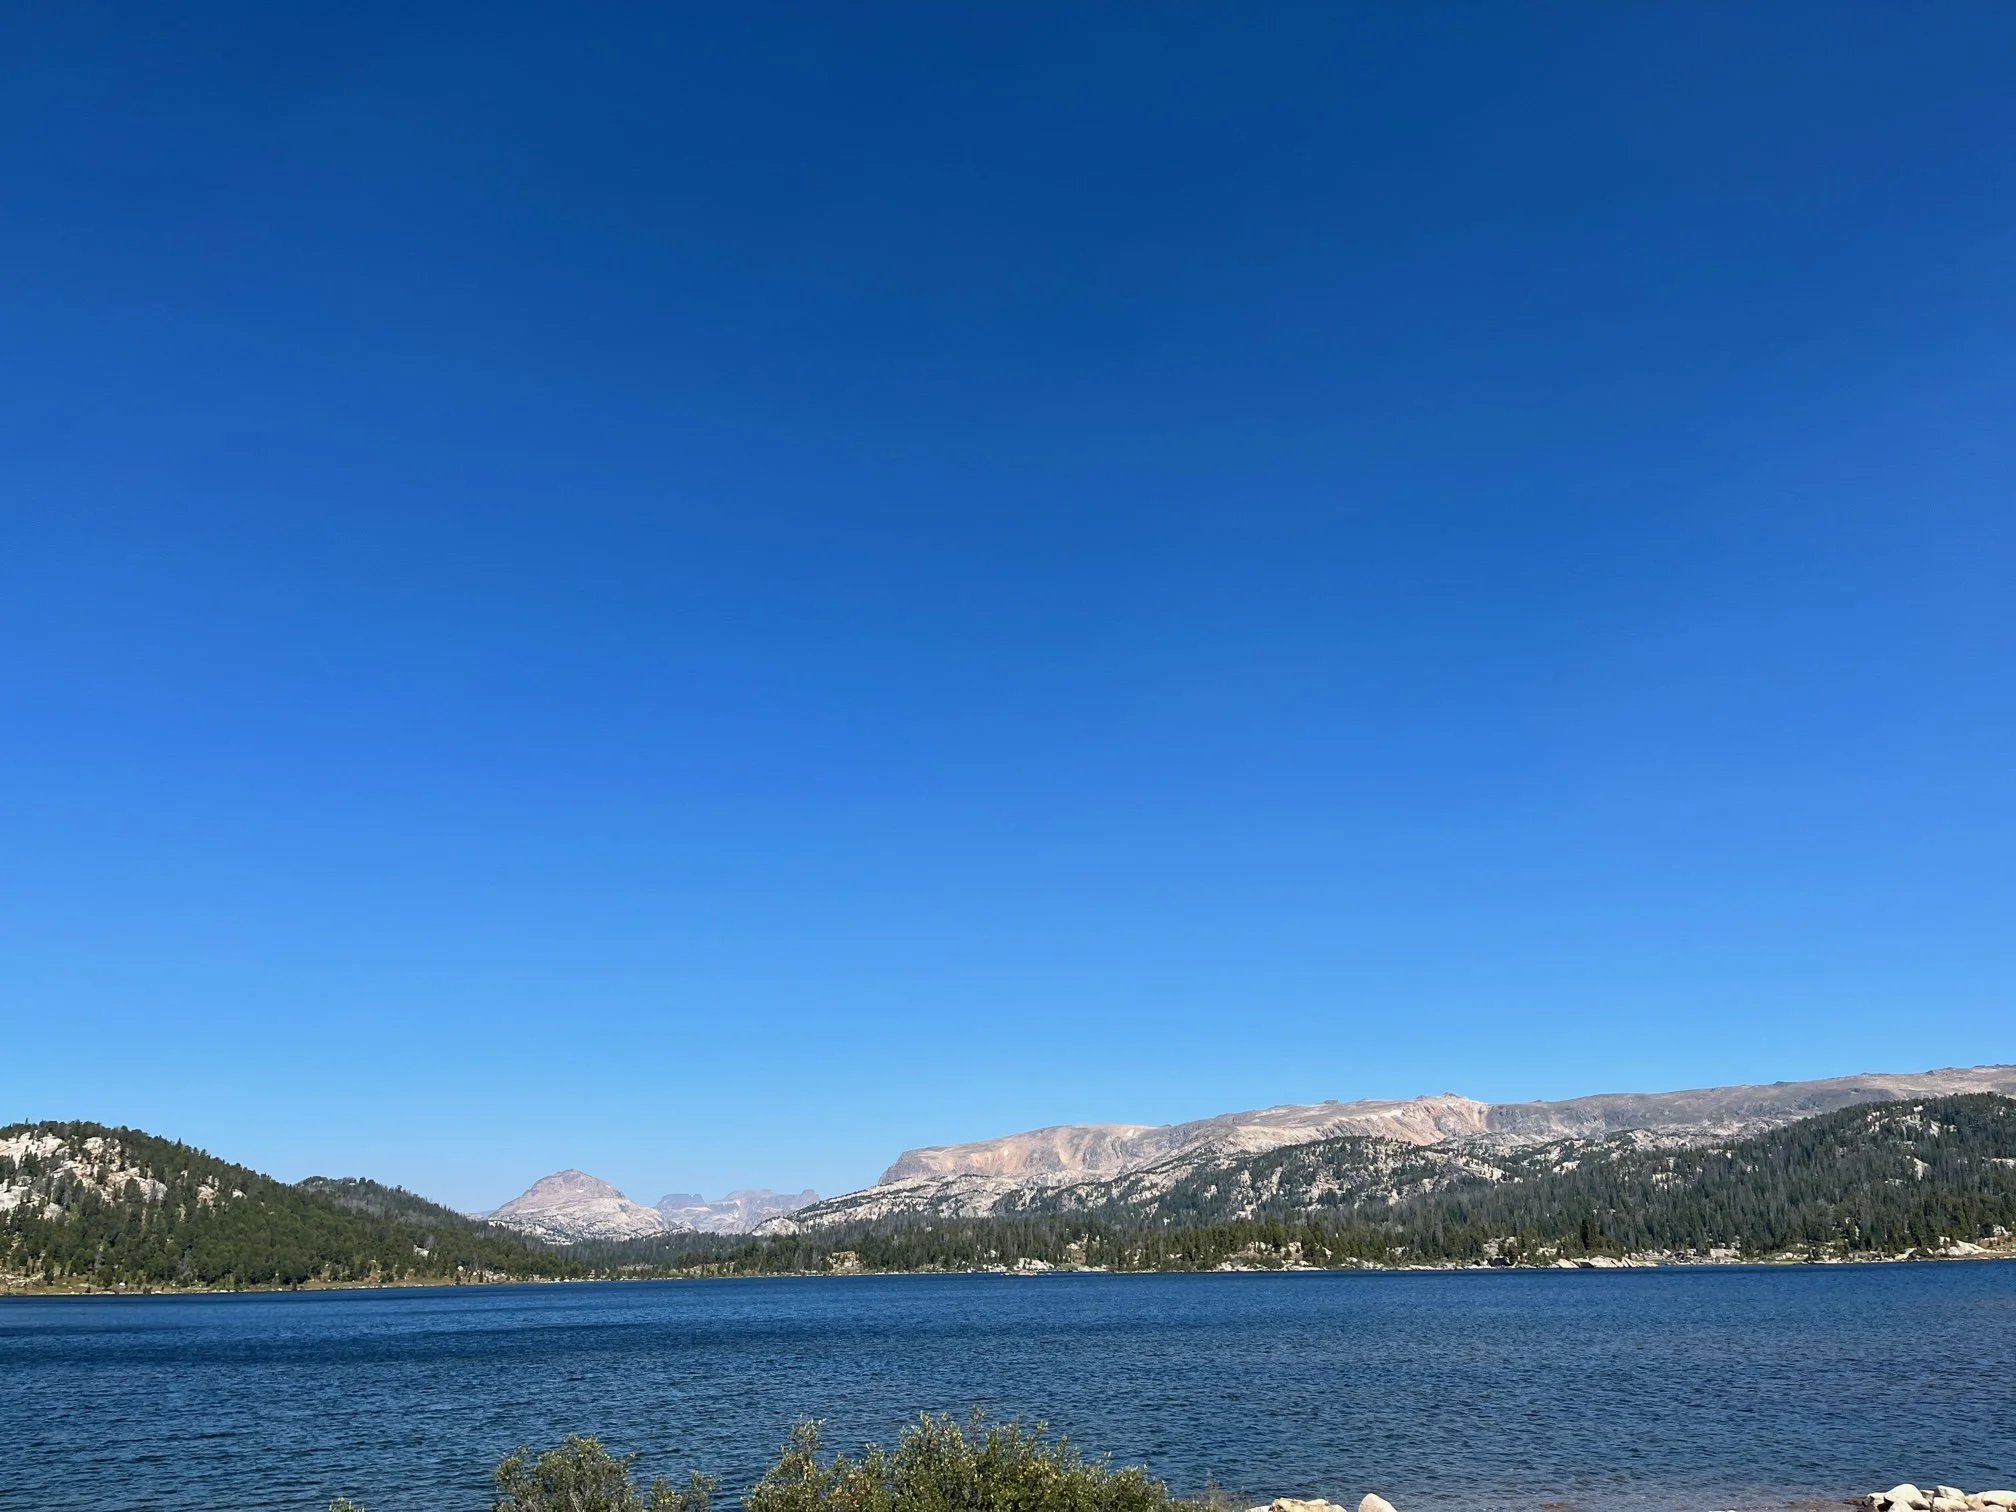
On the bottom loop, you’ll find Old Faithful, Grand Prismatic Springs, Fishing Bridge, Lake Yellowstone, and West Thumb Geyser Basin.
In this itinerary, you’ll explore areas along both the top and bottom loops.
If you drove the entirety of Grand Loop Road, it would take roughly 6 hours.
That timing assumes that you won’t have any wildlife encounters slowing traffic down and that you drive straight through without any stops.
But what fun is that experience?!
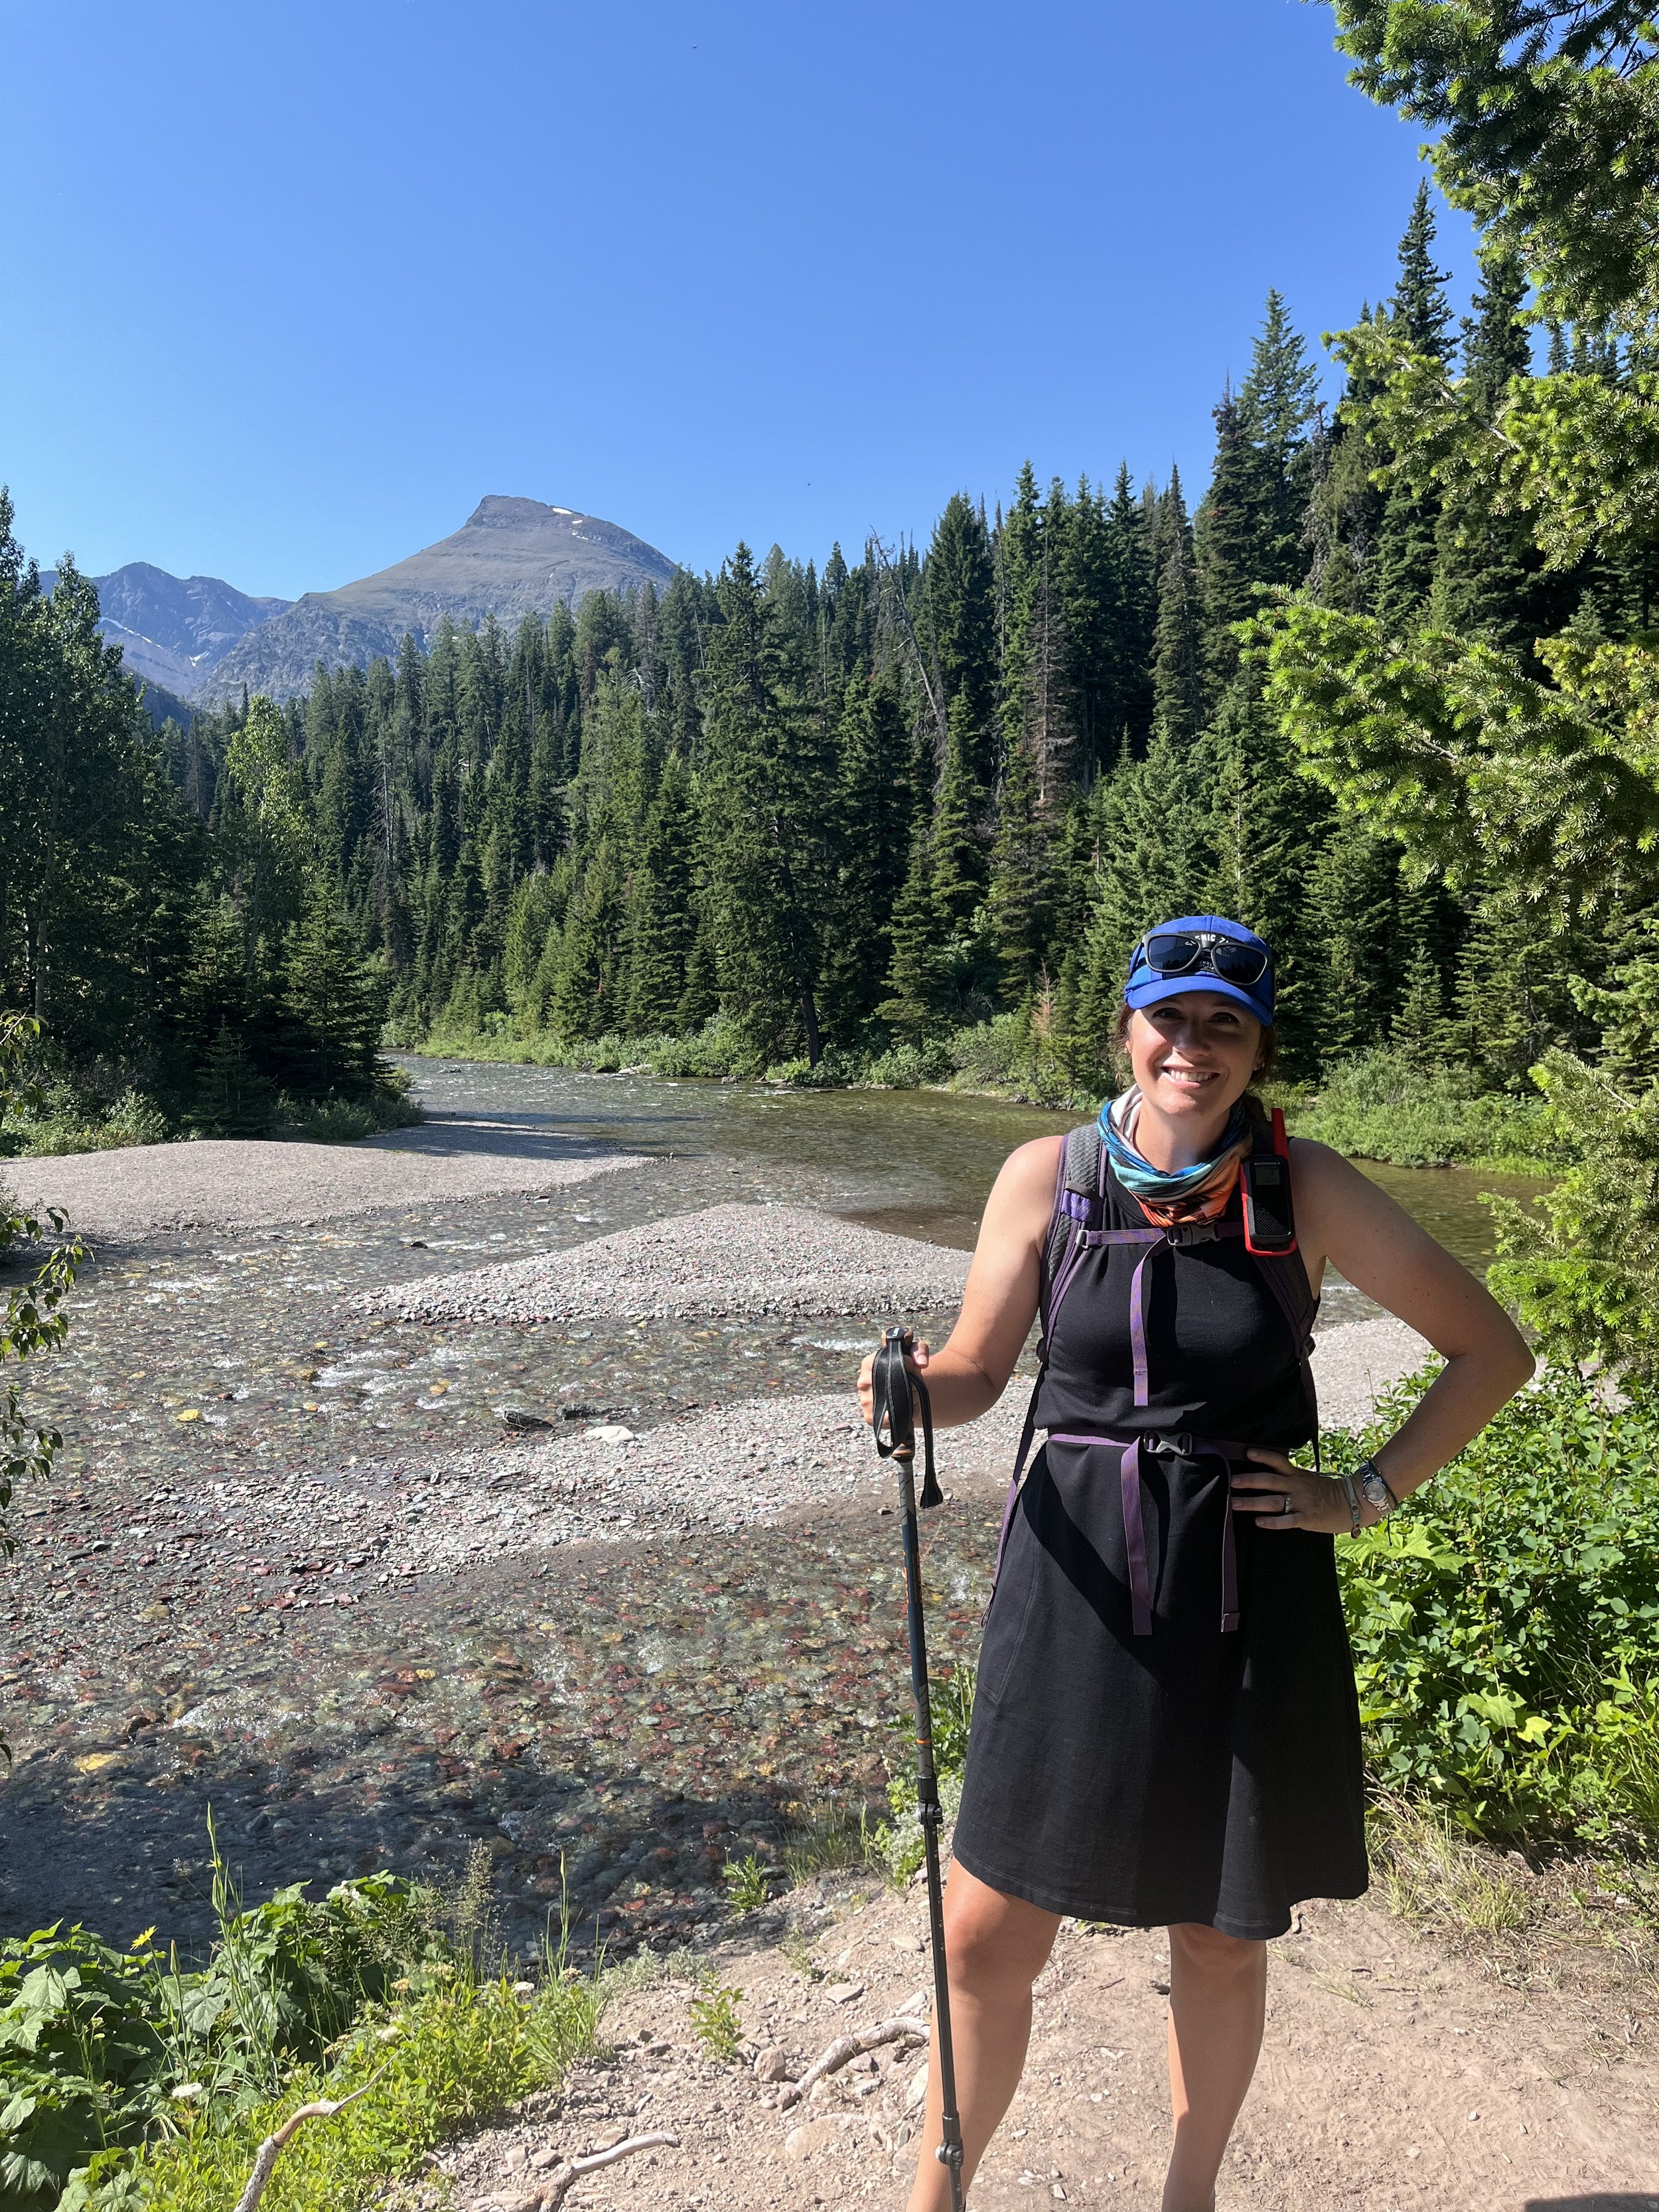
An easy add-on to this trip is Grand Teton National Park.
Did you know that Yellowstone National Park and Grand Teton National Park share a border?
In fact, if you’re approaching Yellowstone from Jackson, Wyoming (via the south entrance), you’ll pass through Grand Teton National Park to get to Yellowstone.
Even though they’re geographically close together, the parks are wildly different in topography and activities.
Add on a few days to your Yellowstone National Park itinerary to explore Grand Teton National Park, too!
If you’re visiting both parks (and others!) don’t forget to purchase your National Parks annual pass before you arrive!
The annual pass is an incredible value on its own as it gets you into any of the more than 400 NPS sites for a 12 month period, including national battlefields, national seashores, national monuments, and national memorials.
This national parks pass + AllTrails subscription bundle is an even better deal, and you’ll be able to explore all over the US!

I couldn’t believe that we came across this rainbow in Grand Teton National Park!
Here are a few of my Grand Teton posts to get you started:
Yellowstone National Park in 10 Days: Day-by-Day Itinerary
Do you really need a week and a half to visit Yellowstone? After all, many other parks can be done in a single day.
While any time at Yellowstone is guaranteed to be a good time, I’d highly encourage you to consider a longer trip like the one I’ve outlined below.
You won’t be rushed in any one section of the park, and you’ll get to experience each corner of Yellowstone—each of which is unique in its own right.
To maximize your drive time, I’d suggest purchasing the Yellowstone National Park tour on the GuideAlong app.
We use these in every national park that is available on the app, and they are worth every penny!
Once you download the tour to your phone, you don’t need Wifi to play the tour, which is great for areas of the park that are more remote.
The audio automatically starts and stops as you get to each point of interest, and you can repeat any sections that you’d like to hear again.
The audio tours are incredibly affordable, especially considering how they have made our national park trips richer and more entertaining.
Day 1: Arrival and West Thumb Geyser Basin
We’re hitting the ground running on our first day!
Plan to arrive at Jackson Hole Airport (JAC) by mid-morning. This timing will allow you plenty of sightseeing on your first day in Yellowstone.
Jackson Hole Airport is small, and you’ll disembark on the tarmac next to the terminal. Pick up your bags and head over to the rental car counter.
You’ll absolutely need a rental car to get around in Yellowstone National Park as there aren’t any public shuttles.
Check rental car prices for Yellowstone here.
Overall, you should be able to get in and out of the airport fairly quickly.
NOTE: You will see a kiosk near the baggage claim terminals for bear spray rentals. You can choose to rent here or at one of the same company’s other kiosks elsewhere in the area, or you can purchase bear spray in Jackson or in Yellowstone.
For a complete breakdown of pricing, availability, and use, check out my detailed guide to bear spray rental and purchase in Yellowstone National Park.

PIN ME!
Optional trip: Jackson, Wyoming
If you turn right from the airport, you’ll find Jackson, Wyoming, about 20 minutes down the road.
Here, you can stock up on groceries, drinks, baby items, and outdoor gear if needed.
I will say that the food in Yellowstone is expensive, and, at times, can be lacking both in flavor and variety.
I’d recommend grabbing a small cooler, snacks, and light lunch options in Jackson to help you stretch your food budget and provide options while you’re adventuring each day.
In Jackson, you’ll find an Albertson’s and Whole Foods, as well as an REI and TJ Maxx if you need clothing or gear.
As I noted in my Yellowstone family vacation guide, the park has zero baby and toddler options, so you’ll need to stop in Jackson for extra diapers, snacks, wipes, milk, formula, and the like.
Drive into Yellowstone National Park
Once you’re ready with supplies, rental car, and plenty of snacks, turn north to head into Yellowstone.
As I mentioned previously, you’ll first drive through Grand Teton National Park to get to the south entrance of Yellowstone, which makes for a scenic approach.
Without any wildlife-induced traffic jams, you should be able to make it to Yellowstone’s southern entrance in about 90 minutes.
If you do need to stop along the way, the Flagg Ranch visitors center at the northern end of Grand Teton National Park just before you cross over into Yellowstone territory has clean bathrooms and free kid’s coloring pages.
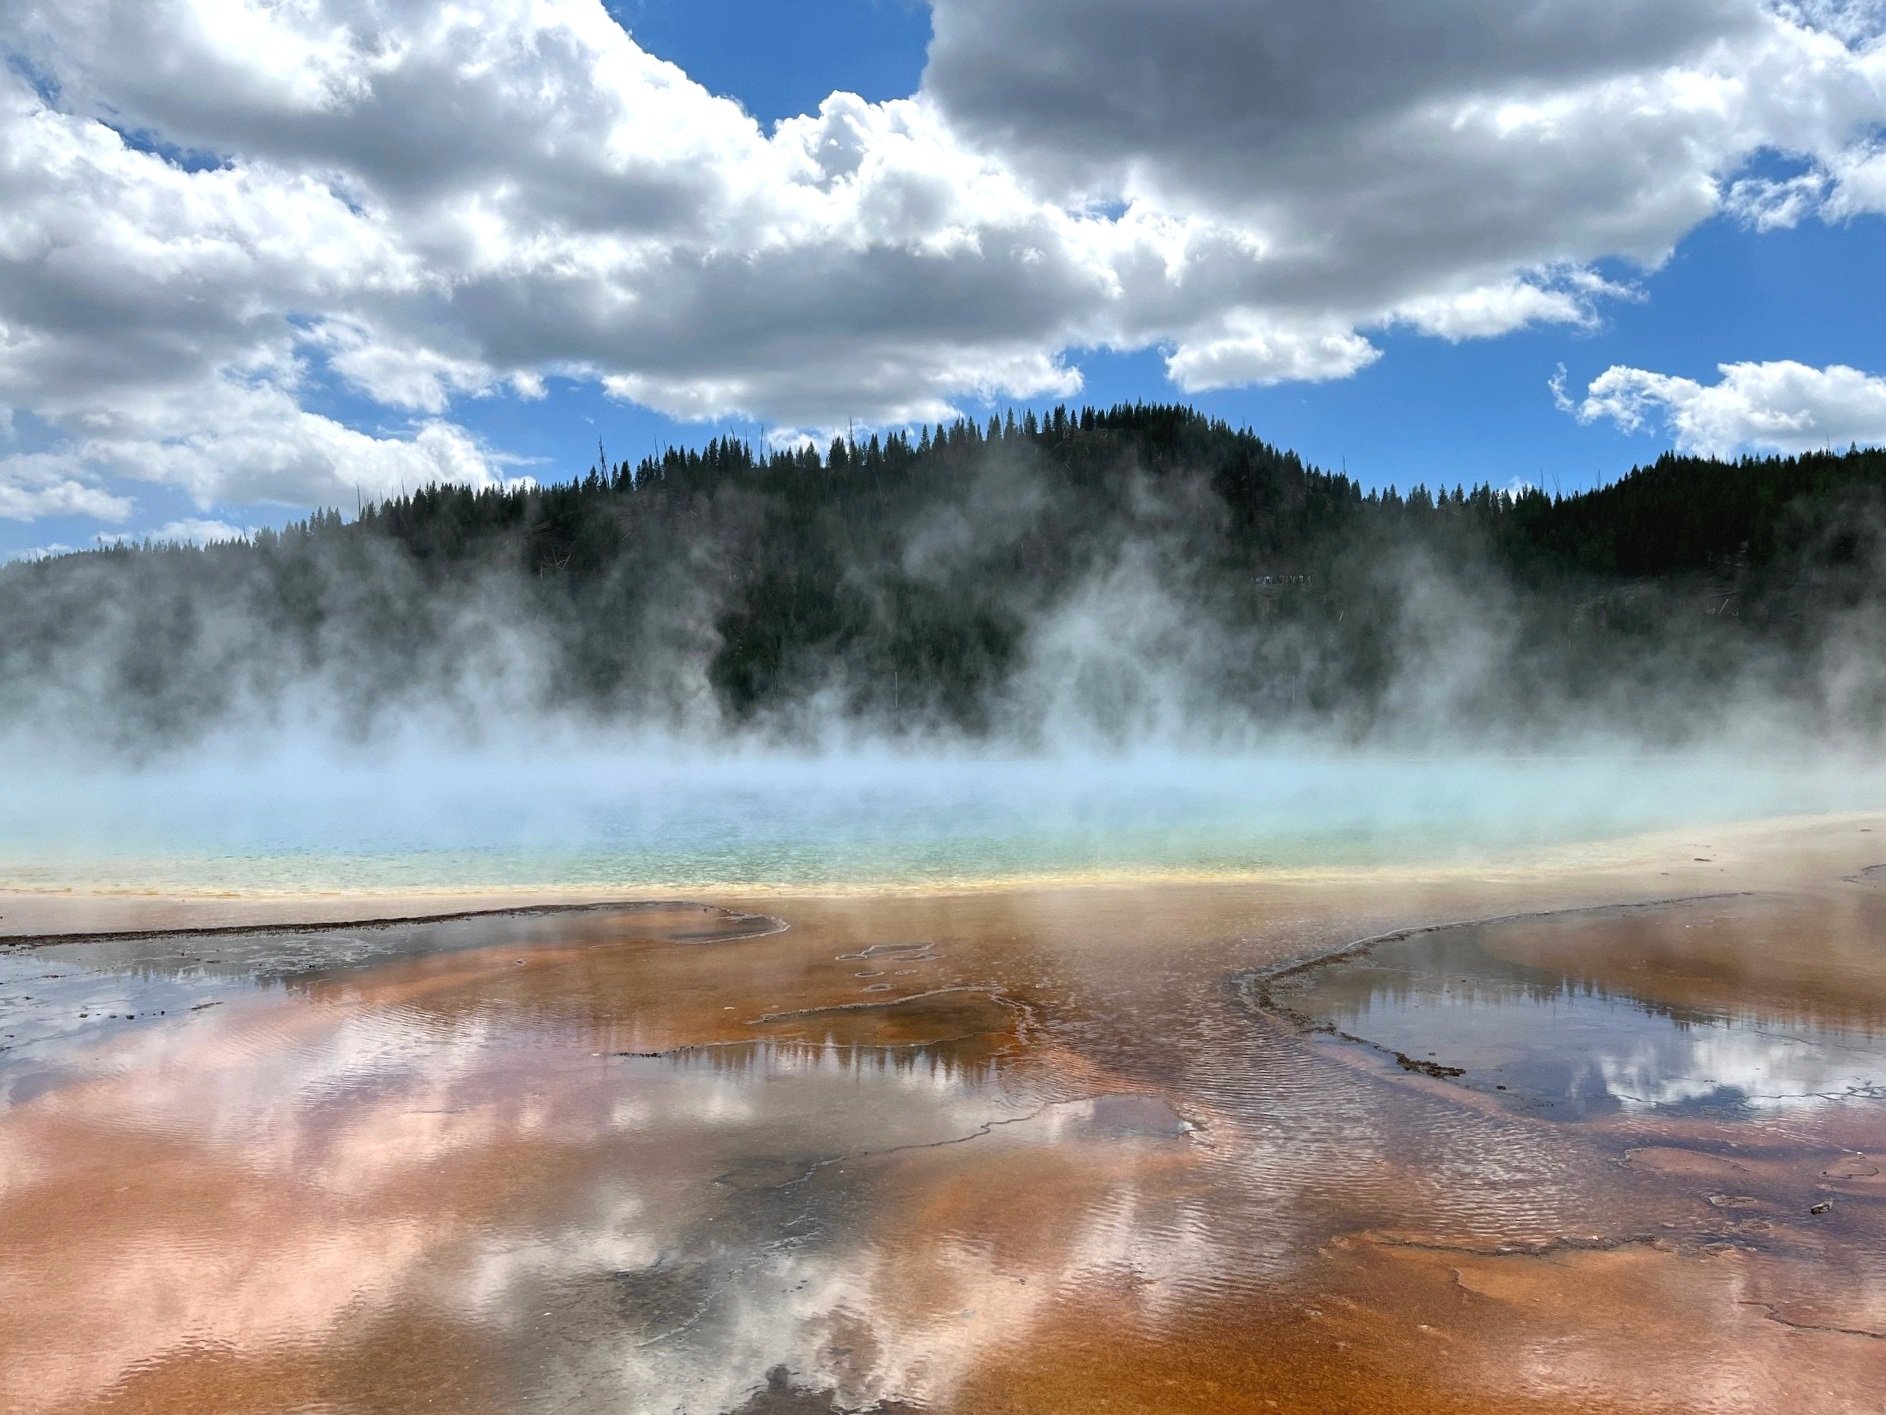
West Thumb Geyser Basin

One of the hot springs in West Thumb
Once you’ve made it into Yellowstone National Park (yay!), we’re headed just past Grant Village to the West Thumb Geyser Basin.
Here, you’ll find ample parking and a great introduction to the park’s geothermal features. From hot springs to geysers to mud pots, the park has them all in vast quantities.
The West Thumb parking area even has a couple of smaller steam vents!
Head out onto the boardwalk for incredible views of Lake Yellowstone and to view dozens of steam vents and hot springs.
The most famous feature here is Fishing Cone, located on the edge of Lake Yellowstone.
It’s named over the fishermen who’d quickly steam their fresh catch for a bite to eat.
Plan your entire national parks vacation with this helpful (and free) collection of Yellowstone National Park resources!
Overnight: Grant Village

Our room at Bear Lodge in Grand Village
By this point in the day, you’re probably tired, so let’s check into the hotel for the night.
The lodges at Grant Village aren’t spacious or luxurious, but they are clean and conveniently located to the West Thumb Geyser Basin.
Prepare yourself: the accommodations pricing is steep at Yellowstone, and a basic double-double room with ensuite at Grant Village in the summer can easily cost 2 or 3 times what a room at Holiday Inn would be. But, it’s a case of demand being higher than supply, and there’s really nowhere else to stay that isn’t a 2 hour drive.
Go for a stroll along the lake to the visitors center and ampitheatre, or grab a bite to eat at Grant Village Lake House or the Grand Village Dining Room.
Add a tour or experience to your Yellowstone itinerary!
Day 2: Old Faithful and Grand Prismatic Springs
On our second day, we’re headed to the park’s most popular area.
While I don’t think you have to beat the birds up every morning, this day’s itinerary will warrant an early start, especially if you’re visiting in the peak summer months.
So many people come to Yellowstone JUST to do the activities listed for our day 2, so prepare for crowds and pack your patience.
Kepler Cascades
After you’ve gotten some breakfast, hop in your rental car and head north towards the Old Faithful area.
On the way, make a quick stop at Kepler Cascades. It’s well marked, and the easy stroll from the parking lot has an incredible pay-off of this large waterfall.
Grand Prismatic Spring Boardwalk
Don’t linger too long as we’re headed to Grand Prismatic Springs next, where the parking is highly limited.
(We’re passing the turn off for Old Faithful, but don’t worry—we will circle back!)
On peak days, especially in the afternoon, the Grand Prismatic Springs parking lot will have a turn lane of over a quarter-mile. The parking lot is tiny with nowhere near enough room for the number of visitors who come here each day.
Hopefully, by getting here early, you’re missing most of the crowds and can zip into a spot with no trouble.
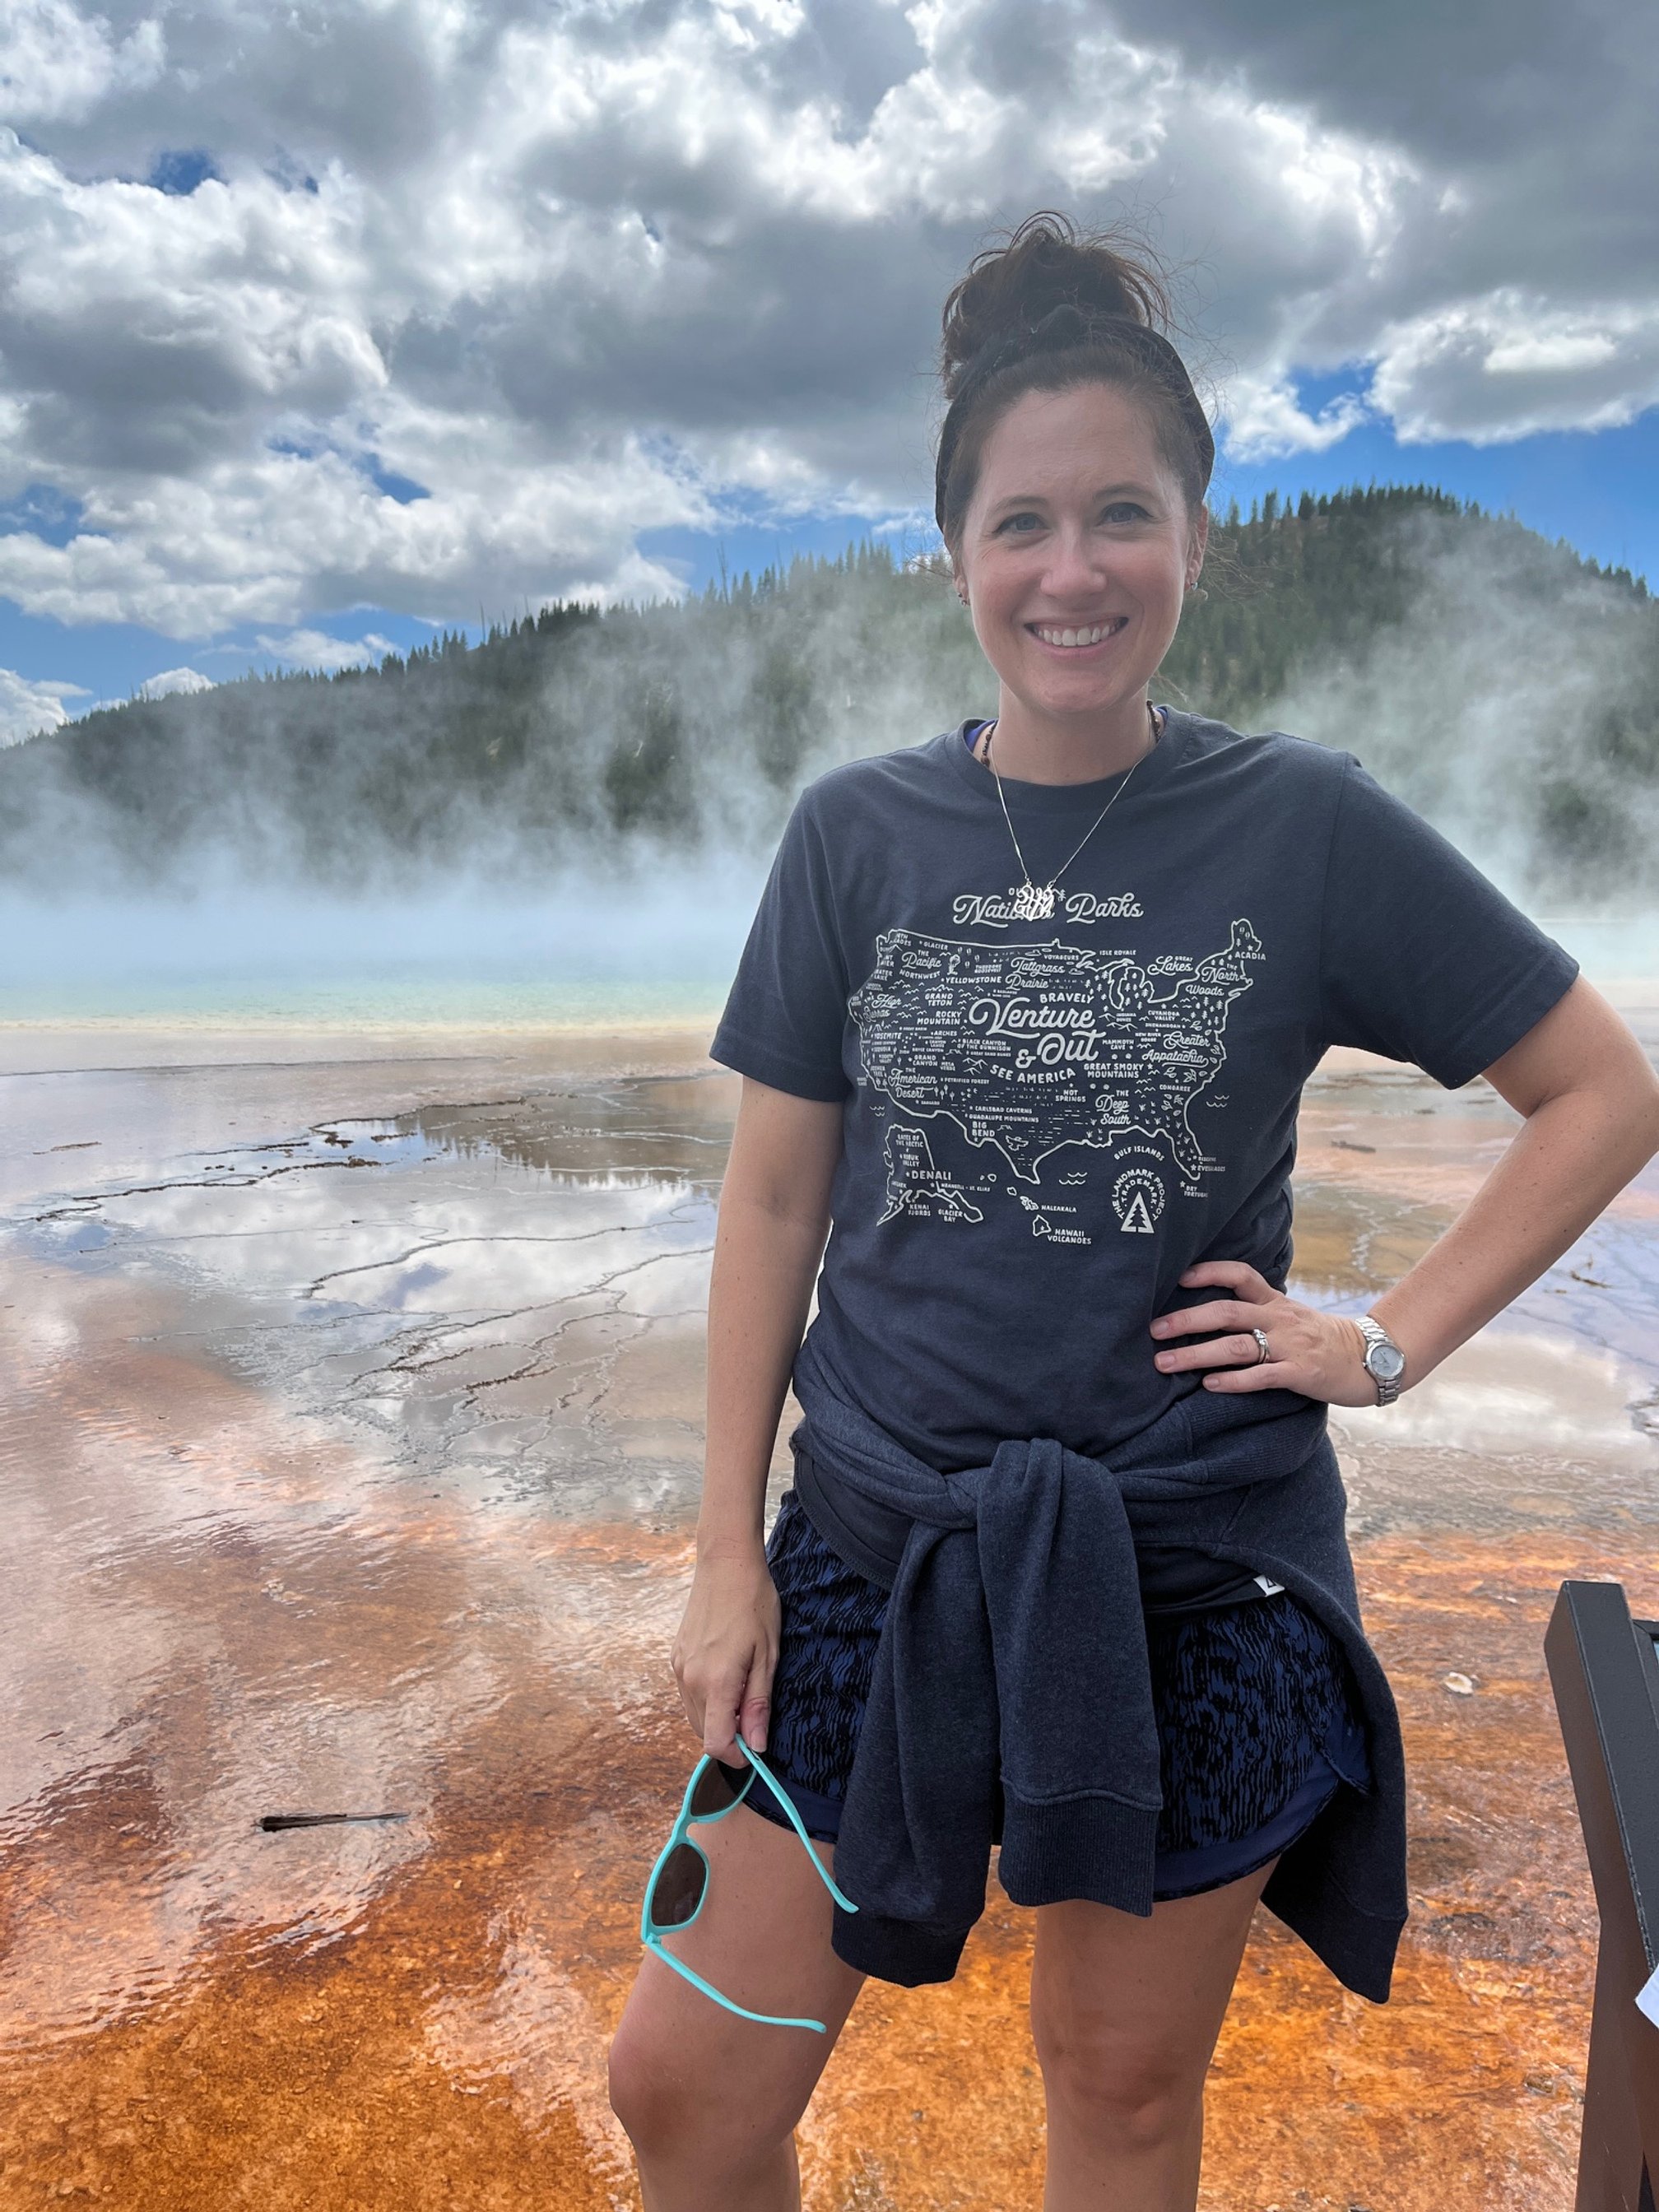
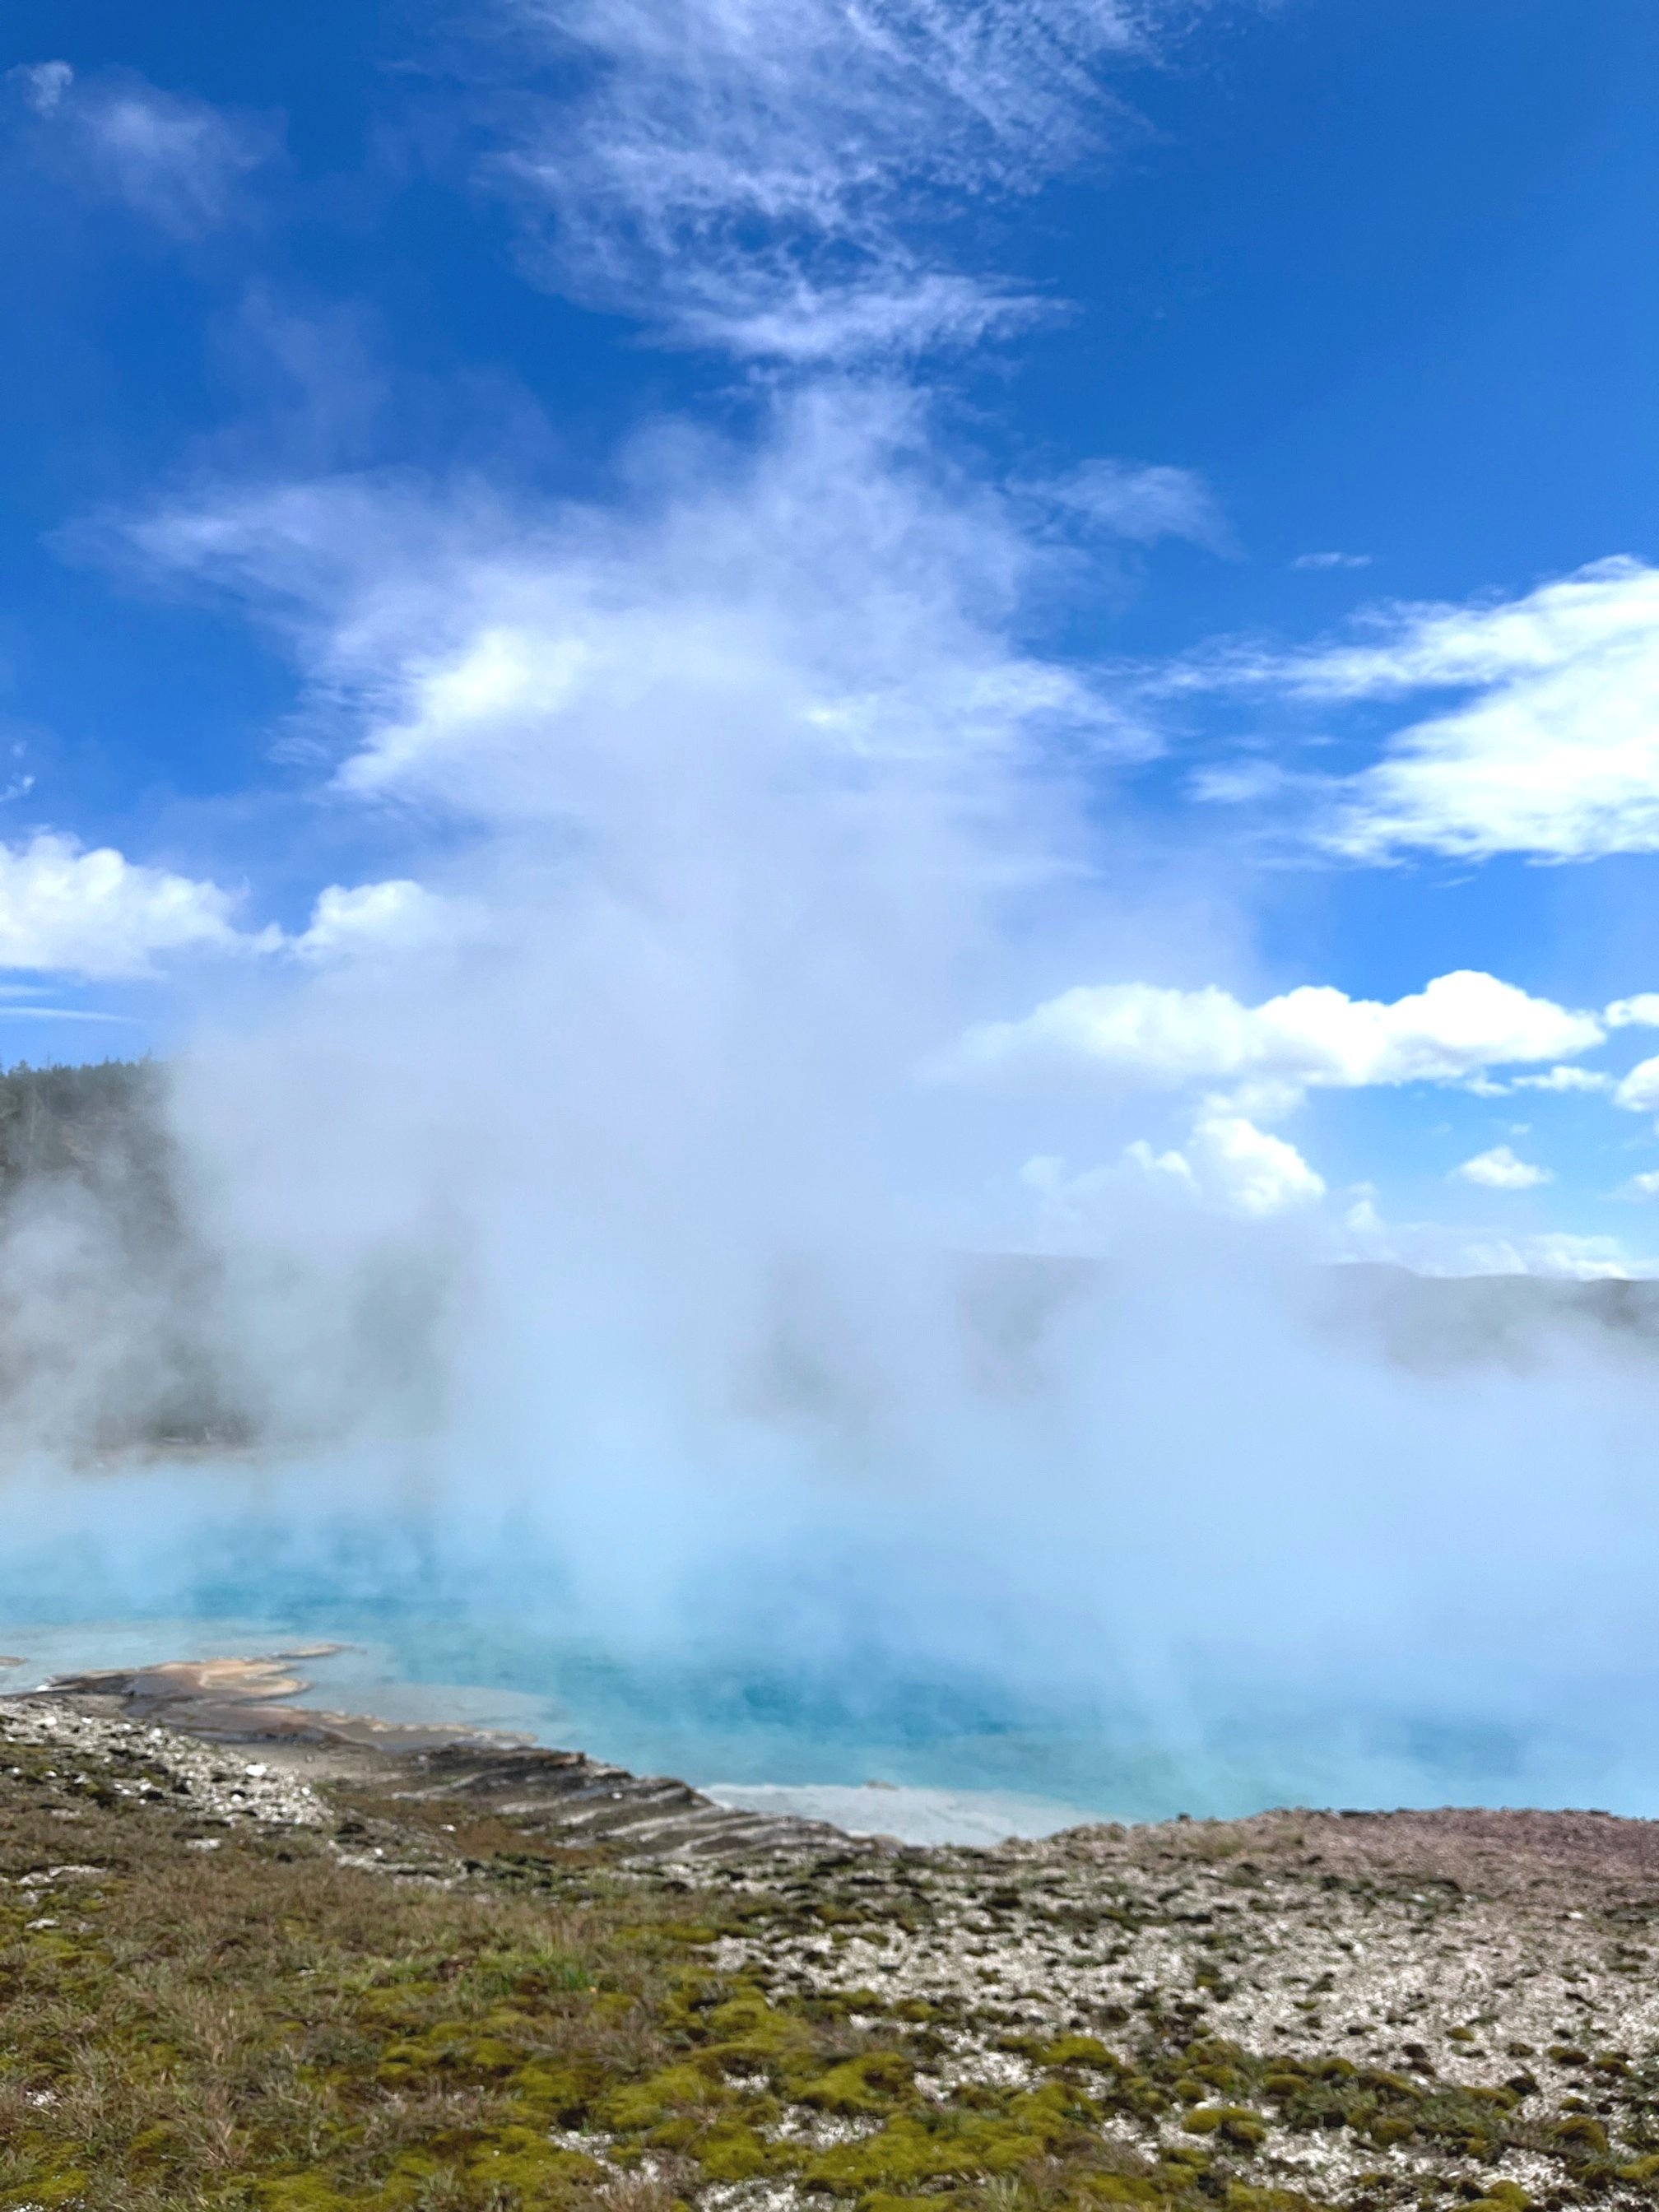
Walk the Grand Prismatic boardwalk which has 4 different hot springs. While the multi-colored Grand Prismatic Spring is the showstopper, the crystal clear Excelsior Geyser Crater is also fascinating. The latter is also a dormant geyser, and, last time it blew, it carved out several feet of land around one end.
Fairy Falls Trail and Grand Prismatic Overlook
Most visitors walk the Grand Prismatic boardwalk and head off to other areas of the park.
However, I think there’s an even BETTER way to experience Grand Prismatic Spring—and that’s on the nearby Fairy Falls Trail.
This easy trail leads to the titular waterfall, but along the way, you’ll also stop by the incredible Grand Prismatic Overlook.

My dad and I at the observation tower at the Grand Prismatic Overlook/ Fairy Falls trail
This vantage point brings out the vibrant colors of the springs below in a way that you just can’t see on the boardwalk.
Continue onto the waterfall if you have time, or return to the parking lot.
>> For a complete hiking guide, see my Grand Prismatic Spring Overlook Trail post. <<

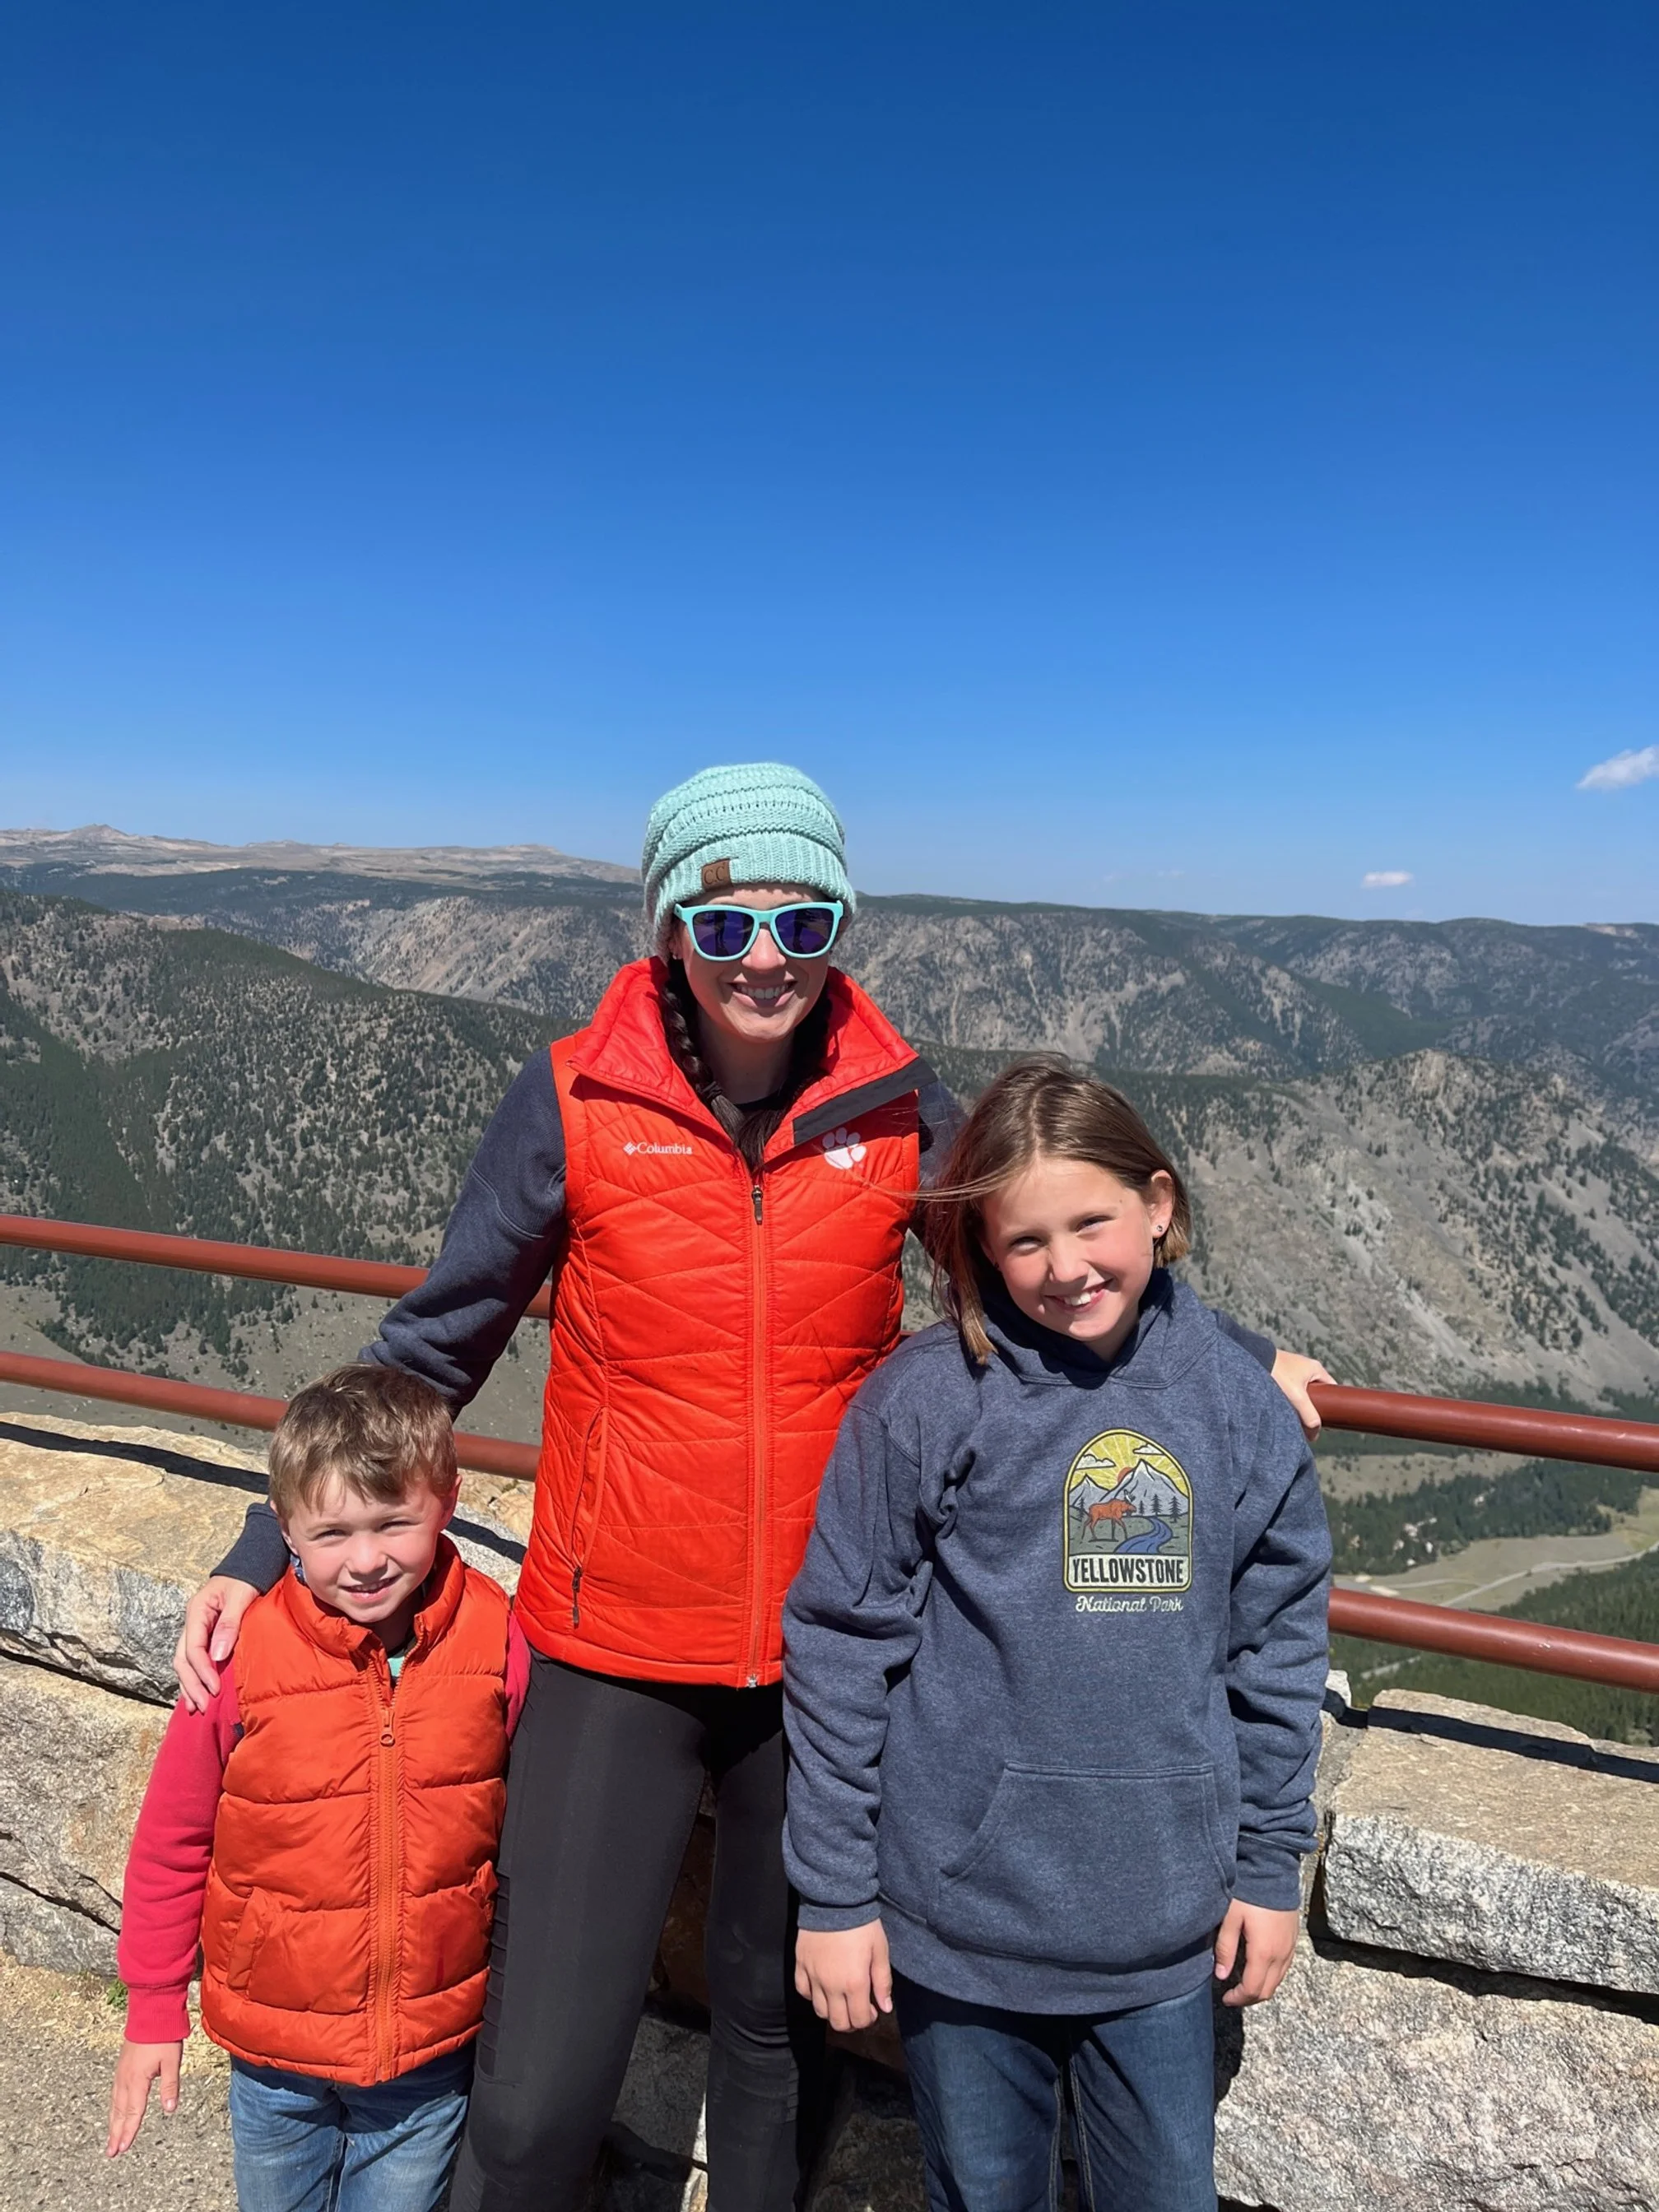
The Camping Kiddos and I at the Old Faithful geyser
NOTE: You will need to back track from Grand Prismatic Spring parking lot to the Fairy Falls parking lot to access the trailhead.
If you’re headed from the Grand Prismatic Spring lot, the Fairy Falls lot will be on your right after a wide curve in the road.
Old Faithful Geyser Area
Spend the rest of your afternoon around the world’s most famous geyser, the ever reliable Old Faithful.
If you’d like to have an estimation on when the geyser will erupt next, download the NPS app and check the times under the Yellowstone section.
The timing isn’t perfect—it can be off up to 30 minutes—but it will give you an idea on when to head towards the geyser.
The viewing area here is spacious with benches.
Unlike Grand Prismatic Spring, you won’t have to fight anyone for a good spot as the Old Faithful boardwalk nearly circles the geyser, providing great views from every angle.
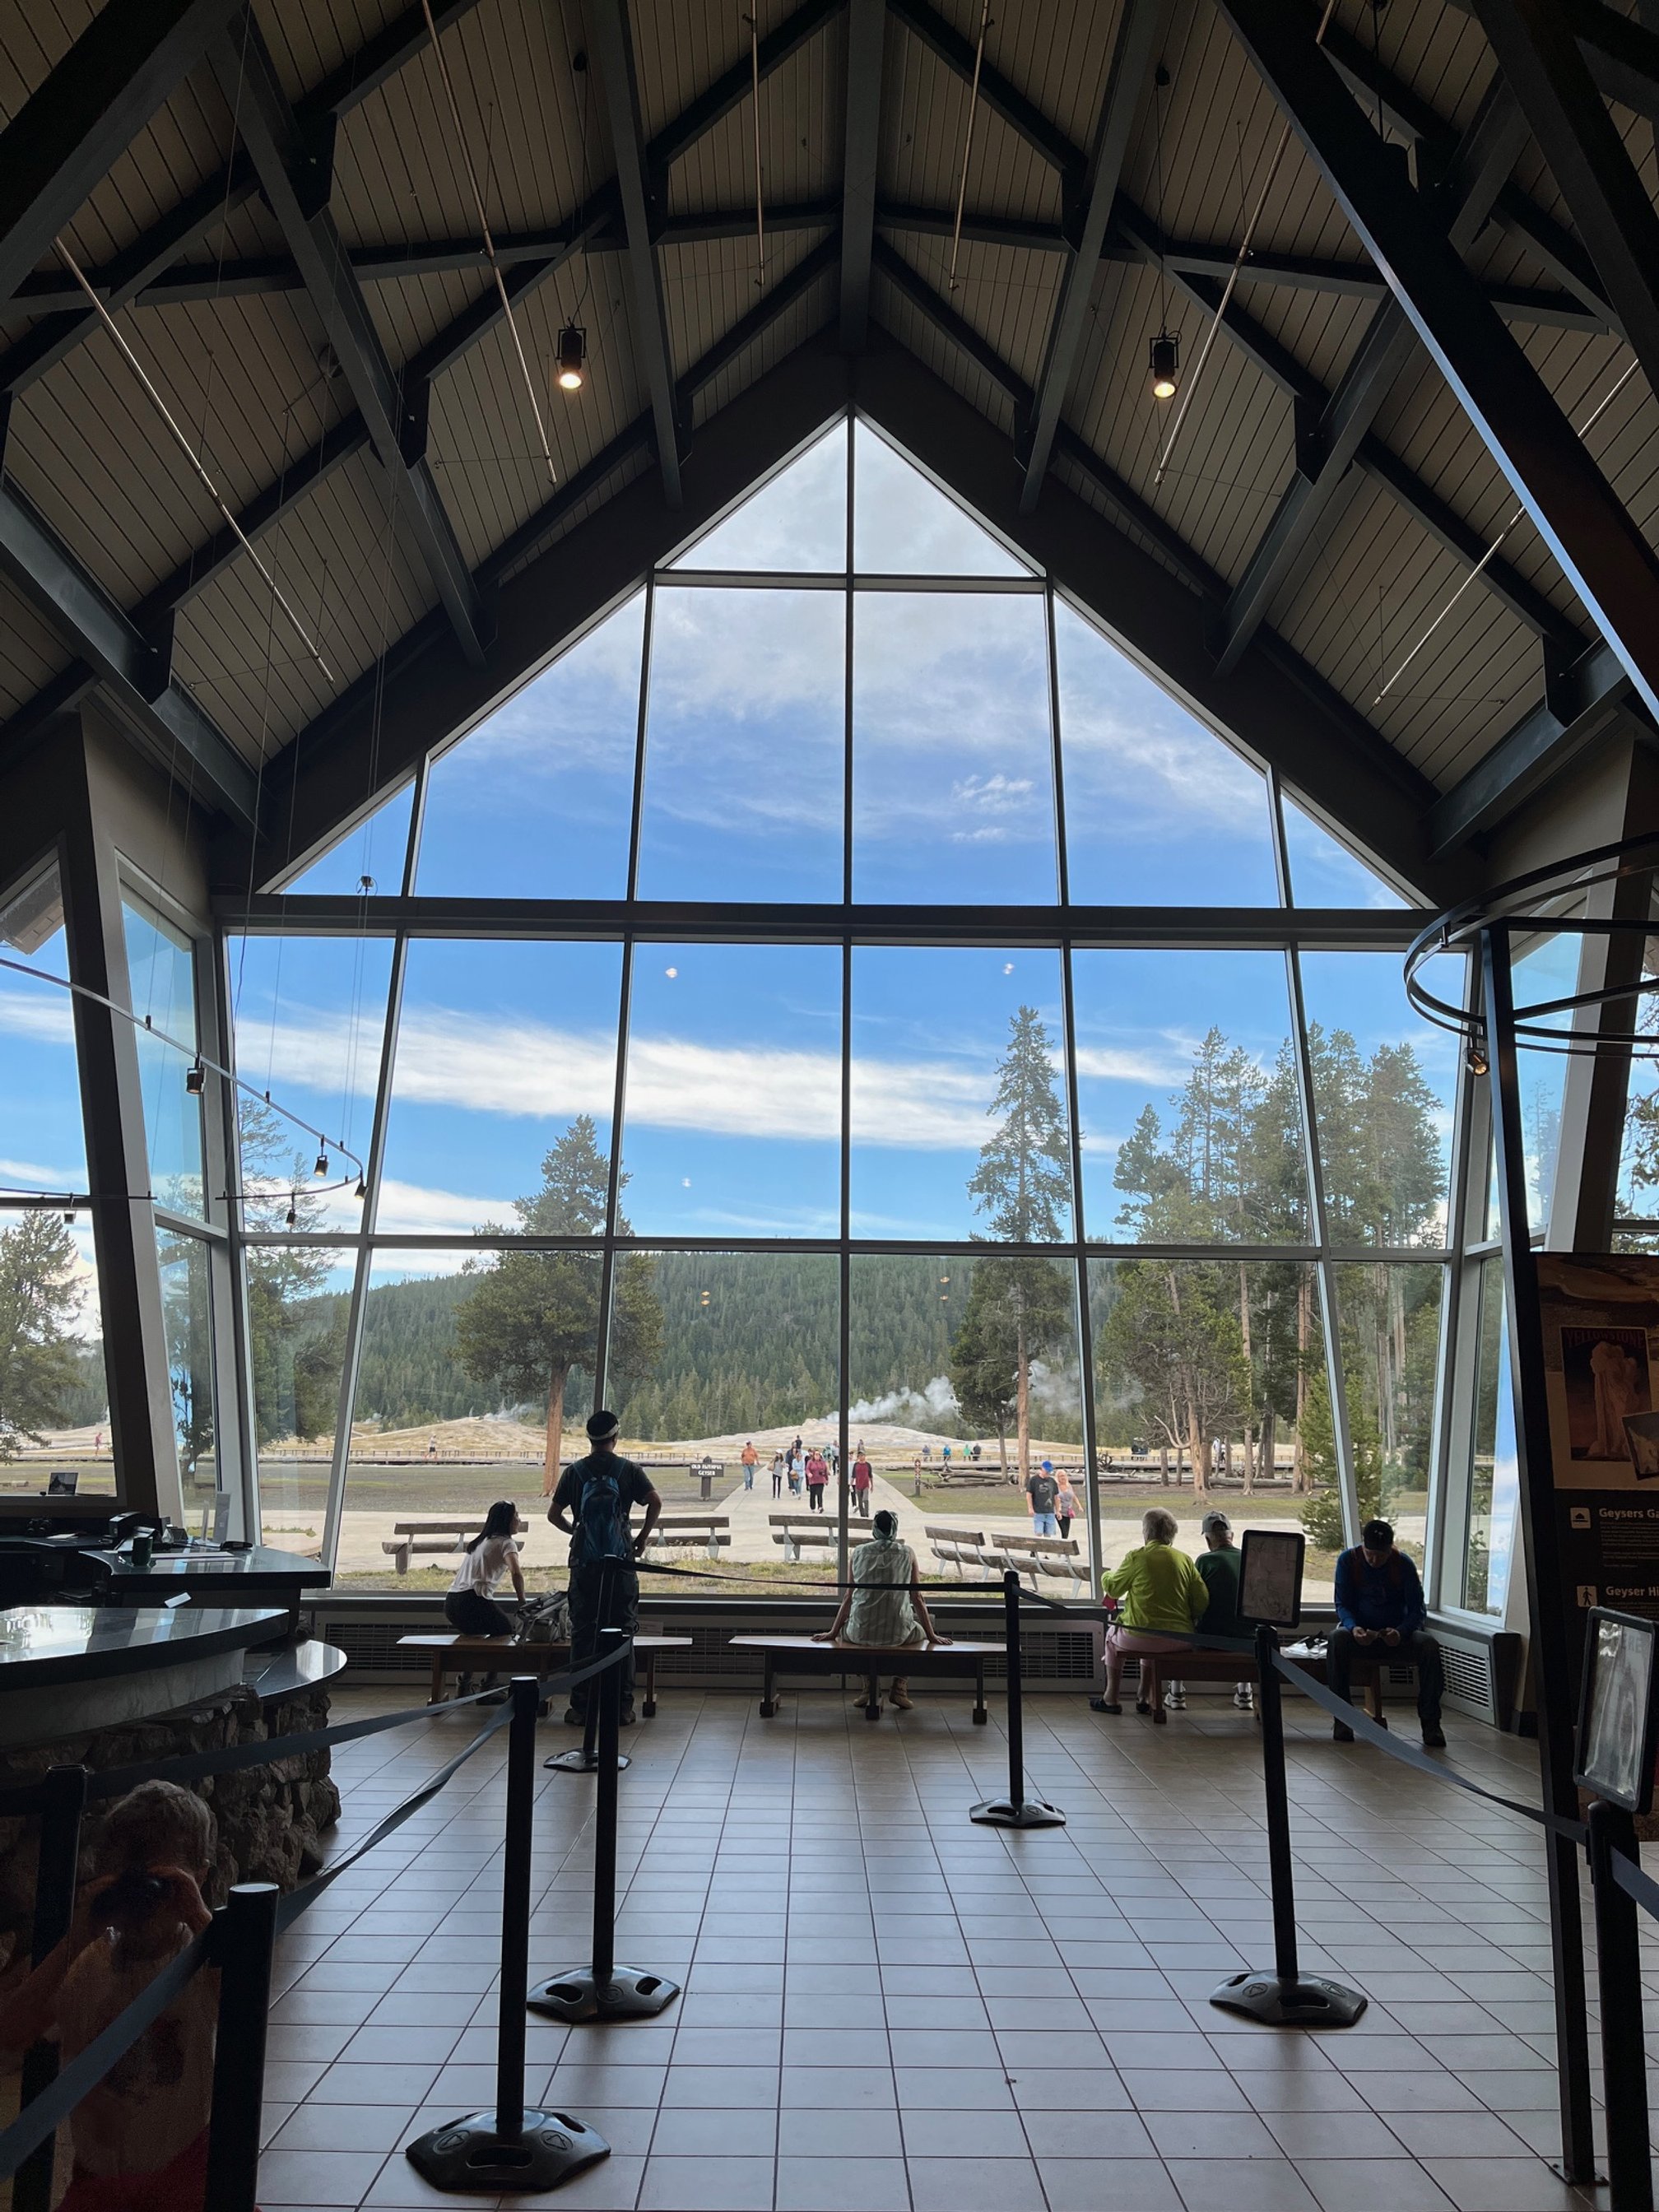
The visitors center overlooks the Old Faithful geyser and boardwalk
The Visitors Center directly behind Old Faithful has free movies running continuously about the park. You can also pick up your Junior Ranger booklets at the ranger desk here!
If you’re up for another hike, there are dozens of geysers here other than Old Faithful. Ask at the desk for a map.
Overnight: Old Faithful area
Unlike Grant Village, the Old Faithful area has multiple accommodations options.
For a historical stay, consider the Old Faithful Inn, built in 1903, and widely believed to be the largest log construction in the world.
Old Faithful Lodge is on the other side of the boardwalk, and offers up a chalet-style feel with dining room, cafeteria, bakery, and gift shop. Old Faithful Lodge was built in 1923.
Finally, there’s Old Faithful Snow Lodge, the newest addition to this area. Built in 1998, the Old Faithful Snow Lodge is across the parking lot from the geyser area, but offers up multiple dining options, including a sit-down dinner and a grab-and-go deli.
Day 3: Norris Geyser Basin
Today, we’re continuing north as we drive clockwise around the bottom loop of the Yellowstone figure 8.
When you get to Madison (an otherwise uneventful intersection), you’re going to turn to the right towards Norris.
NOTE: If you were to turn left at Madison instead, you’d quickly end up at the west entrance to Yellowstone, which is the entrance nearest to Ashton, Idaho.
Gibbon Falls
Just after this intersection, you’ll see the parking area for Gibbon Falls. While there are many incredible waterfalls in Yellowstone, I’ve included just the easiest to access for families.
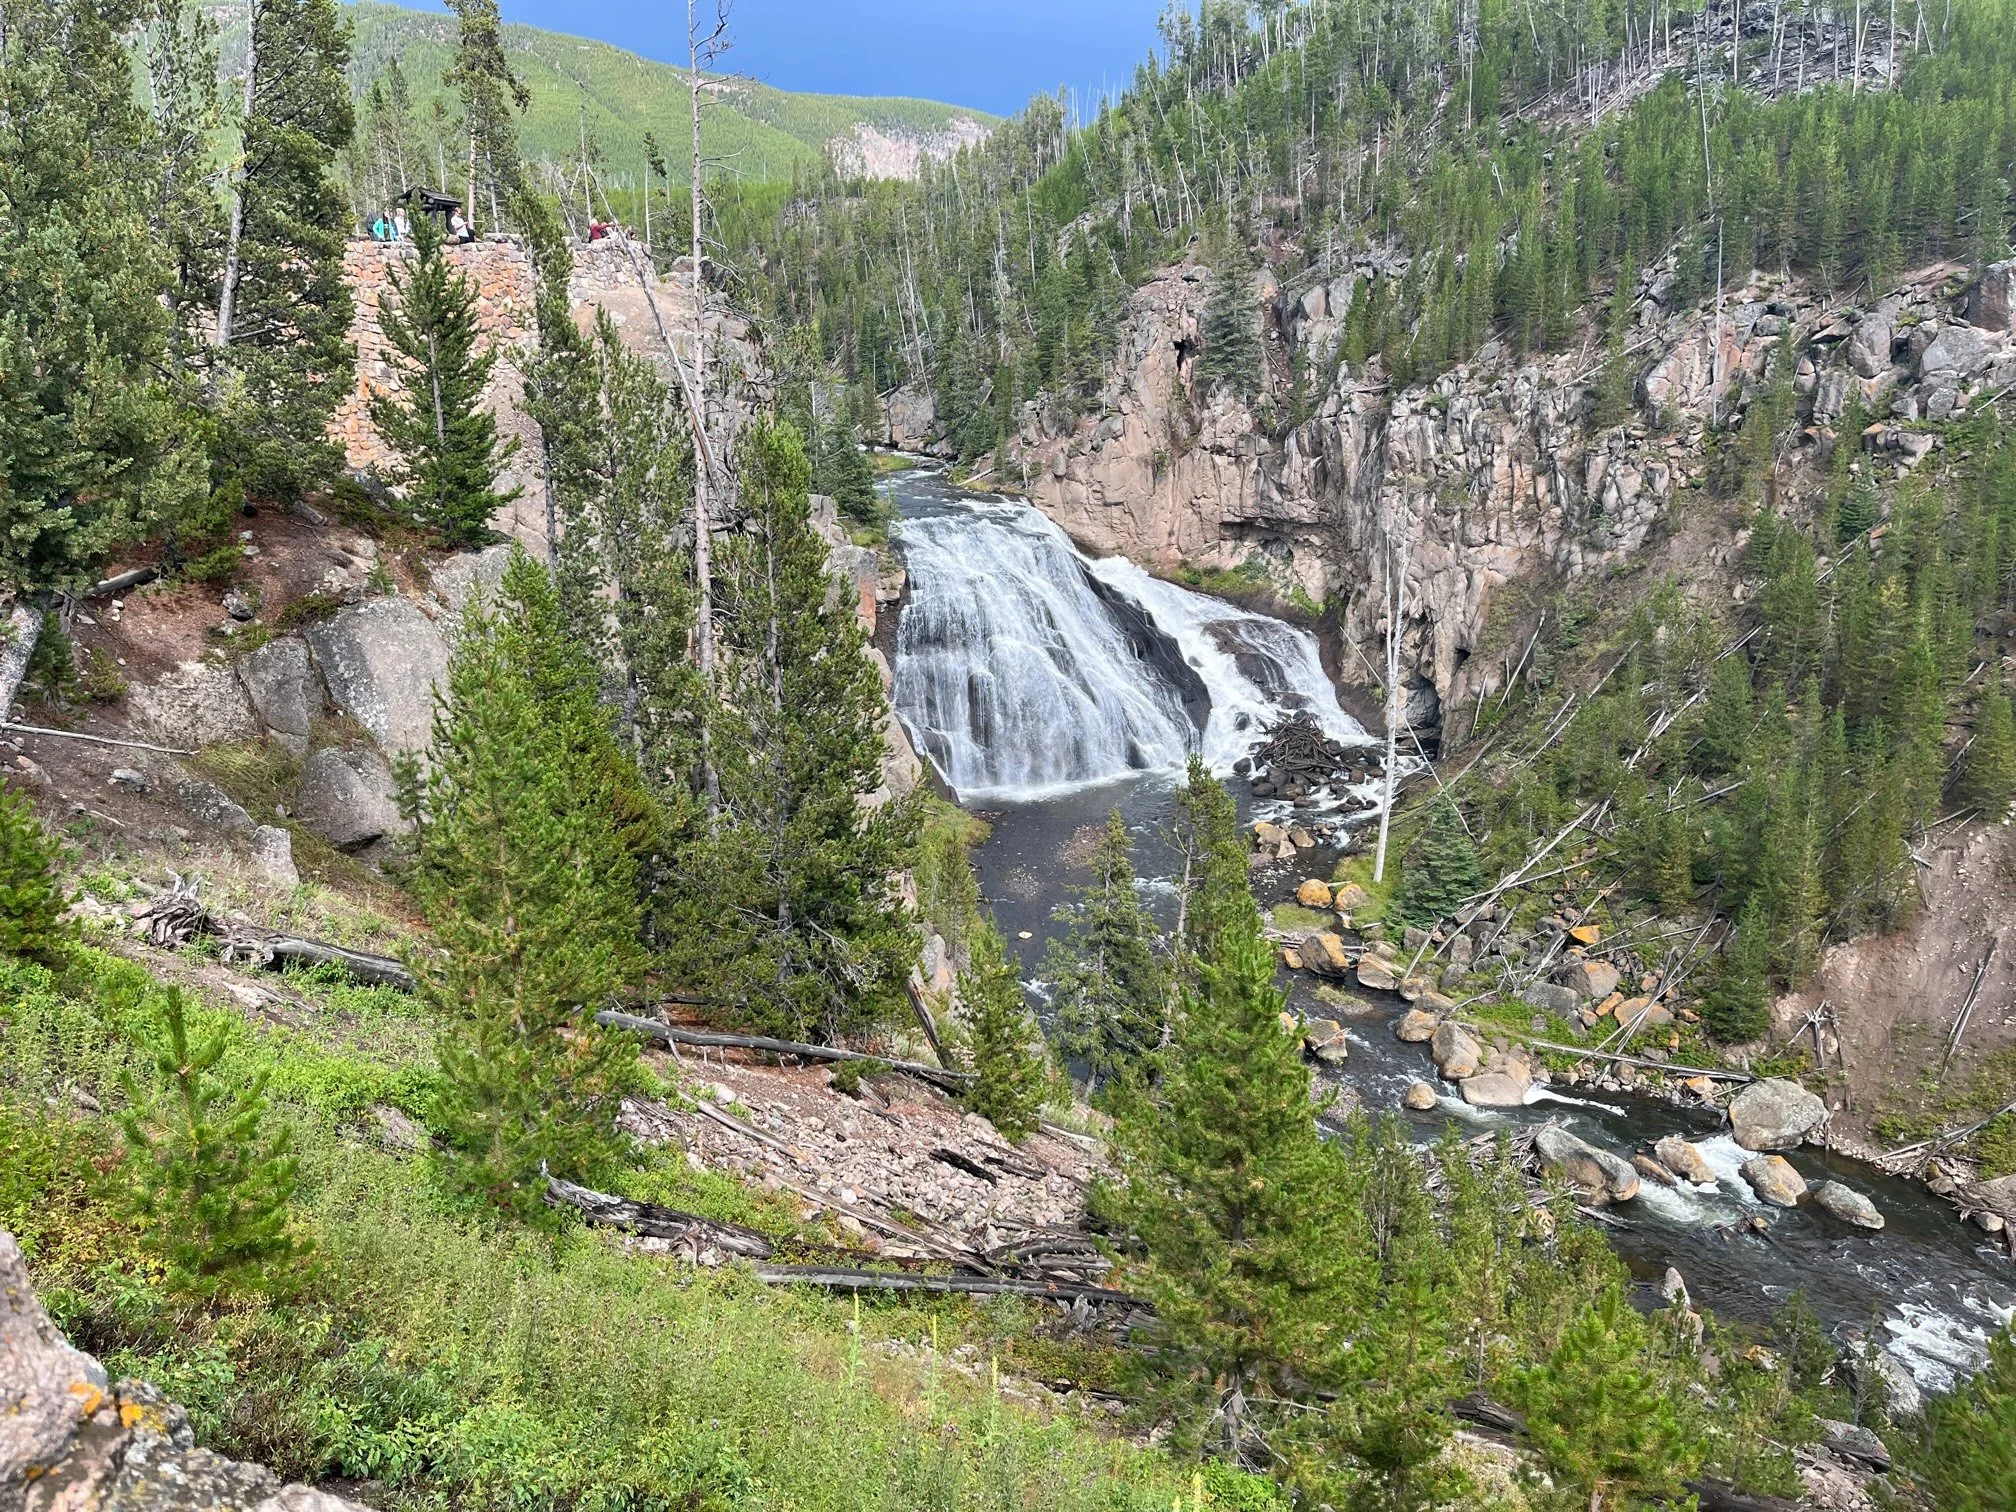
Gibbon Falls from the lower overlook
Gibbon Falls is a large cascade with a paved path to 2 separate overlooks.
While the parking area can get busy, you likely won’t have to wait more than a moment or two before another car will leave.
When you’re ready, get back on the road towards Norris, but we have one more worthwhile stop before the Norris area.
Artists Paint Pot Trail
This trail isn’t nearly as busy at the ones we visited yesterday, but it still worth your time.
Did you know that less than 2% of Yellowstone visitors get any further than 250 feet from their cars? The BEST way to see this national park is on foot, so short hikes are a must-do in my opinion.
See all of my favorite easy hikes in Yellowstone here. All have been approved by my own little hikers!
Artists Paint Pot Trail is largely flat other than a couple of flights of stairs to the mud pots. These bubbling, gooey mud pots are both gross-looking and fascinating!
Elsewhere, you’ll see iron-rich red hot springs, milky blue hot springs, and incredible views of Mount Holmes in the distance.
Explore more with our trail guide to Artists Paint Pots here.
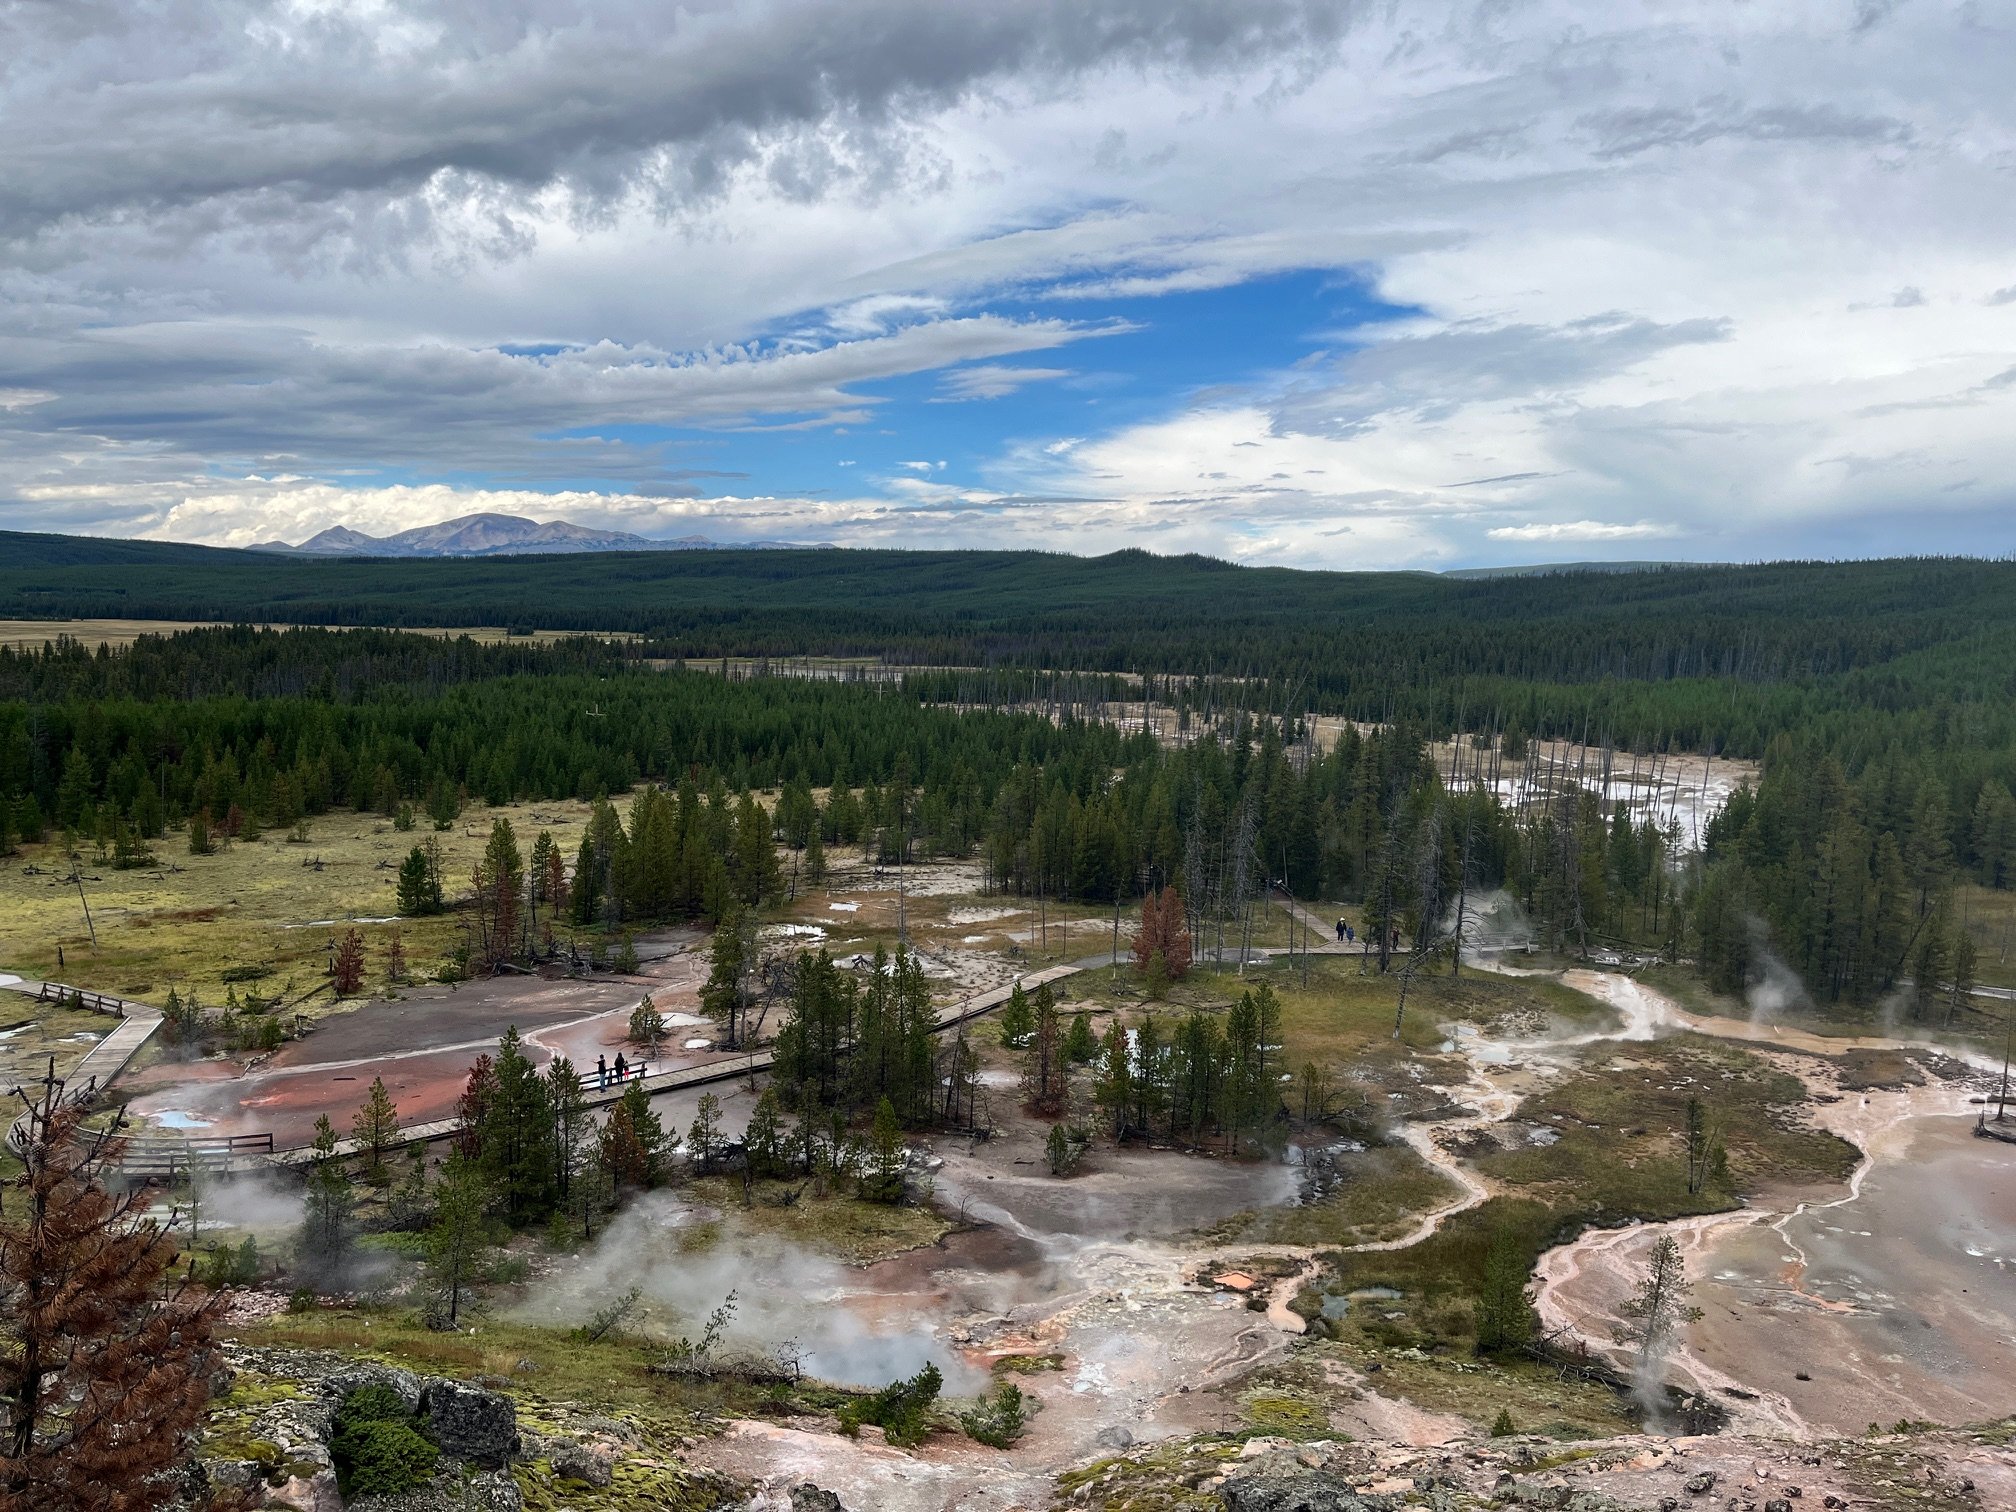
Norris Geyser Basin
If you’re still up for some more geysers, stop in Norris.
You can walk along multiple boardwalks to see additional mud pots, several geysers, and hot springs.
The visitors center here has a small but informative museum section that walks visitors through the creation and features of the geothermal features in the park.
Overnight: Canyon Village
When you’re ready to call it a day, head east from Norris along Norris Canyon Road to Canyon Village.
Canyon Village has a cluster of lodges, all of which are identical inside.
We’ve stayed at both Washburn Lodge and nearby Rhyolite Lodge. The Canyon Village lodges have been recently updated and have large rooms and bathrooms.
Day 4: Grand Canyon of Yellowstone
While it’s not quite as large as the one down in Arizona, the Grand Canyon of Yellowstone is still pretty impressive.
Grand Canyon of Yellowstone South Rim
To get a complete experience within the Grand Canyon of Yellowstone, you’ll want to visit both the South and North Rims. You might be able to do both of these in 1 day, but your time will be much more pleasant if you split it into 2 days.
Again, hiking is going to be your best way to see the canyon on both sides.
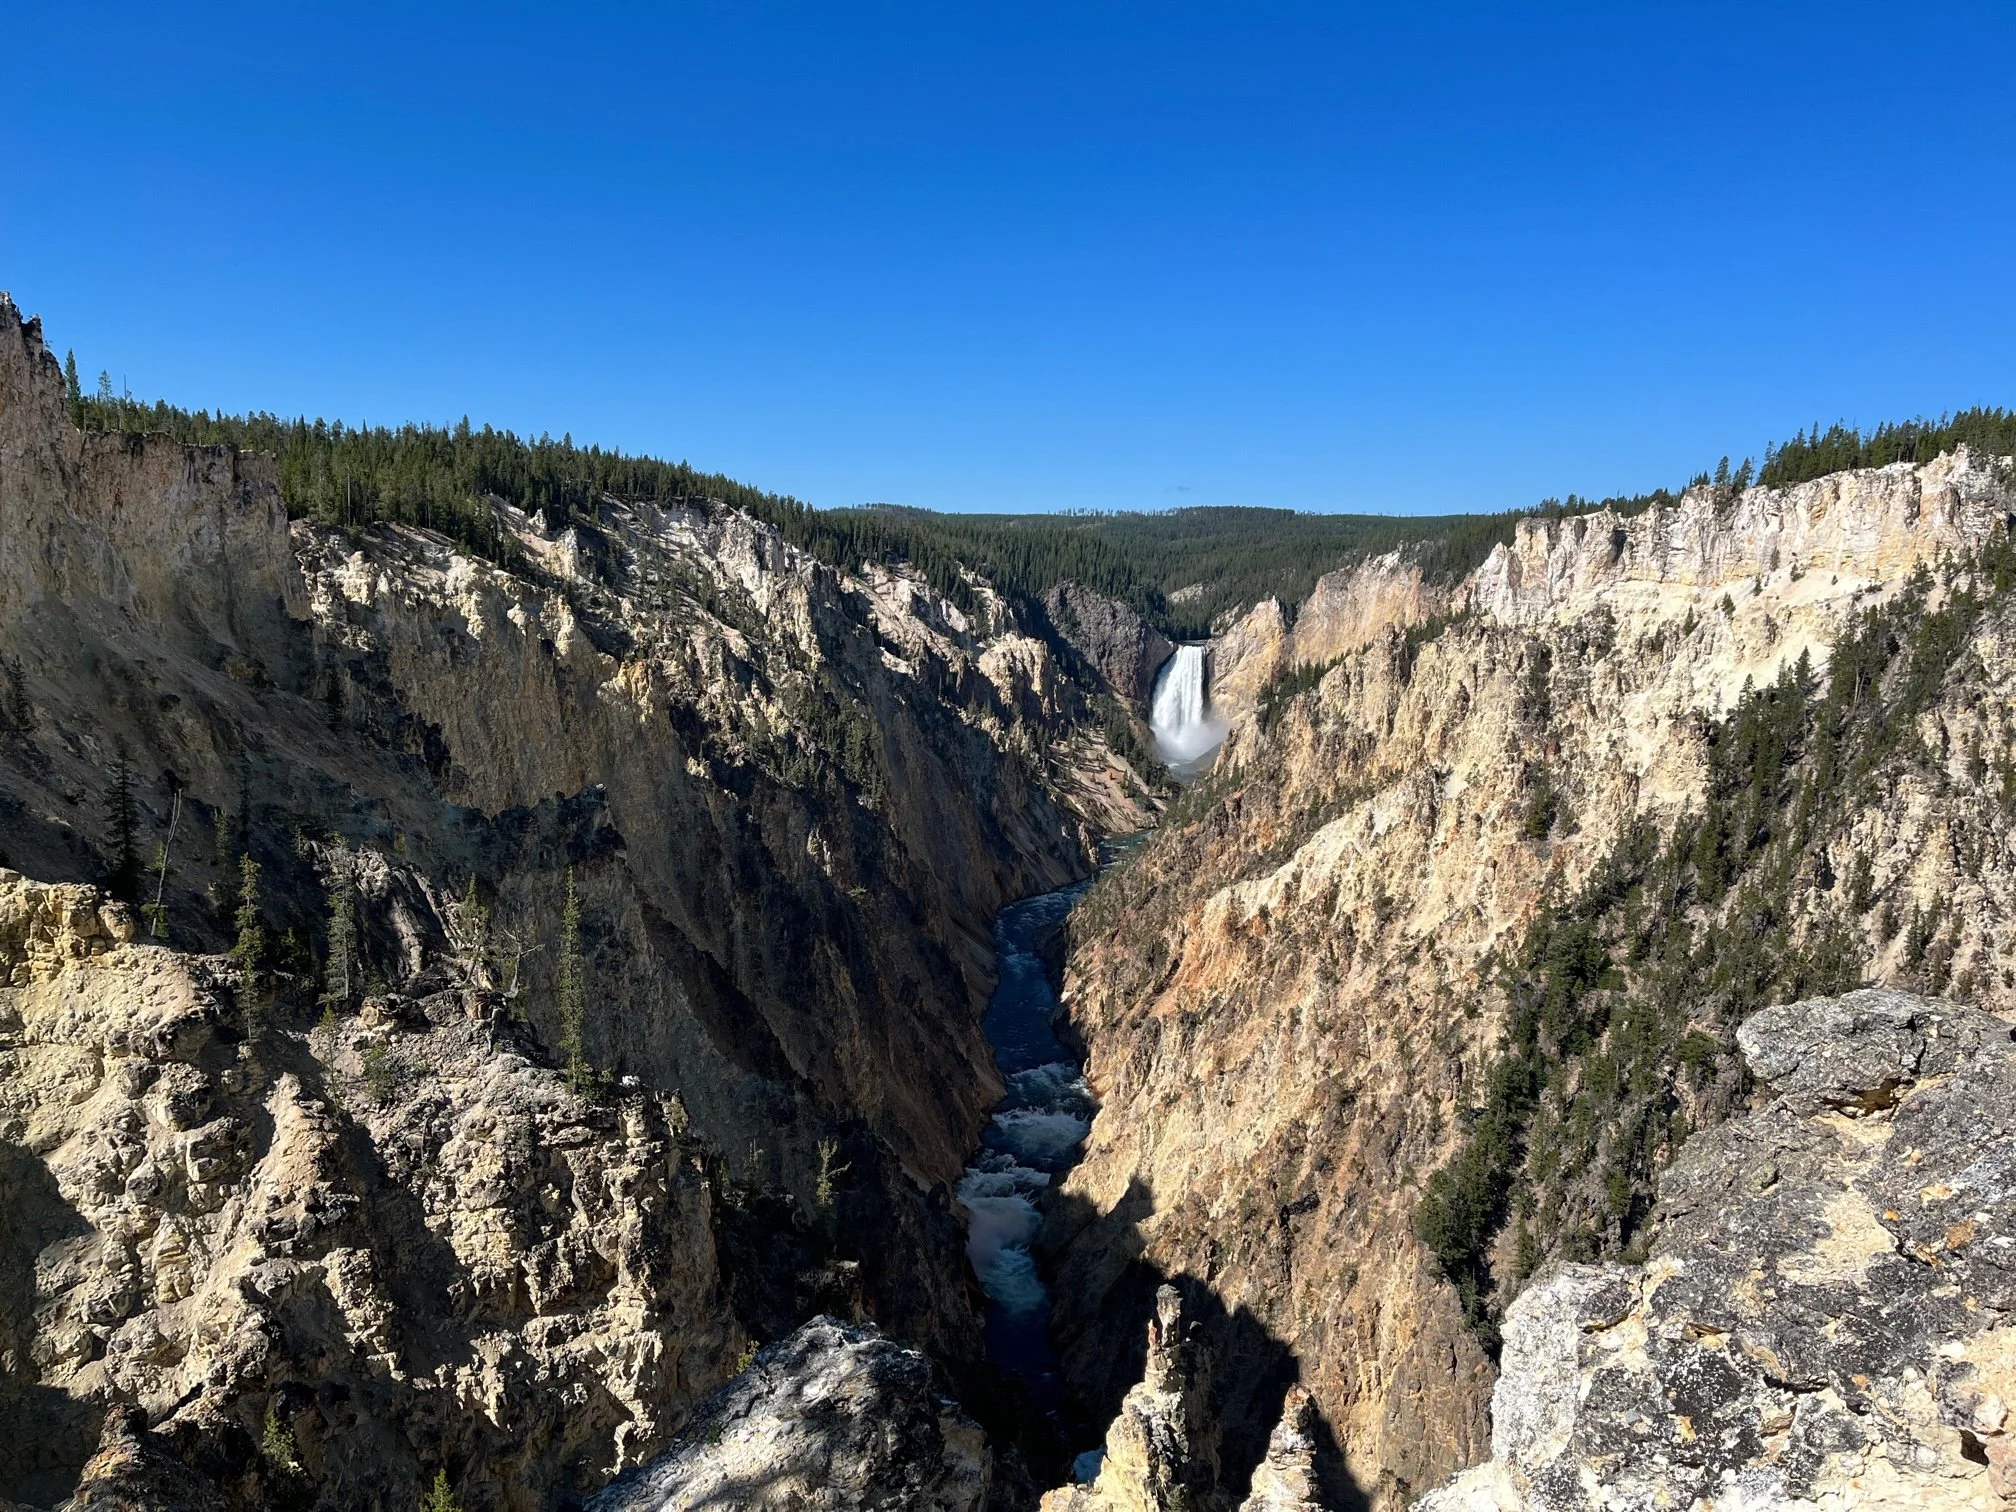
The Grand Canyon of Yellowstone as seen from Artist’s Point
I highly recommend seeing when the ranger-led hikes of the South Rim are. These free programs are excellent ways to learn more about the ecology, geology, wildlife, and flora of different areas in Yellowstone.
You can find the most up-to-date ranger program times and meeting locations at the Canyon Visitor Education Center in Canyon Village, or by looking on the park’s official website.
A popular ranger tour of the South Rim begins at the Upper Falls Viewpoint off of South Rim Drive. You’ll then learn about everything from strata in the canyon to how to spot signs of bears over 1.5 hours.
We followed our ranger guide the rest of the way to Artist’s Point, though I don’t recommend the second half of that trail for very young kids (lots of extremely steep drop-offs with no barriers).
If you’re not up for hiking, stop by both the Upper Falls Viewpoint and Artist’s Point to get 2 different but equally beautiful views of the falls and Yellowstone River.
Canyon Village and Hiking
You’re probably hungry after a morning of hiking, so head back to Canyon Village for lunch. The Canyon Fountain and Grill inside the General Store had delicious diner-style food, including grilled chicken strips, cheeseburgers, and fries.
In the afternoon, stop by the Canyon Visitor Education Center. If you haven’t already, you can pick up your Junior Ranger booklet.
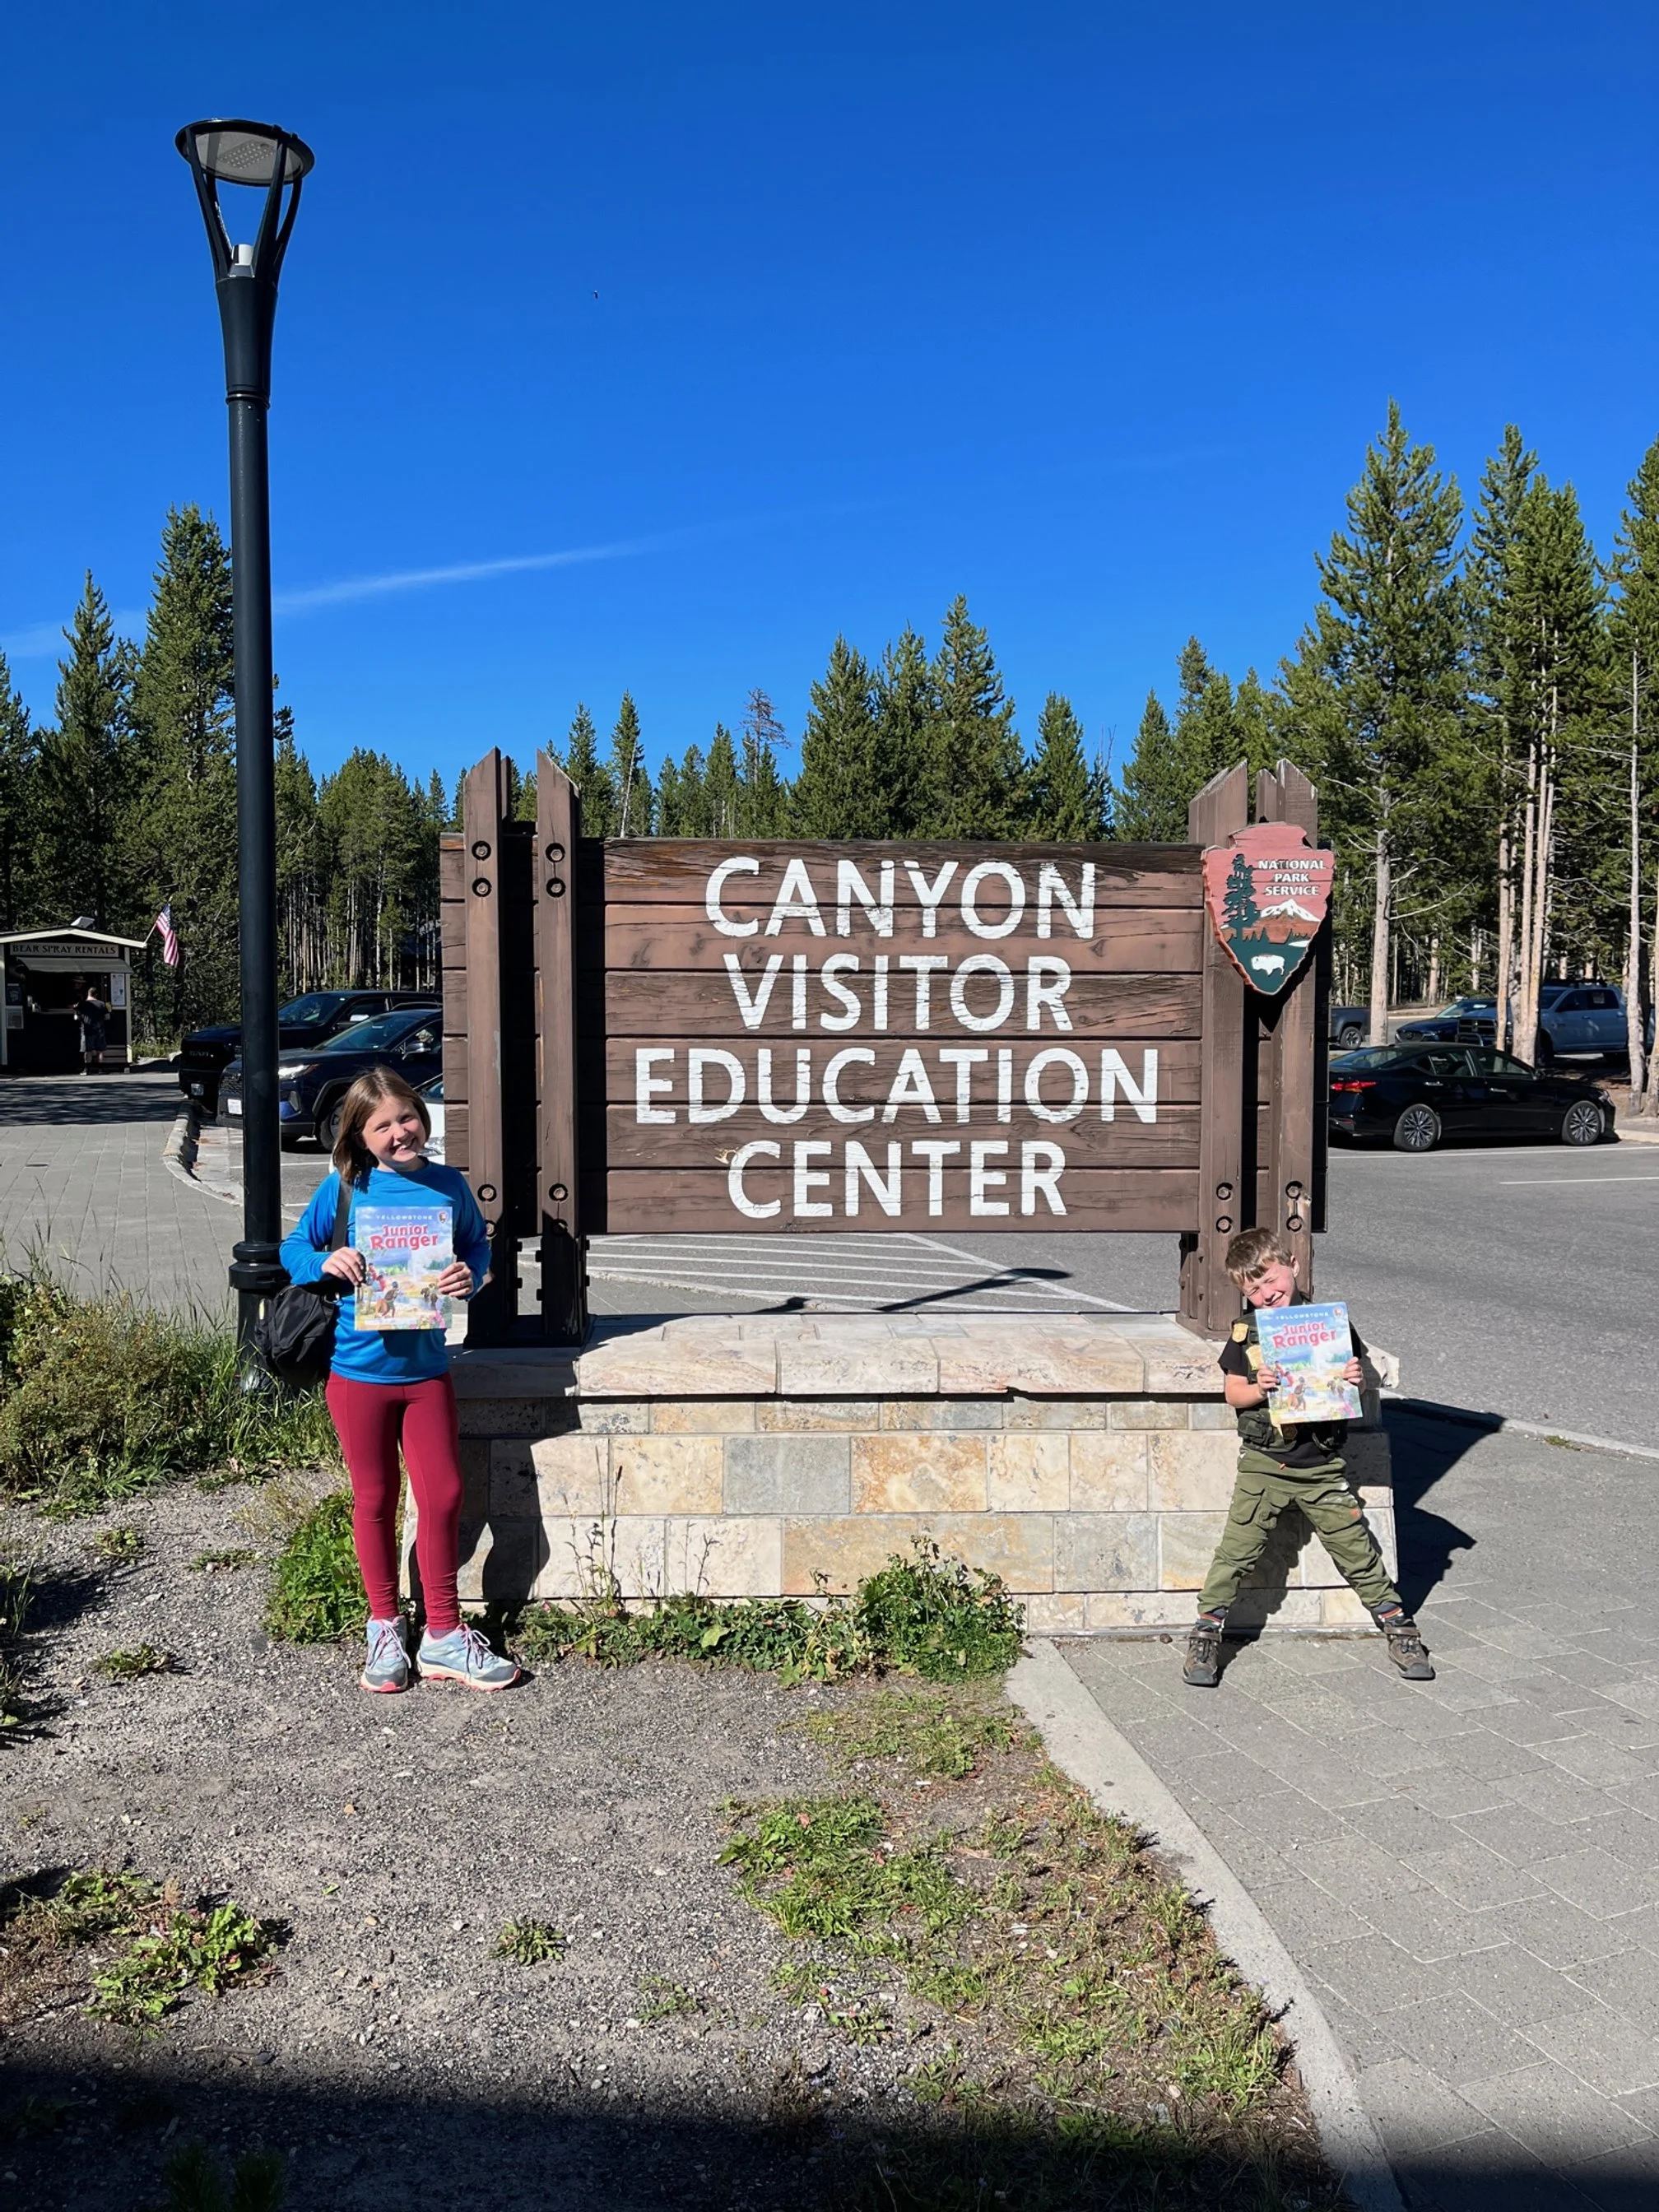
Spend time exploring the interactive exhibits here, which detail the topography and geology of Yellowstone. You’ll be able to see a relief map of the park, feel different levels of earthquakes, and learn about the supervolcano that sits underneath Yellowstone.
If you’d like to get in one more hike today, Cascade Lake trailhead is less than a mile and a half from Canyon Junction (go north on Grand Loop Road). The 4.4 mile out-and-back hike is a great place to spot bison and elk!
Overnight: Canyon Village
If you’re looking for a light dinner, I’d recommend the appetizer sampler plate at M66, the lounge at the end of the main dining hall in Canyon Village.
The sampler includes eggrolls, fried cheese sticks, chicken wings, and onion rings with 3 different dipping sauces.
Day 5: Grand Canyon of Yellowstone, Hayden Valley, and Lake Yellowstone
We’re headed to the North Rim of the Grand Canyon of Yellowstone today, which will give a different perspective on this awe-inspiring geological feature.
Brink of the Lower Falls

The picture of the Lower Falls and canyon that I waited patiently to get!
If you can handle the several hundred foot drop in elevation over just 1/4 of a mile, I highly recommend hiking down to the Brink of the Lower Falls viewpoint.
My family and I are from coastal South Carolina, so we have to take those inclines slow—but we still get there! Going down to the falls was the easy part; we took our sweet time on the ascent to the parking lot.
Still, all of that hiking was worth it to see the canyon perhaps its best side. On a nice day, a rainbow is nearly certain to be a part of your photos!
You may have to wait for this spot, but the furthest right corner is THE place to take a photo of the canyon and falls (rainbow included).
NOTE: Parking on the north side of the canyon can feel crowded, but people are constantly coming and going. Just wait a minute or two and someone is sure to leave.
Inspiration Point
If you’d rather skip the elevation gain on the previous hike—or if you want another view of the Lower Falls—head to Inspiration Point.
This vantage point requires much less work on your part for some stunning views of the Yellowstone River.
Walk along the sidewalk, or take the small trail to a little overlook.
(For the love of all that is good in the world, don’t step over the railing to get a better view of the canyon. It’s a straight shot down. I only say this because I saw a group of people doing just that.)
There are several more turnouts on the North Rim, but I think you can skip them unless you really want more time in this area of the park.
Hayden Valley
Instead, I’d suggest heading south on Grand Loop Road to Hayden Valley.
While you can, and will, see wildlife anywhere in the park, Hayden Valley and Lamar Valley (to the north) are 2 areas where large groups of bison tend to gather. You might also see trumpeter swans, elk, grizzly, ravens, and more here.
Slowly drive through Hayden Valley, stopping along the pull-outs if you’d like to view any animals.
This section of the park can take 20 minutes or 2 hours depending on how many animals are active and how interested you are in viewing them.
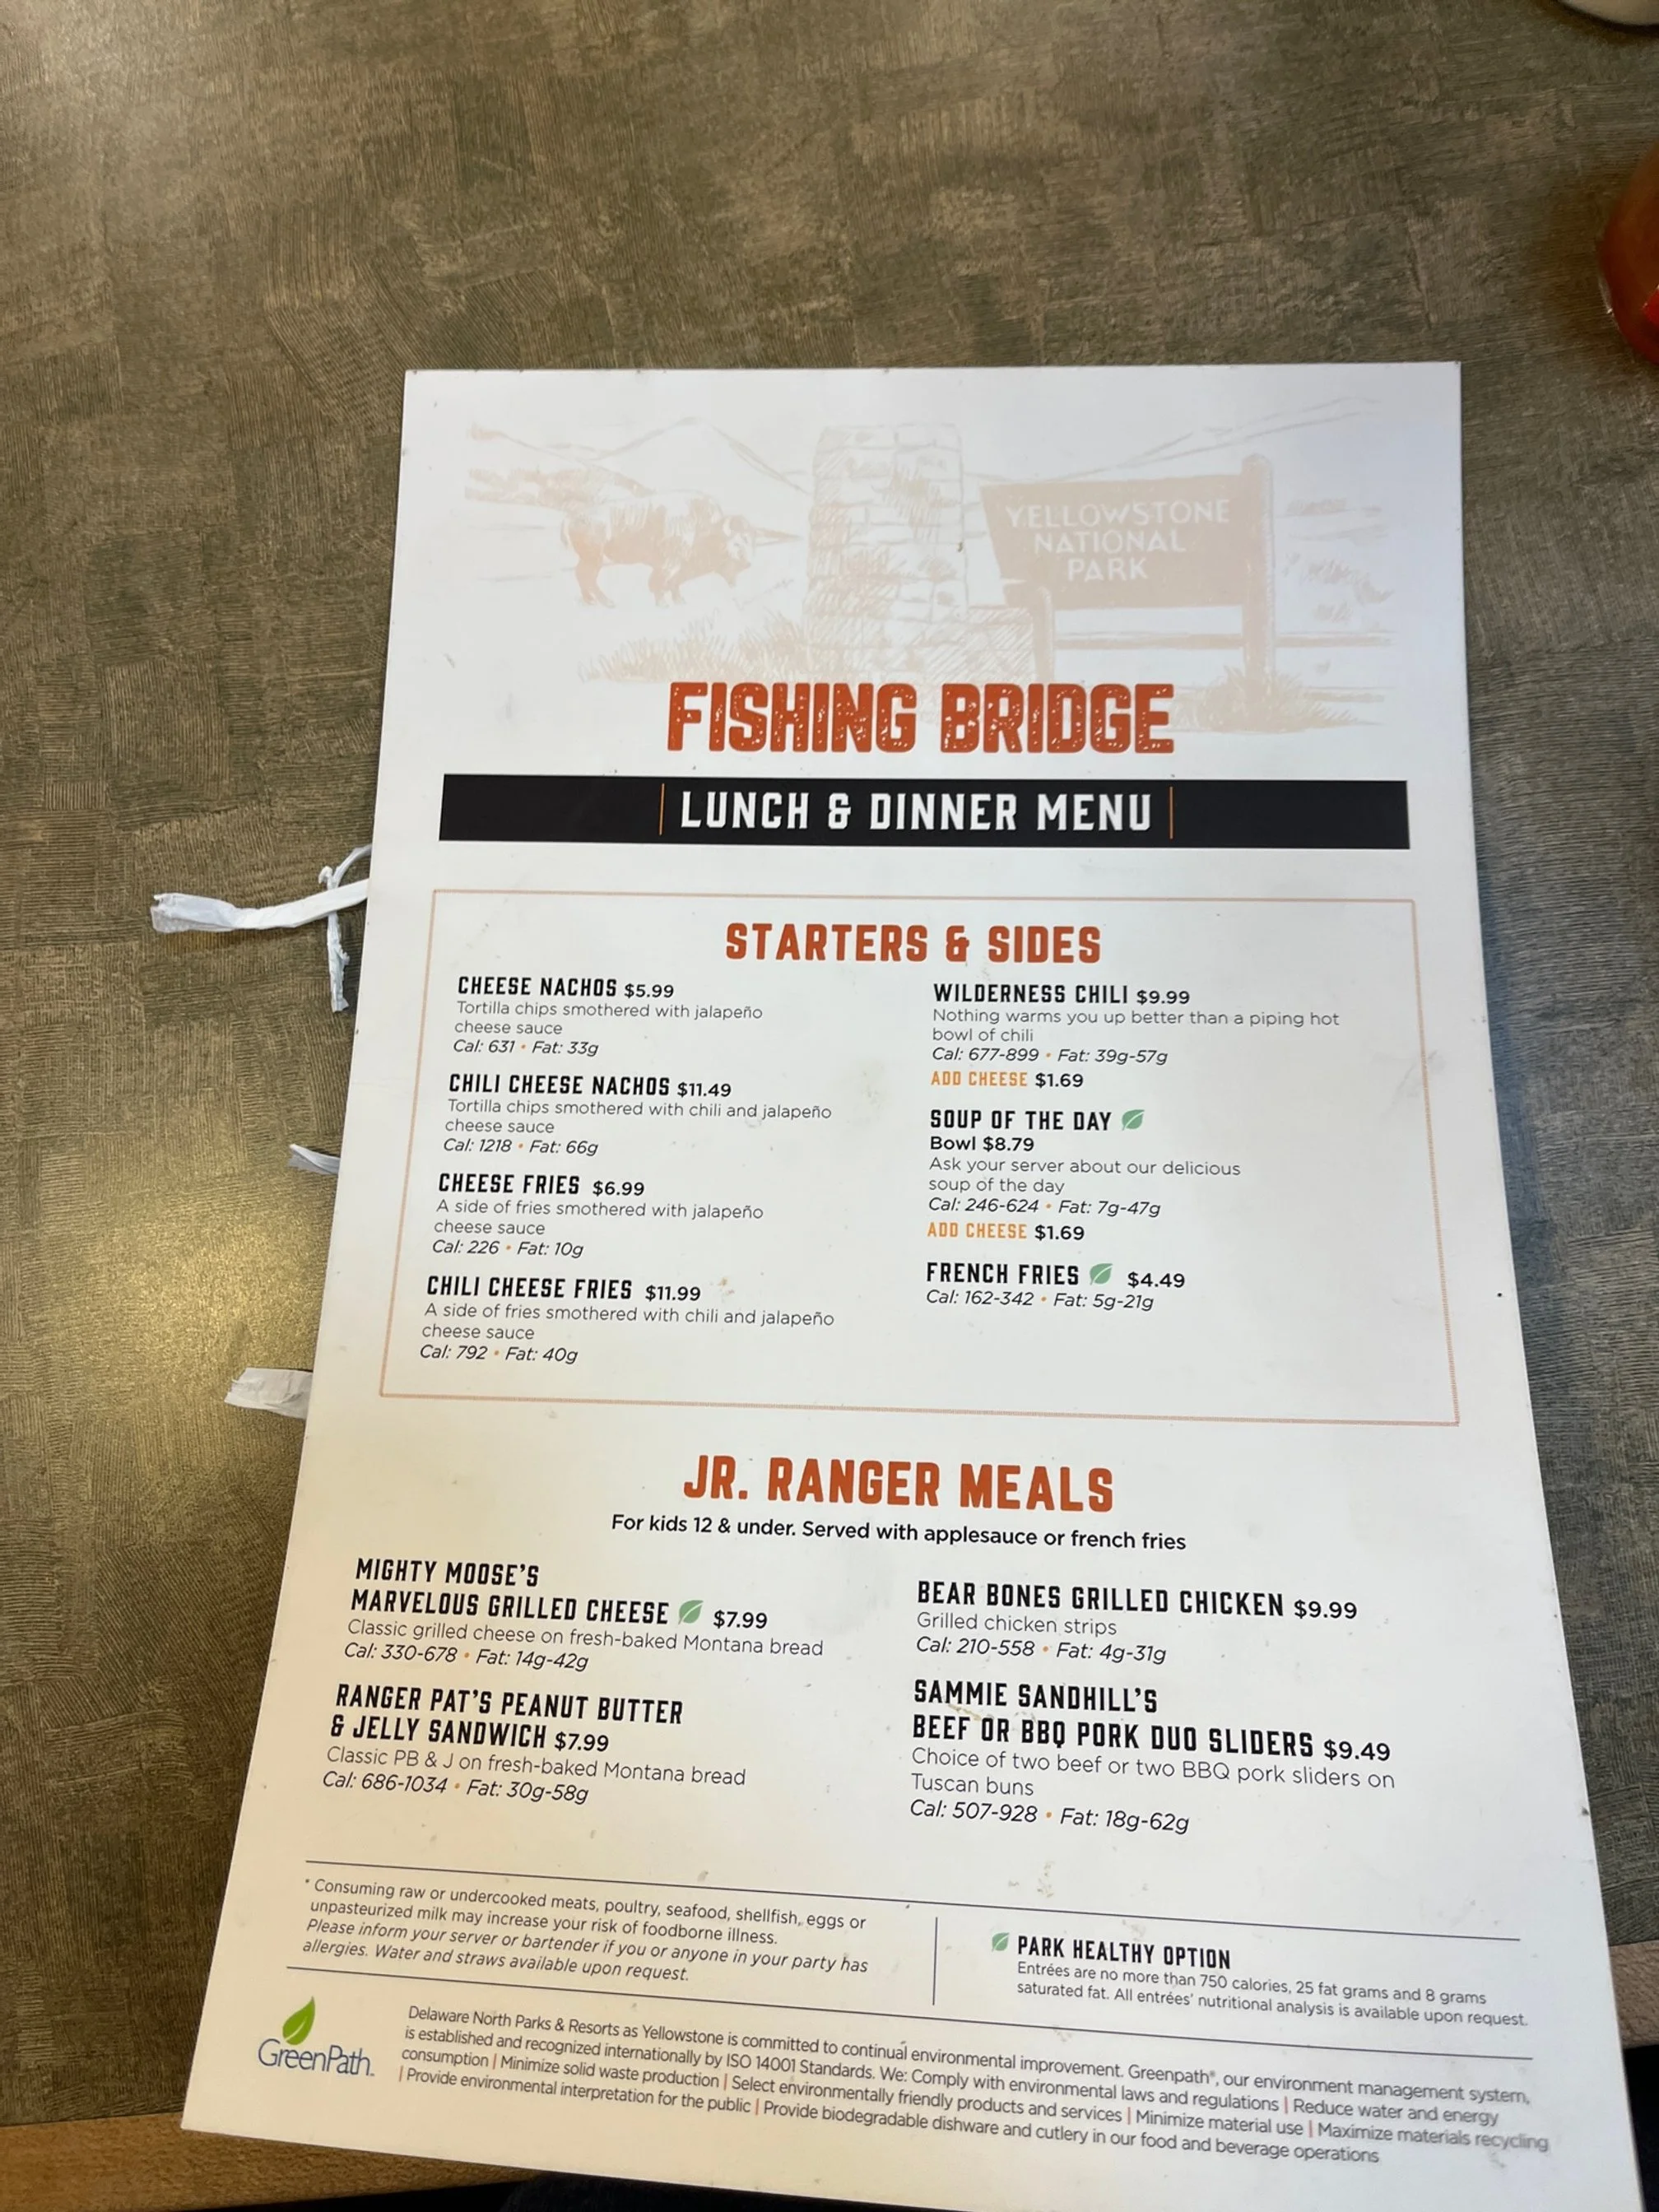
Fishing Bridge Menu
Lunch at Fishing Bridge
Along the way, stop for lunch in Fishing Bridge, where you’ll find a diner-themed restaurant similar to the one in Canyon Village recommended above.
It has a simple but delicious menu with kids options, too.
Both the Fishing Bridge diner and the one in Canyon Village are run by Delaware North, which I felt was much better than the food provided by Xanterra elsewhere in the park.
Tuck into salads, wraps, black bean burgers, and more here.
And if you want to learn more about what to eat in Yellowstone National Park, check out my post on it!
Lake Yellowstone boat tour
Your other afternoon activity should be a ranger-led tour of Lake Yellowstone.
Unlike most of the ranger-led programs and hikes, this one comes with a nominal fee and requires reservations.

The mid-summer tours do fill up quickly, so book as soon as you’re confident of your vacation dates.
This 1.5 long tour takes guests onto Lake Yellowstone to learn about the history of the nearby Lake Yellowstone Lake, tourism in this area, and the unique geological formations of the lake. Did you know that there are steam vents on the lake floor?
We found this tour to be valuable and upbeat, plus it is always fun to have time on the water.
After your tour is over, you can poke your head into Lake Yellowstone Hotel before heading back to Canyon Village.
NOTE: You’ll pass by the Mud Volcano area of the park, but you won’t have time for it today. But don’t worry! We’re returning here on another day of the itinerary.
Overnight: Canyon Village
Day 6: Mammoth Hot Springs and Gardiner
Say goodbye to Canyon Village as we head to another section of the park!
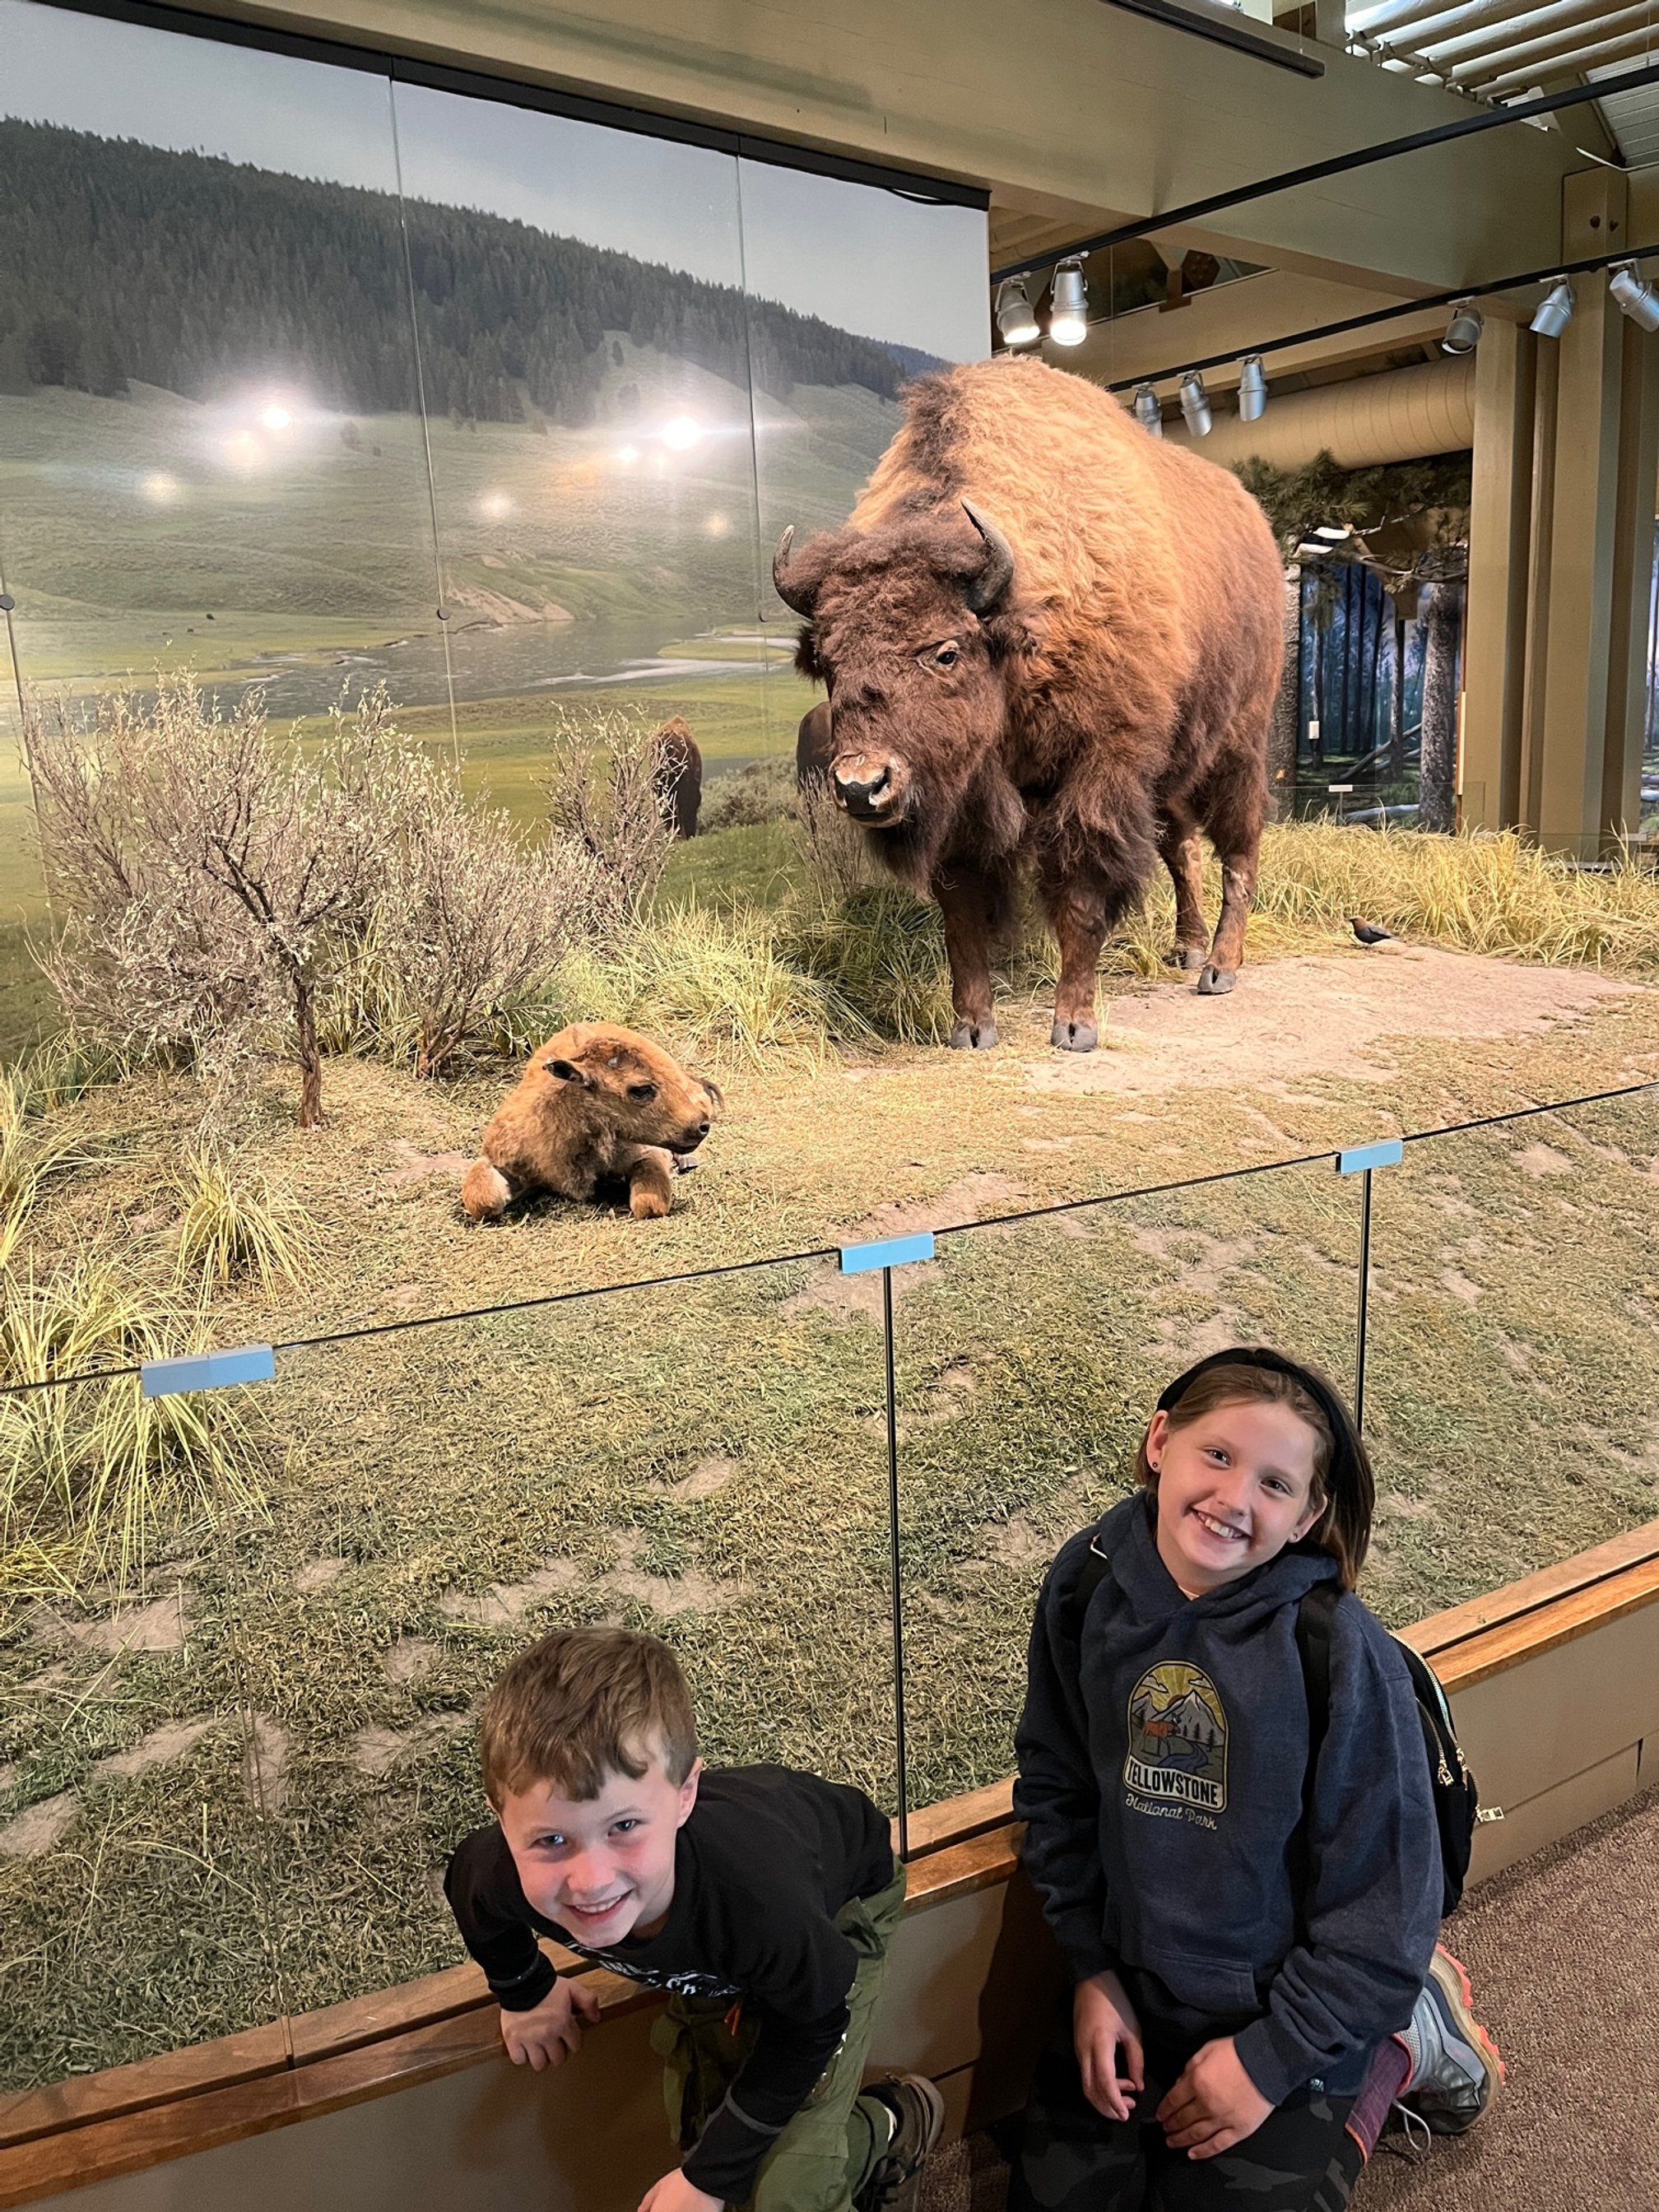
Museum of the National Park Ranger
Head west on Norris Canyon Road, then turn north onto Grand Loop Road. Just after this turn, you’ll want to stop at the Museum of the National Park Ranger.
Here, you and your family can learn about the history of the park ranger, a position that started with the earliest activities for the creation of Yellowstone.
The place is exclusively staffed by retired rangers, and they bring their years of experience into their docent responsibilities.
This museum is free and an excellent stop to encourage the younger members of your family into science-related fields.
Roaring Mountain
Just a few miles down the road from the ranger museum is the strange Roaring Mountain.
So named because of the constant hissing sounds from the many steam vents on its surface, Roaring Mountain is an eerie sight in the early morning light.
There’s not much to do here once you’ve listened for a few minutes, but the oddity of it all is worth a quick hop out of the car.
Sheepeater Cliffs

The Camping Kiddos at Sheepeater Cliffs
As you make your way north to the Mammoth Hot Springs section of the park, you’ll probably want to stretch your legs.
There’s an excellent area to do so at Sheepeater Cliffs, an oddly named but fascinating geological feature.
The rows of rock columns are created naturally from basalt, but their uniformity makes them look as if someone rolled them off of factory floor and tried to stack them up.
Walk on the rocks if you’d like, but note that the piles of basalt are extremely uneven.
We saw several people climb on top of the basalt cliff. I can’t speak to the safety of that choice, but the columns do fall at some point, so use your best judgment.
There are several picnic tables here if you’d like to have a snack.
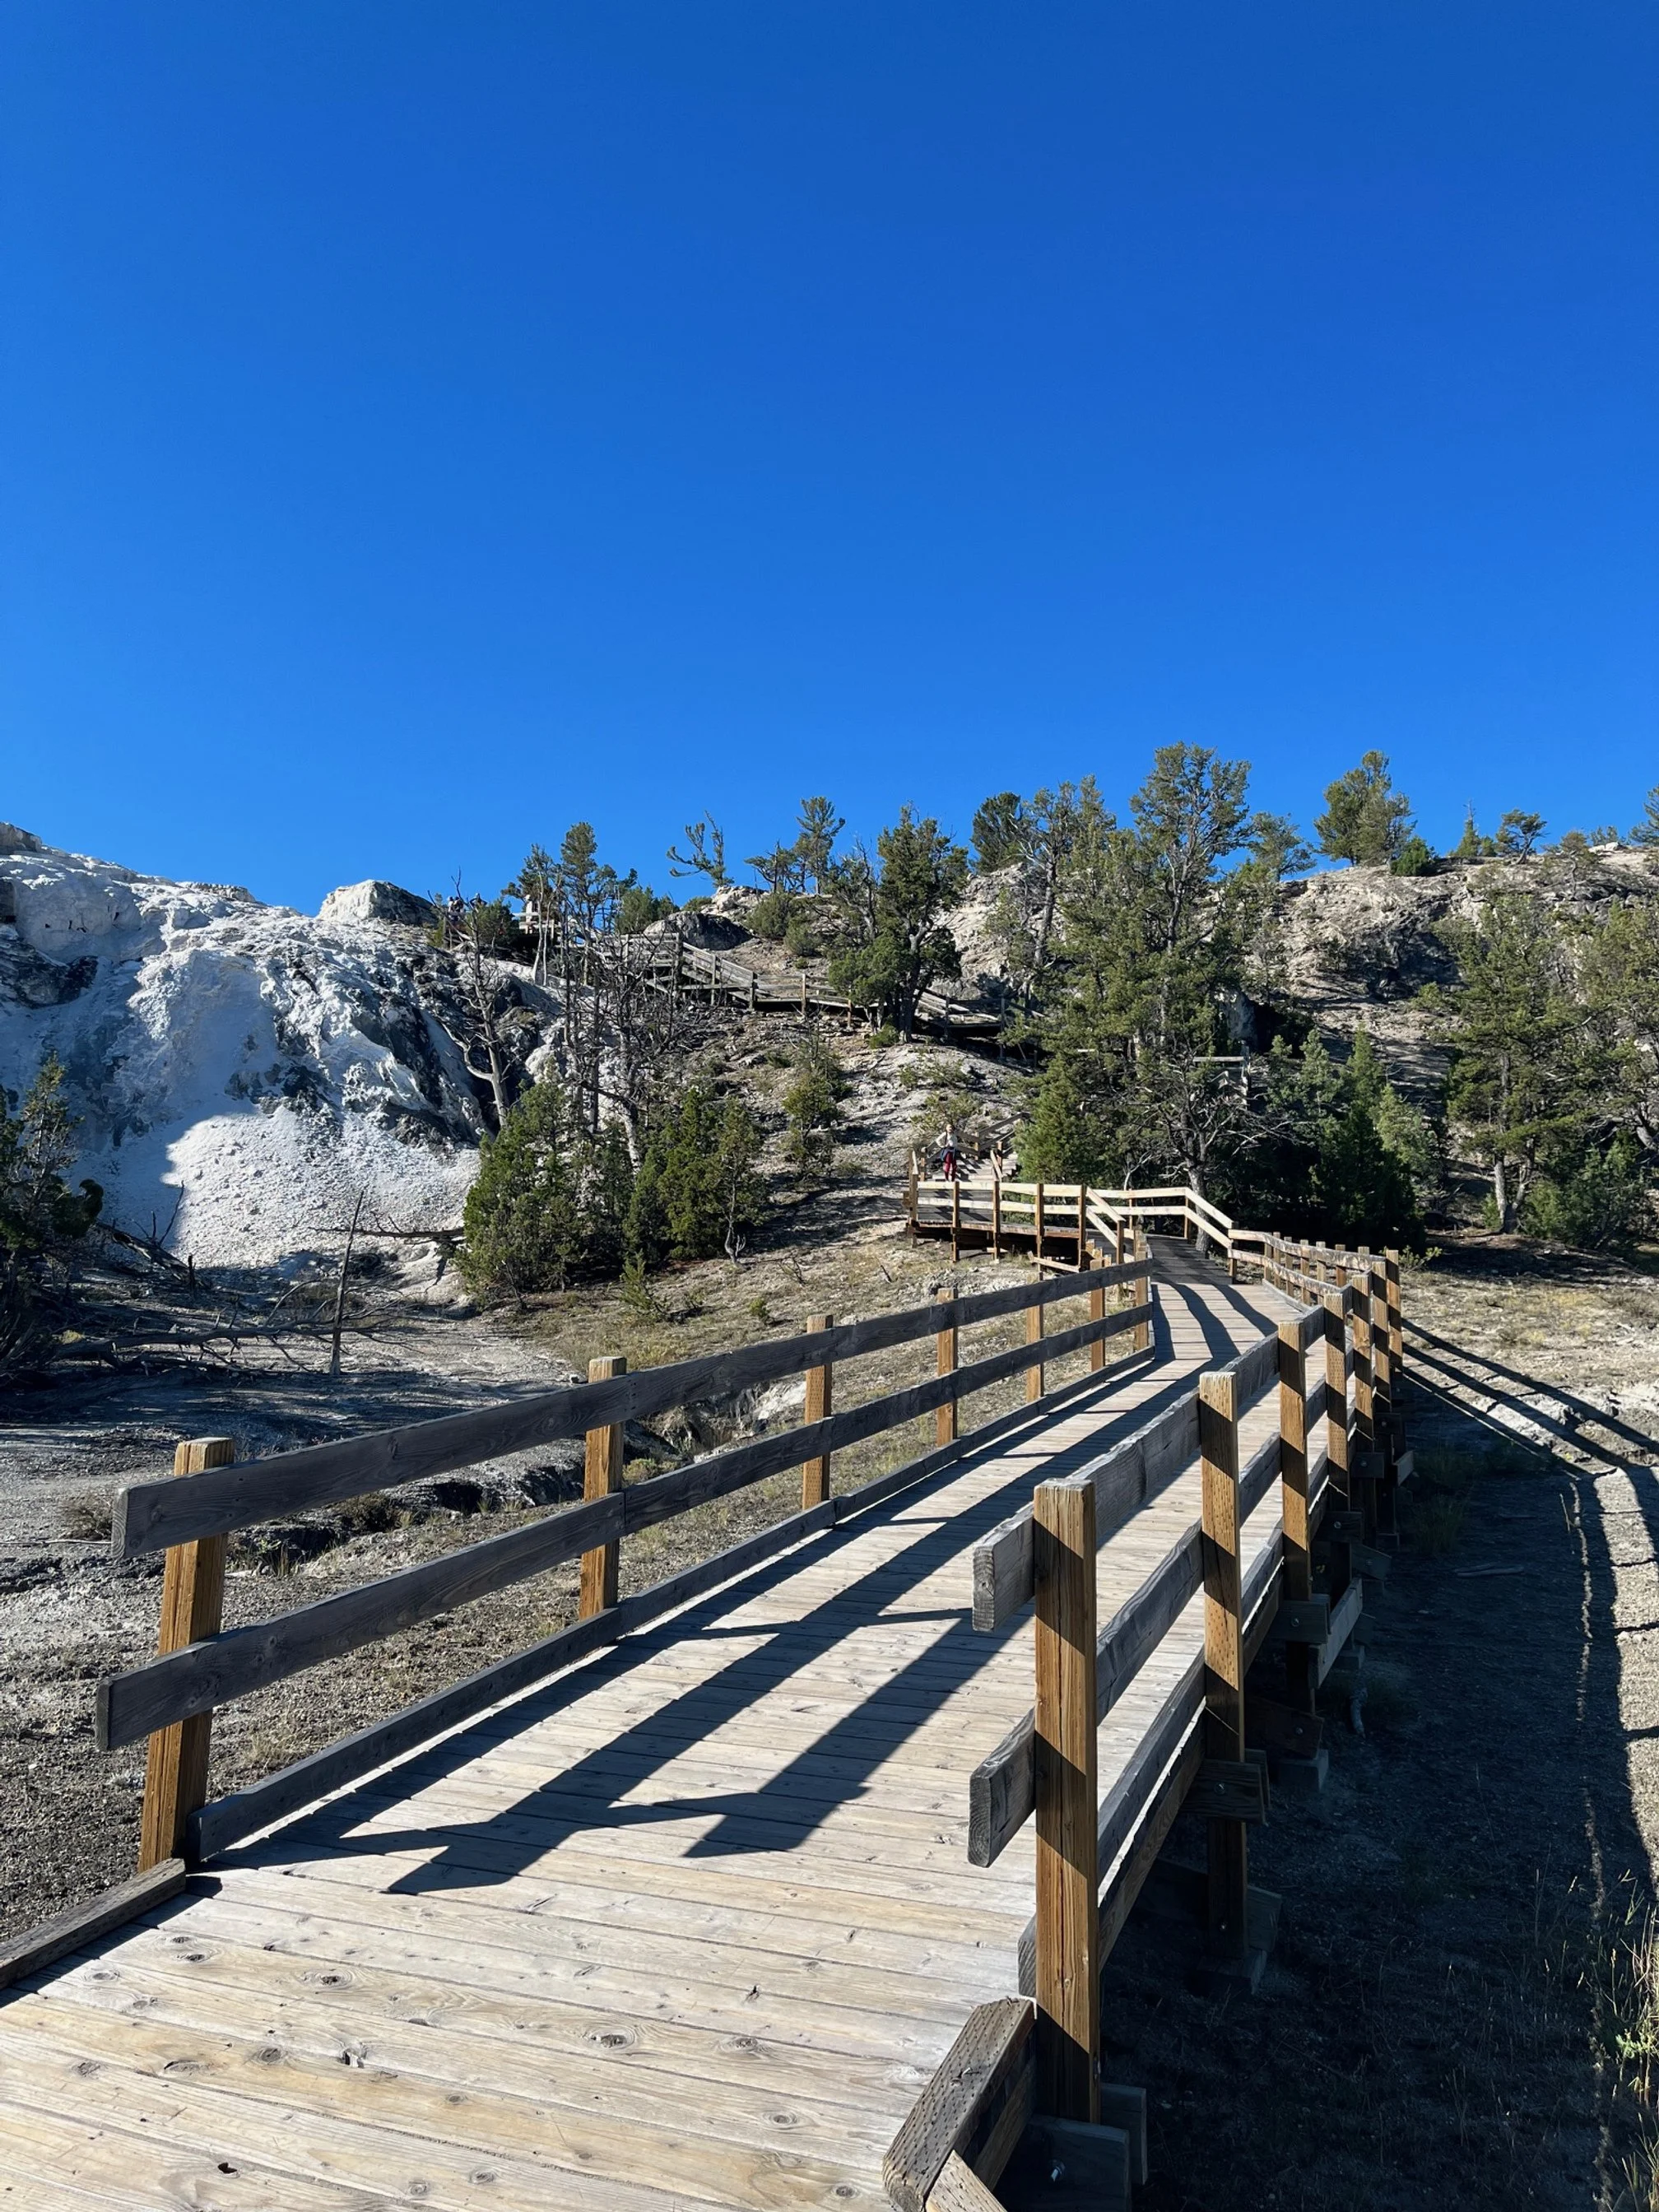
Mammoth Hot Springs
There are several areas where Yellowstone National Park doesn’t even look real—and Mammoth Hot Springs is one of those places.
The boardwalk of the Upper Springs is worth getting out of the car so you can see the stark white, orange, yellow, blue, and purple rock and water formations up close.
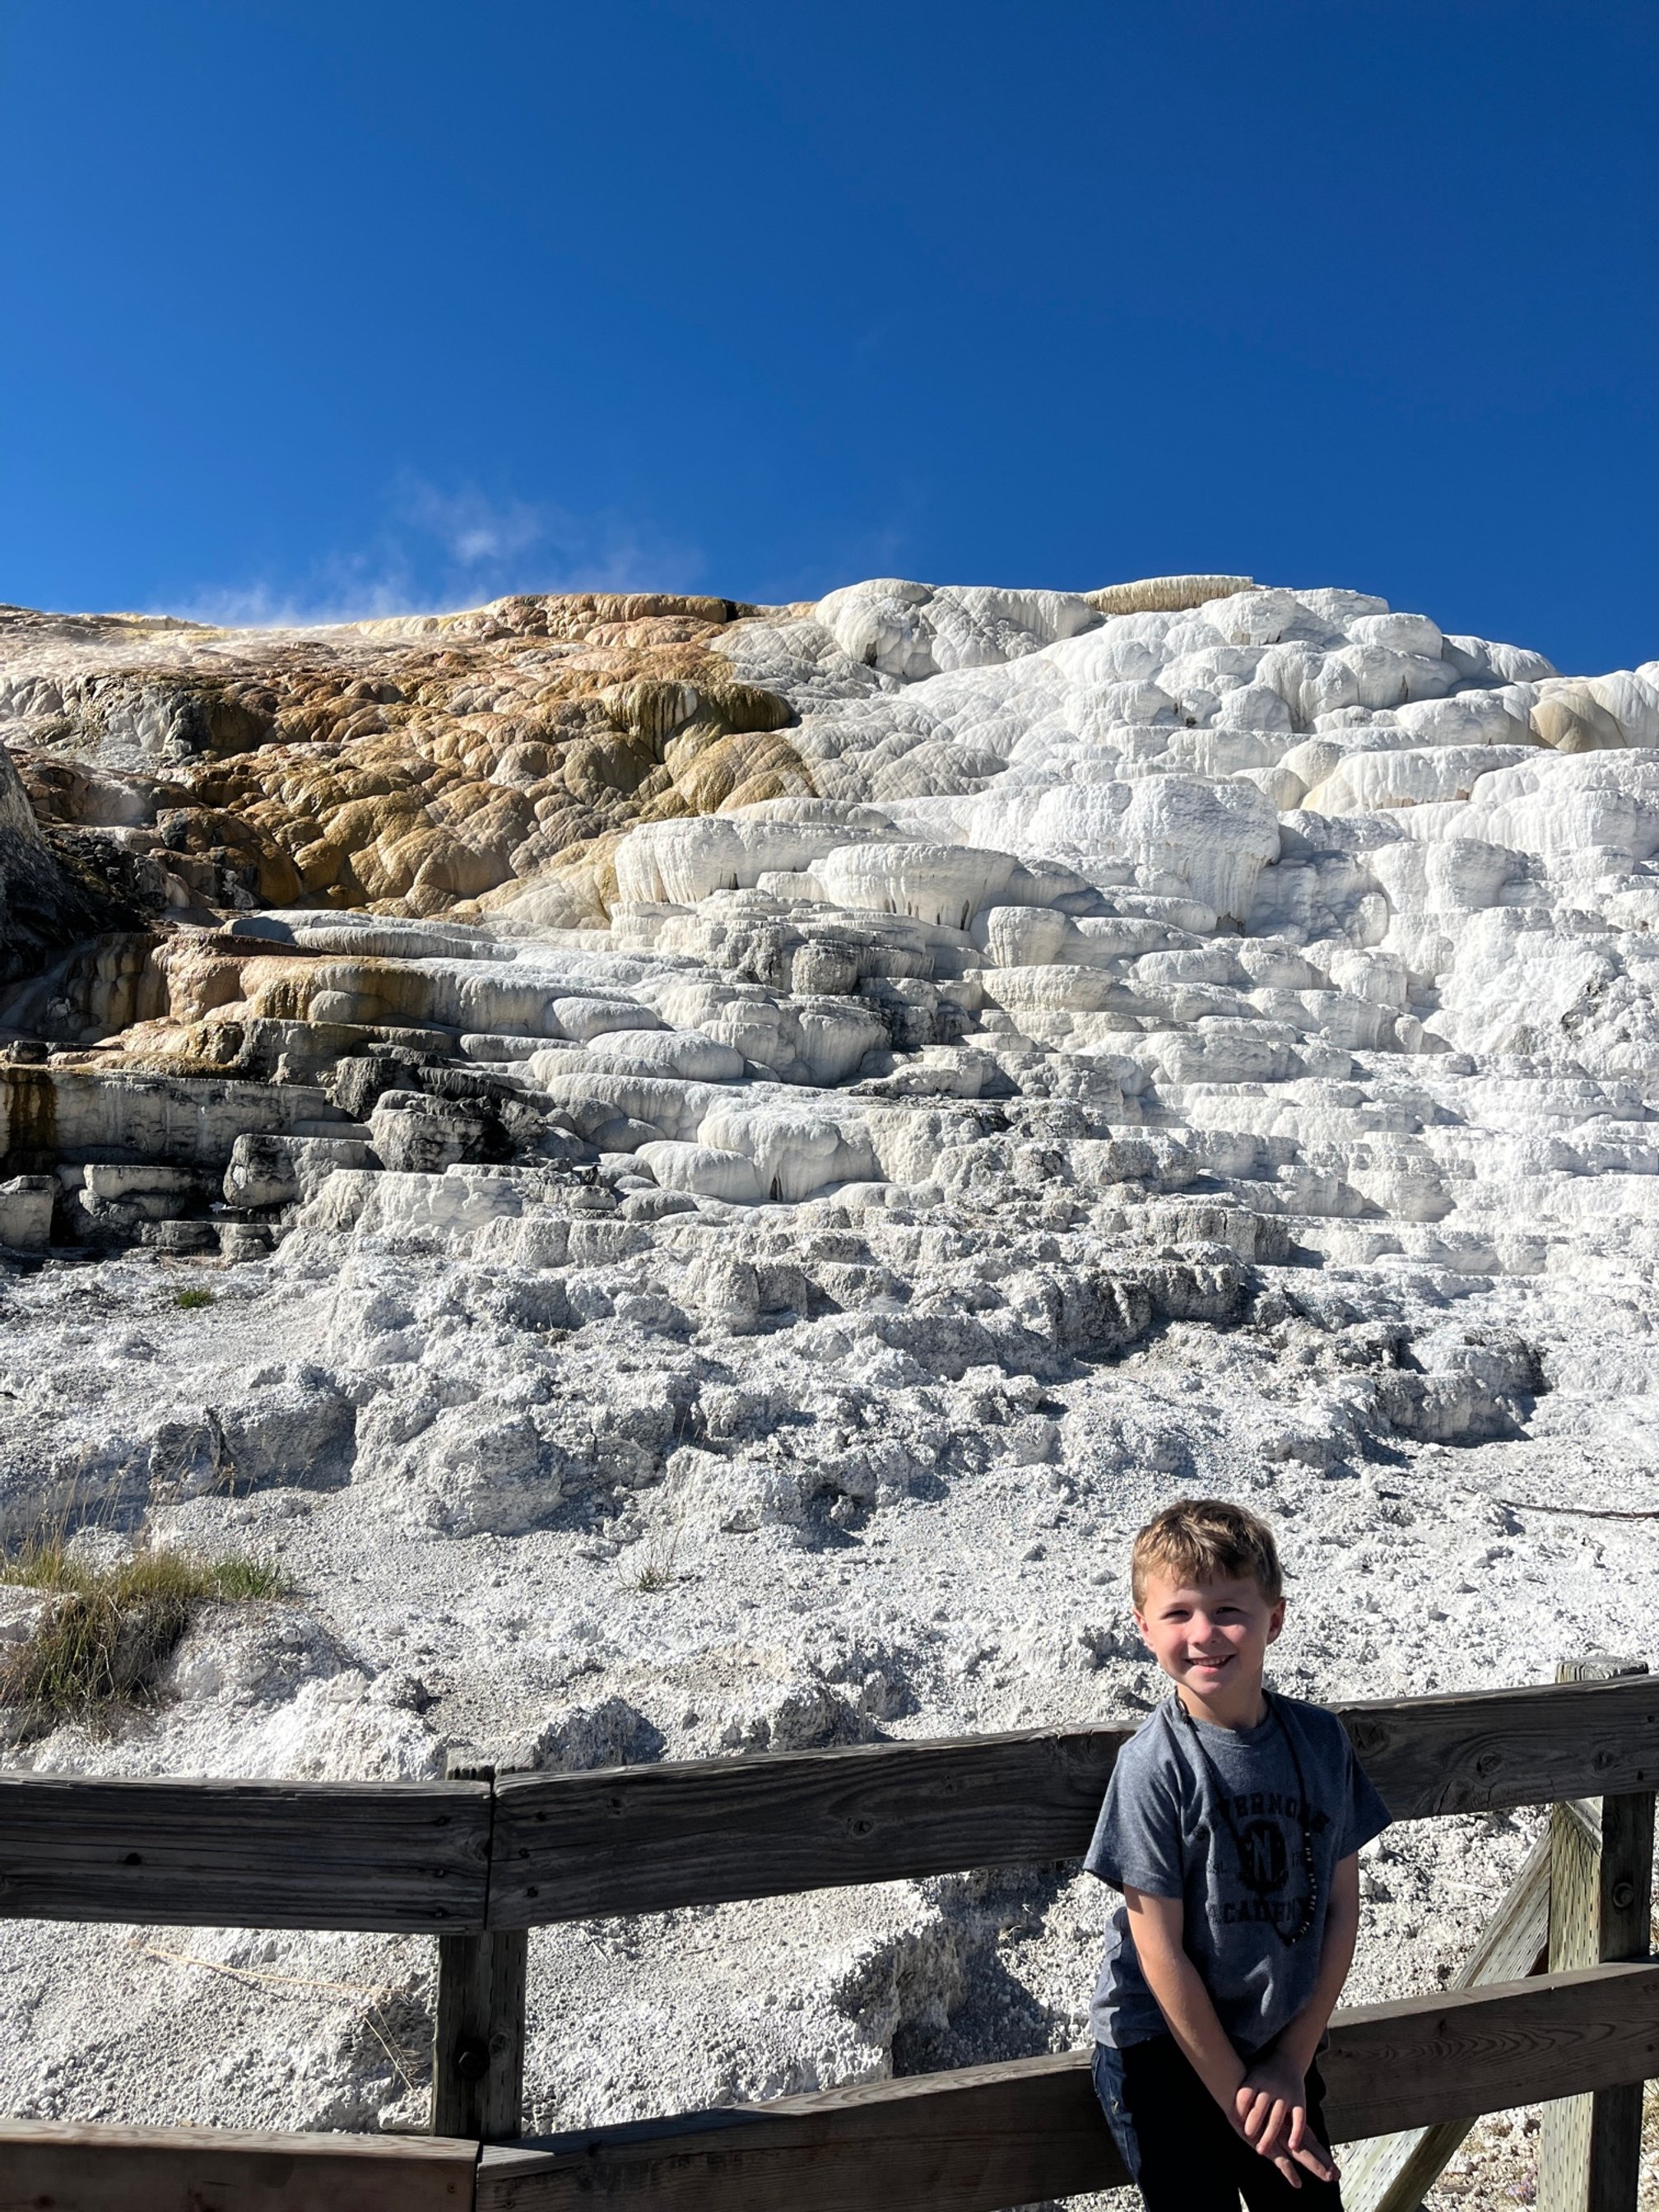
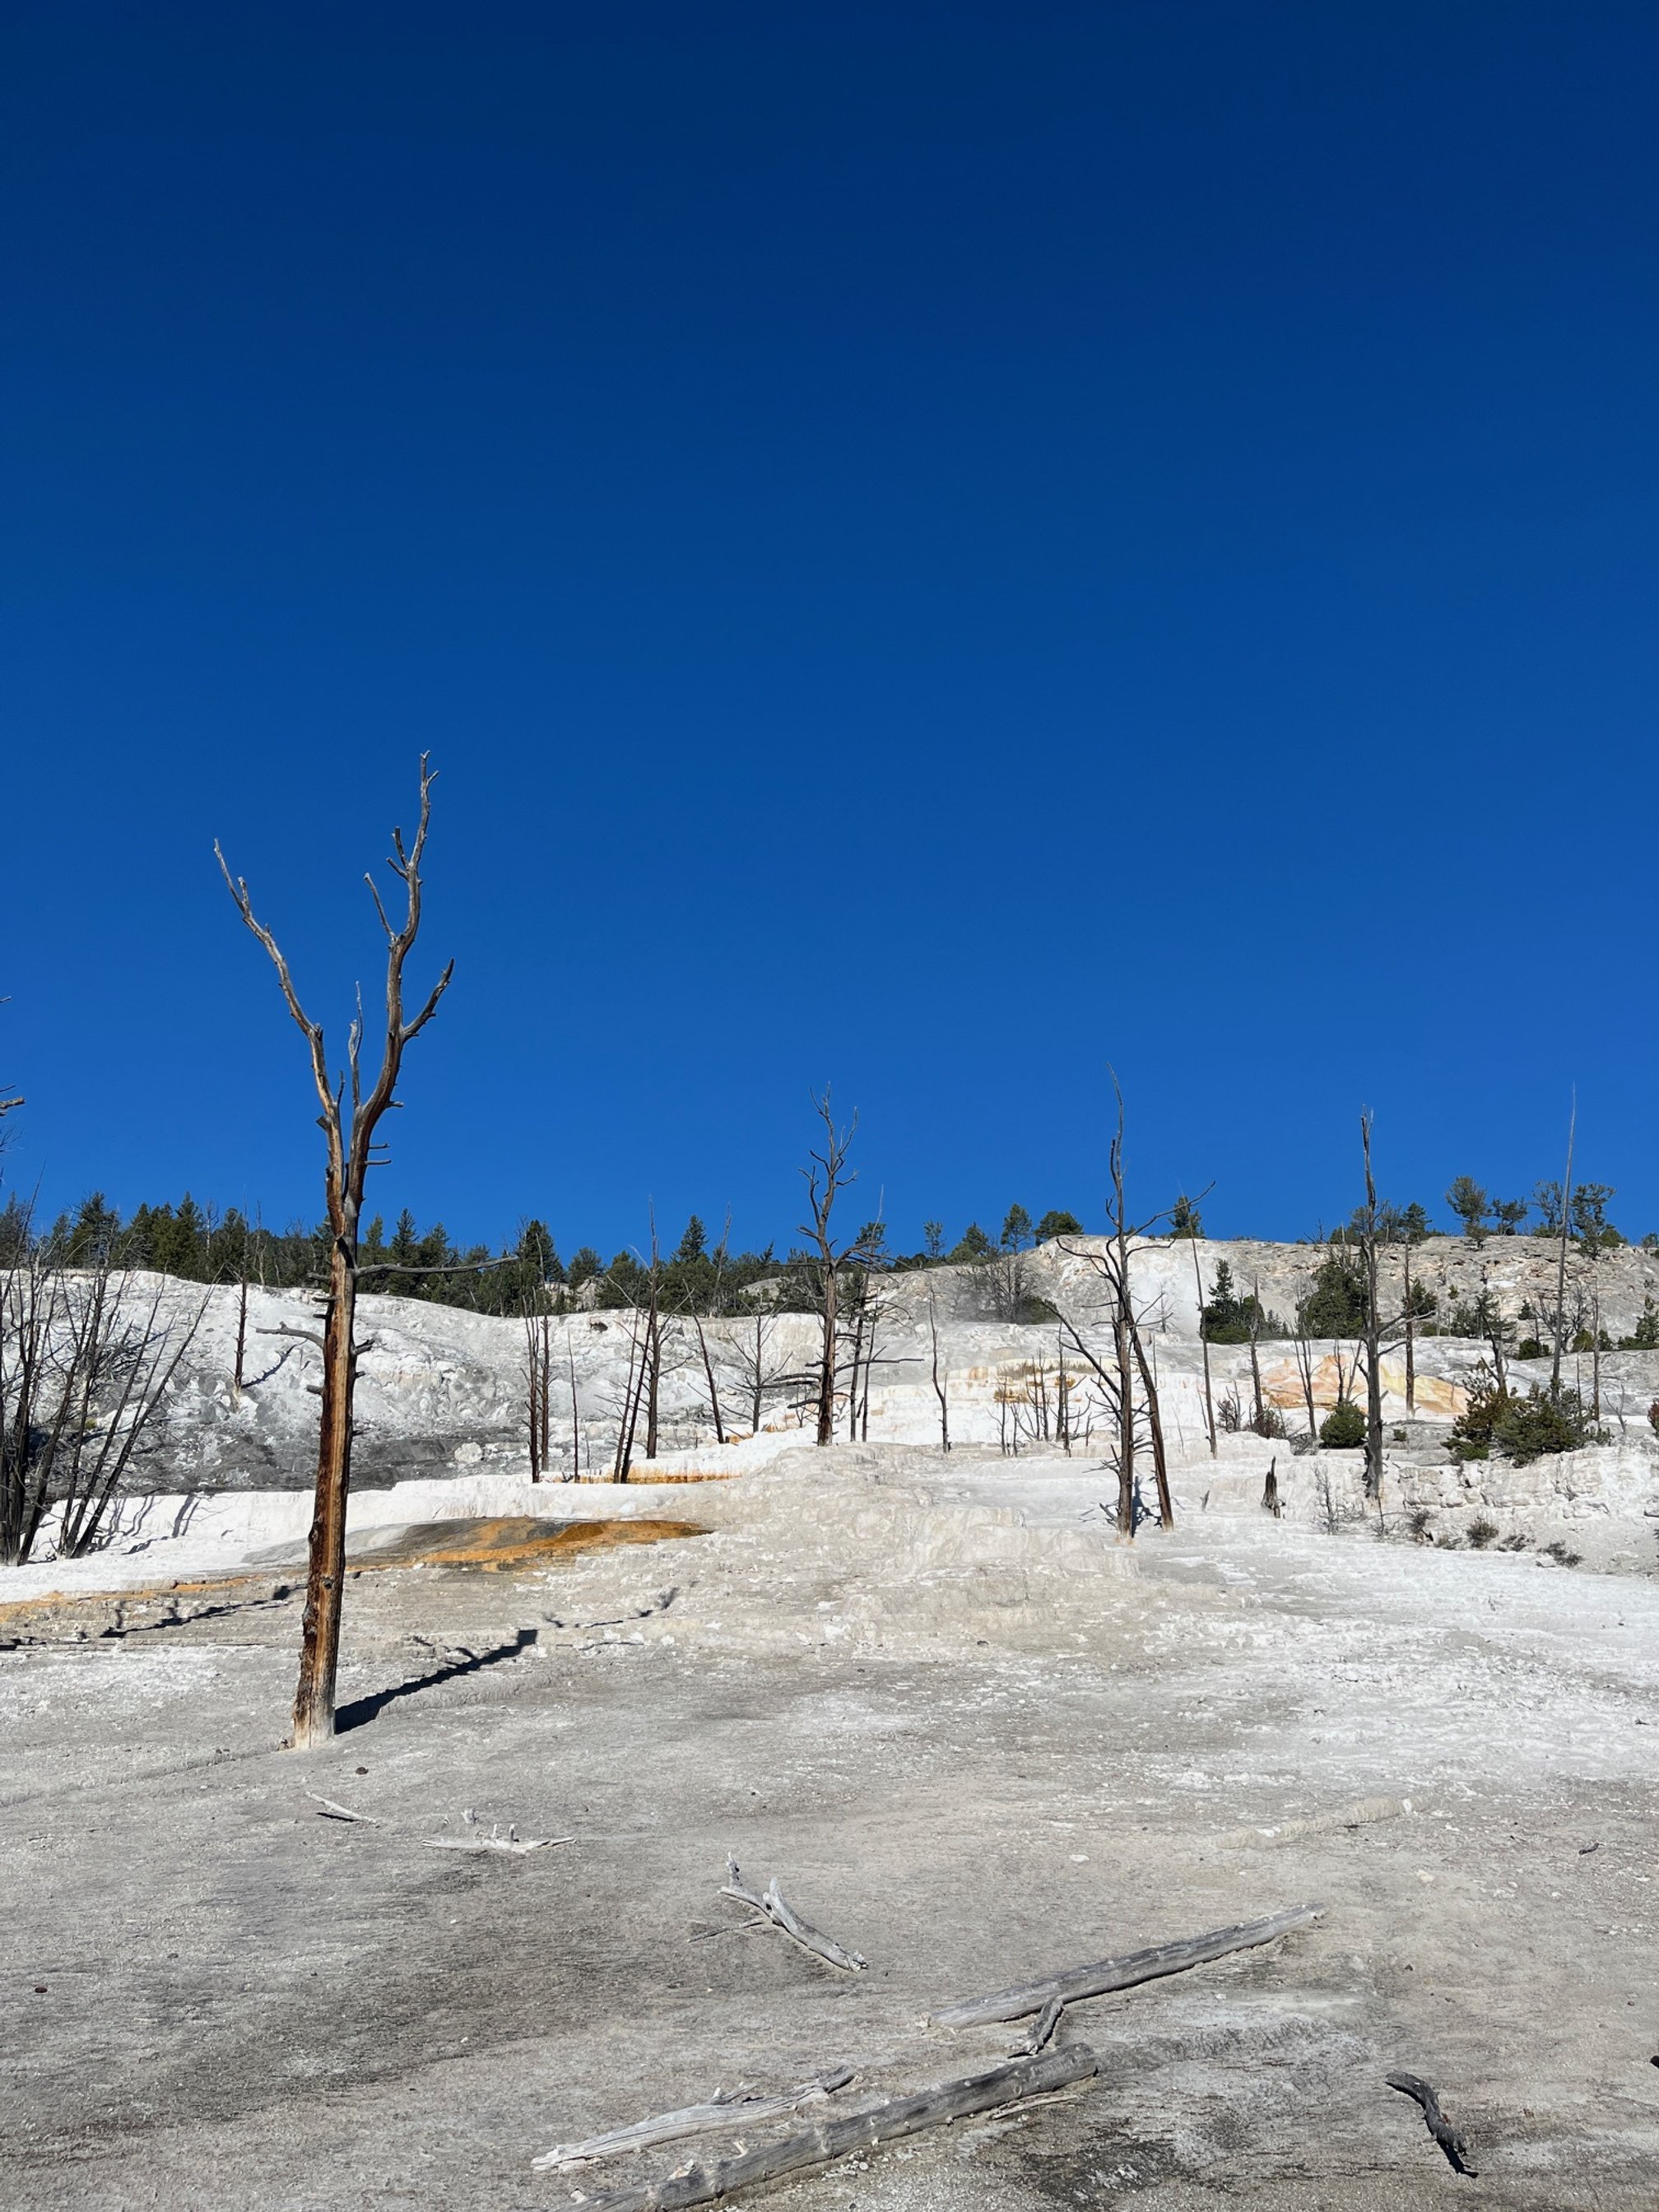
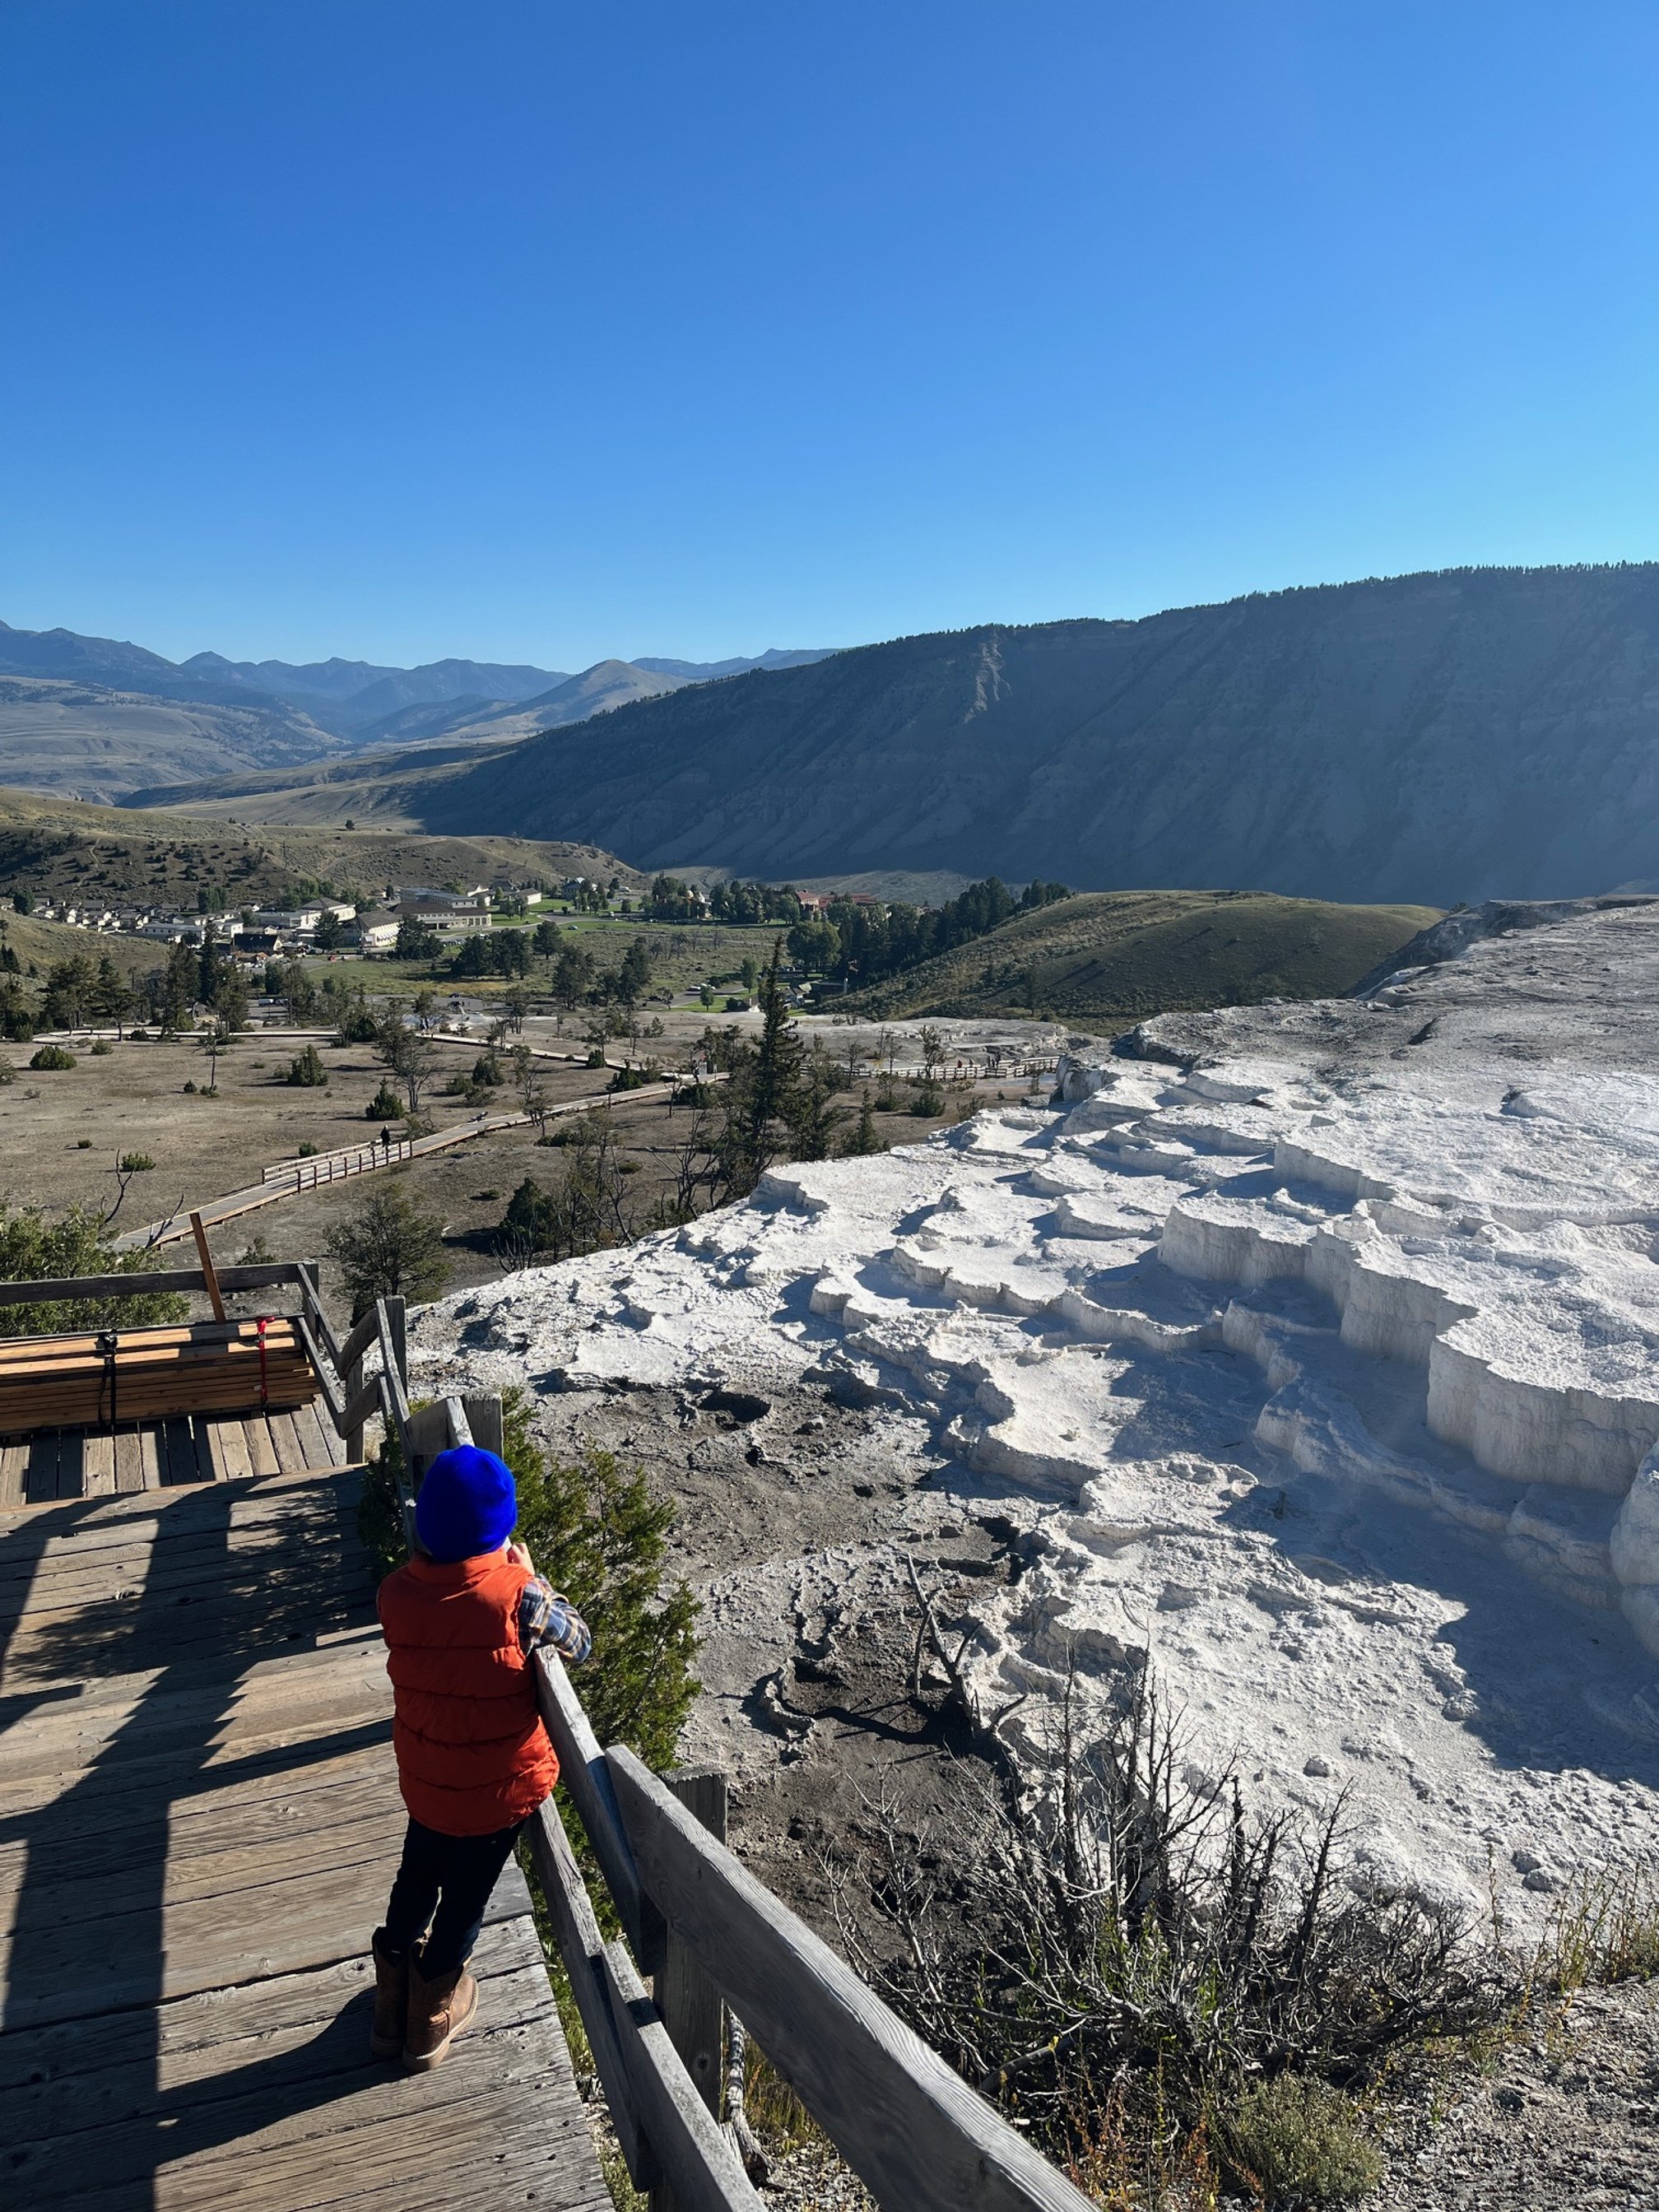
Don’t forget to do the complete driving loop of the Upper Springs, too, as that takes you past the ever growing Orange Spring Mound, the dead trees of Angel Terrace that look like something out of the Namibian desert, and more.
There’s also a Lower Terrace boardwalk, but we enjoyed the Upper section more.
At the bottom of the springs, almost as you enter the town of Mammoth Hot Springs, the now defunct geyser of Liberty Gap lives on a strange column of rock.
Liberty Cap and Palette Springs are literally feet from the parking area, but well worth a quick stop. I thought that Palette Springs was one of the prettiest features of the entire hot springs area.
There’s another visitors center with a small display of taxidermied animals upstairs and a great look at the park over the years in the basement. It was interesting to see how long the park has had to deal with visitors trying to touch the wildlife and doing bizarre things!
There’s also a self-guided tour of Fort Yellowstone here, if you’d like to learn about the history of this section of the park. Unless you’re really into military history, you can skip this.
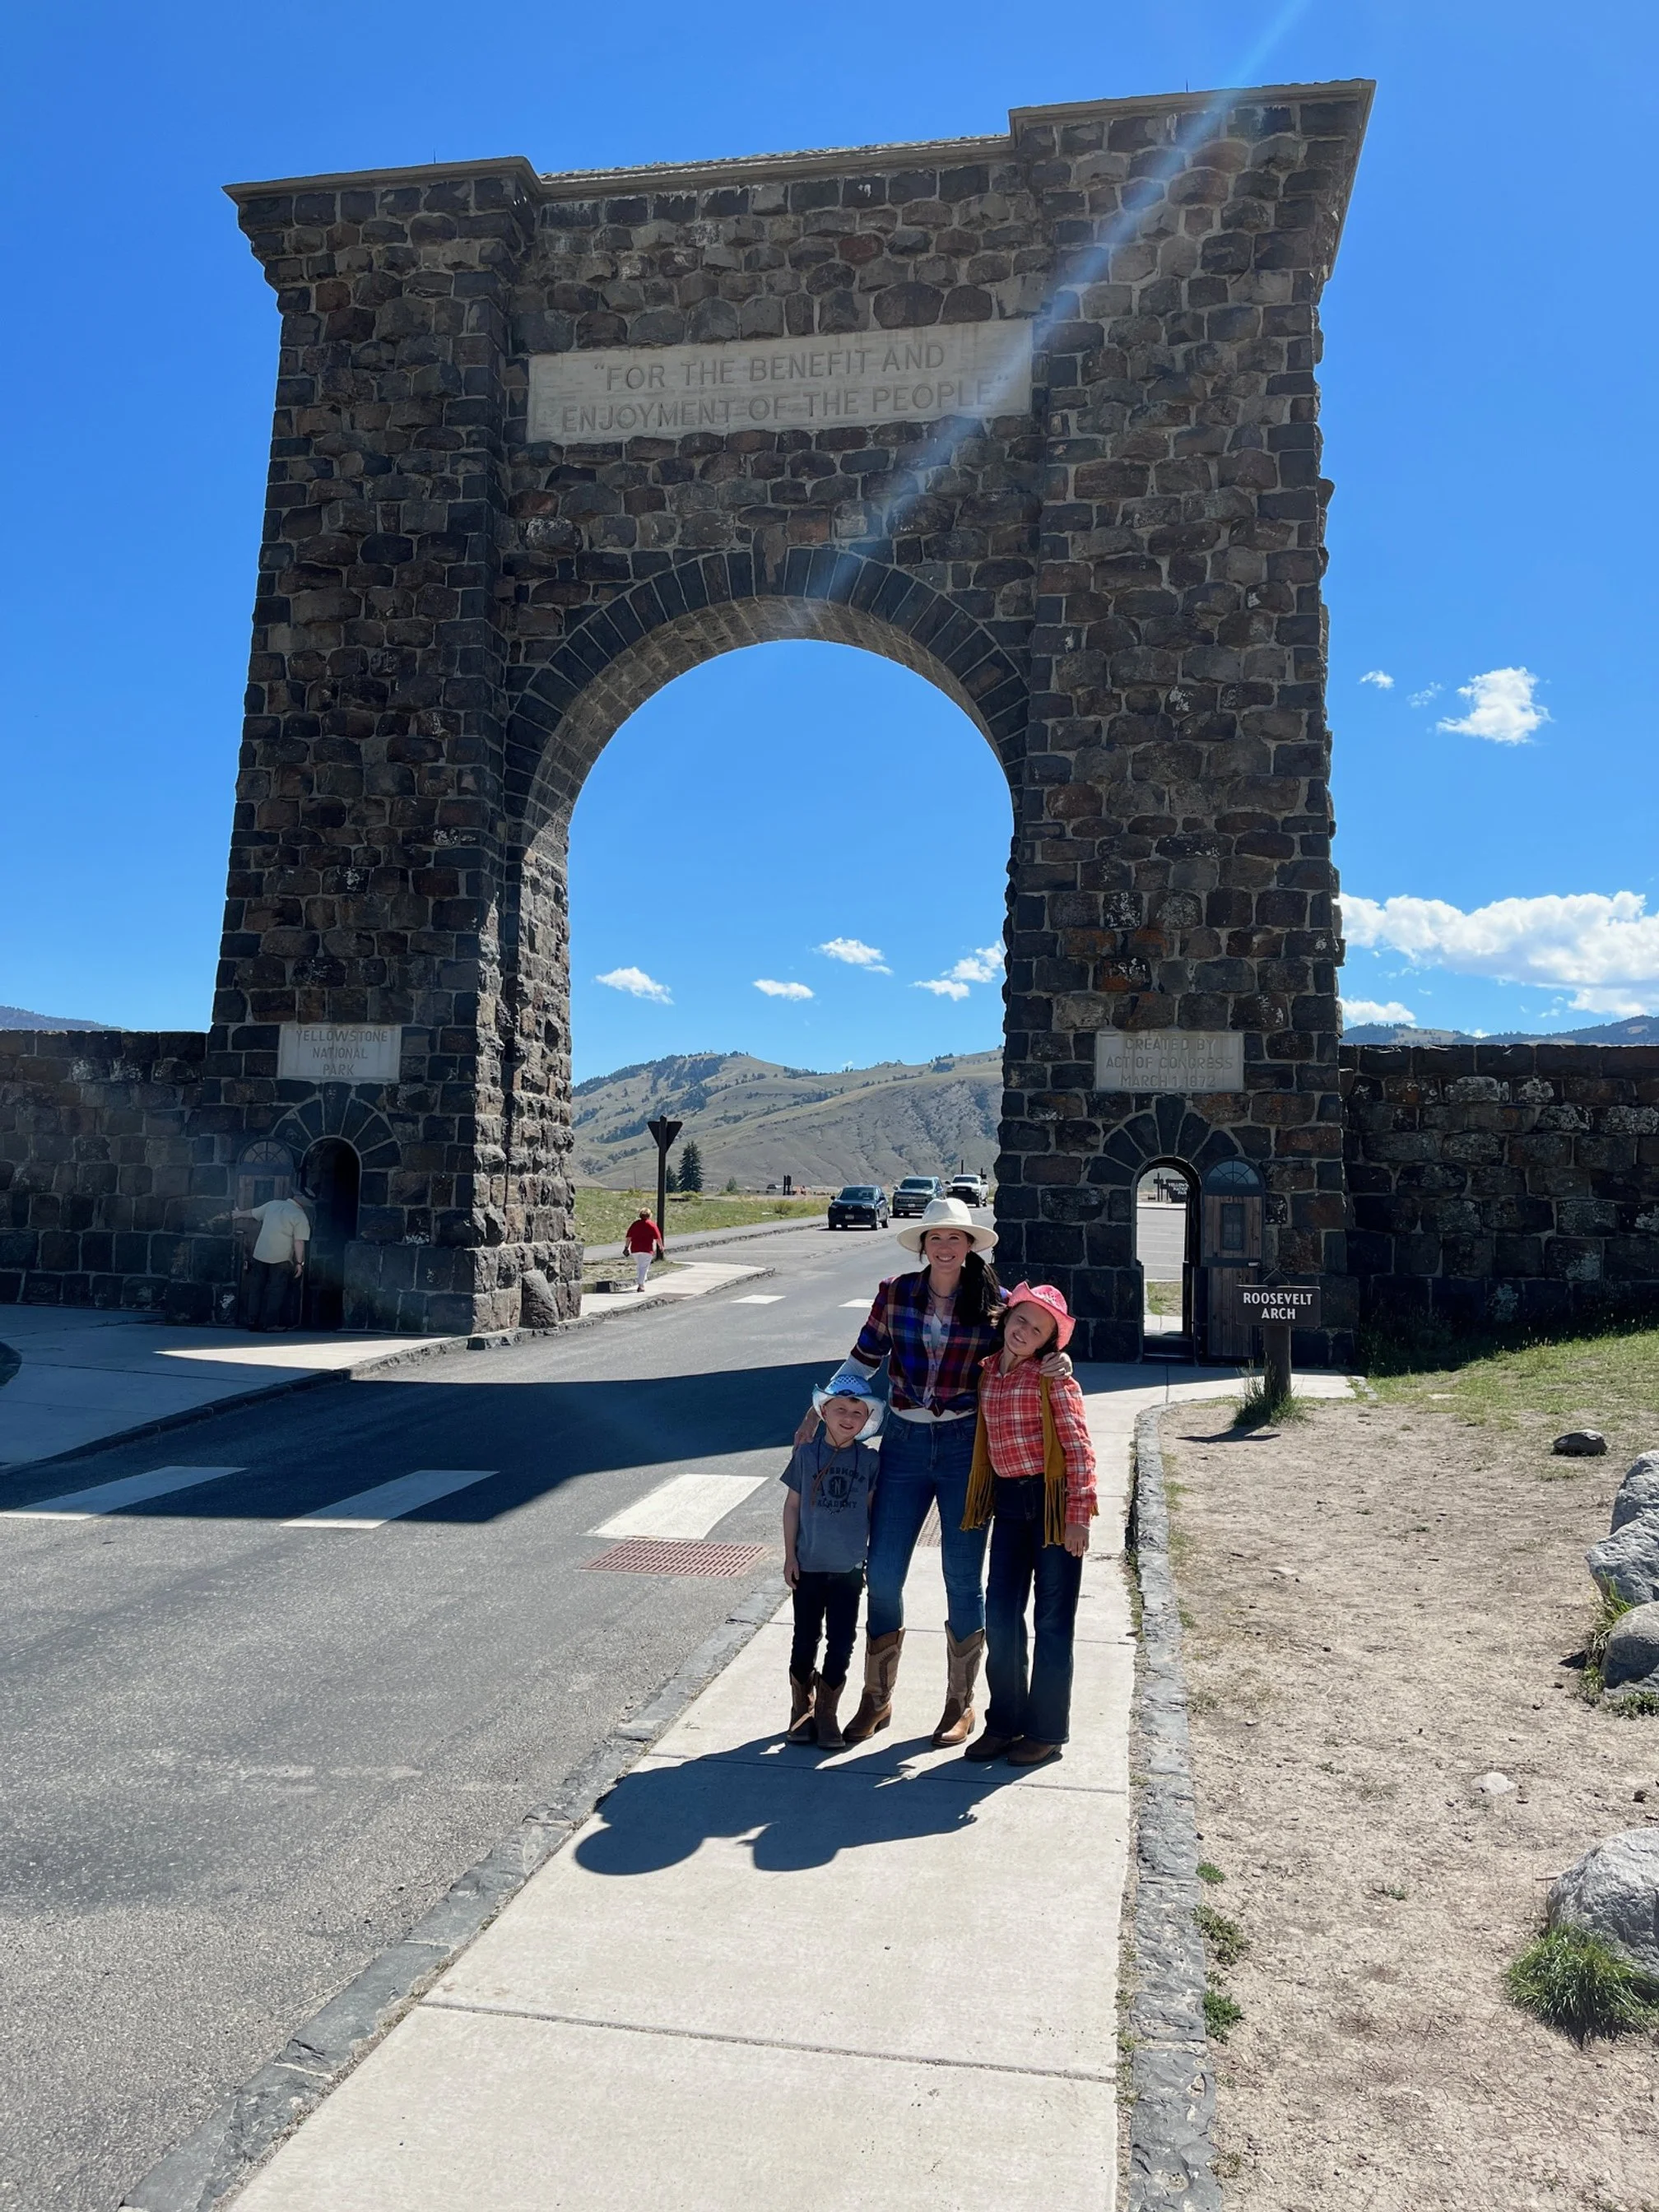
The Camping Kiddos and I at the iconic Roosevelt Arch
Roosevelt Gate
Let’s head out of the park into Gardiner. But first, we have to stop at Roosevelt Gate, the famous stone towers that guard the northwest entrance of the park.
It’s named after President Roosevelt, who laid the cornerstone at the gate, and who worked to expand the national parks system during his presidency.
Today, it’s an iconic spot—and you can get 2-for-1 photos here as the entrance sign to Yellowstone is right behind it.
Afternoon in Gardiner
Gardiner, Montana, is an adorable town on the other side of Roosevelt Tower. Linger here for a few hours, grabbing a bite to eat at one of the town’s many restaurants and shopping for souvenirs.
If you need to top up on any snacks or food items, there is the small Gardiner Market just across the Yellowstone River.
Overnight: Tower-Roosevelt
When you’re done looking around Gardiner, head back into the park and head east from Mammoth Hot Springs on Grand Loop Road.
Tonight (and for the next 2 nights), you’ll be staying at my favorite spot in Yellowstone National Park: the Roosevelt Cabins.
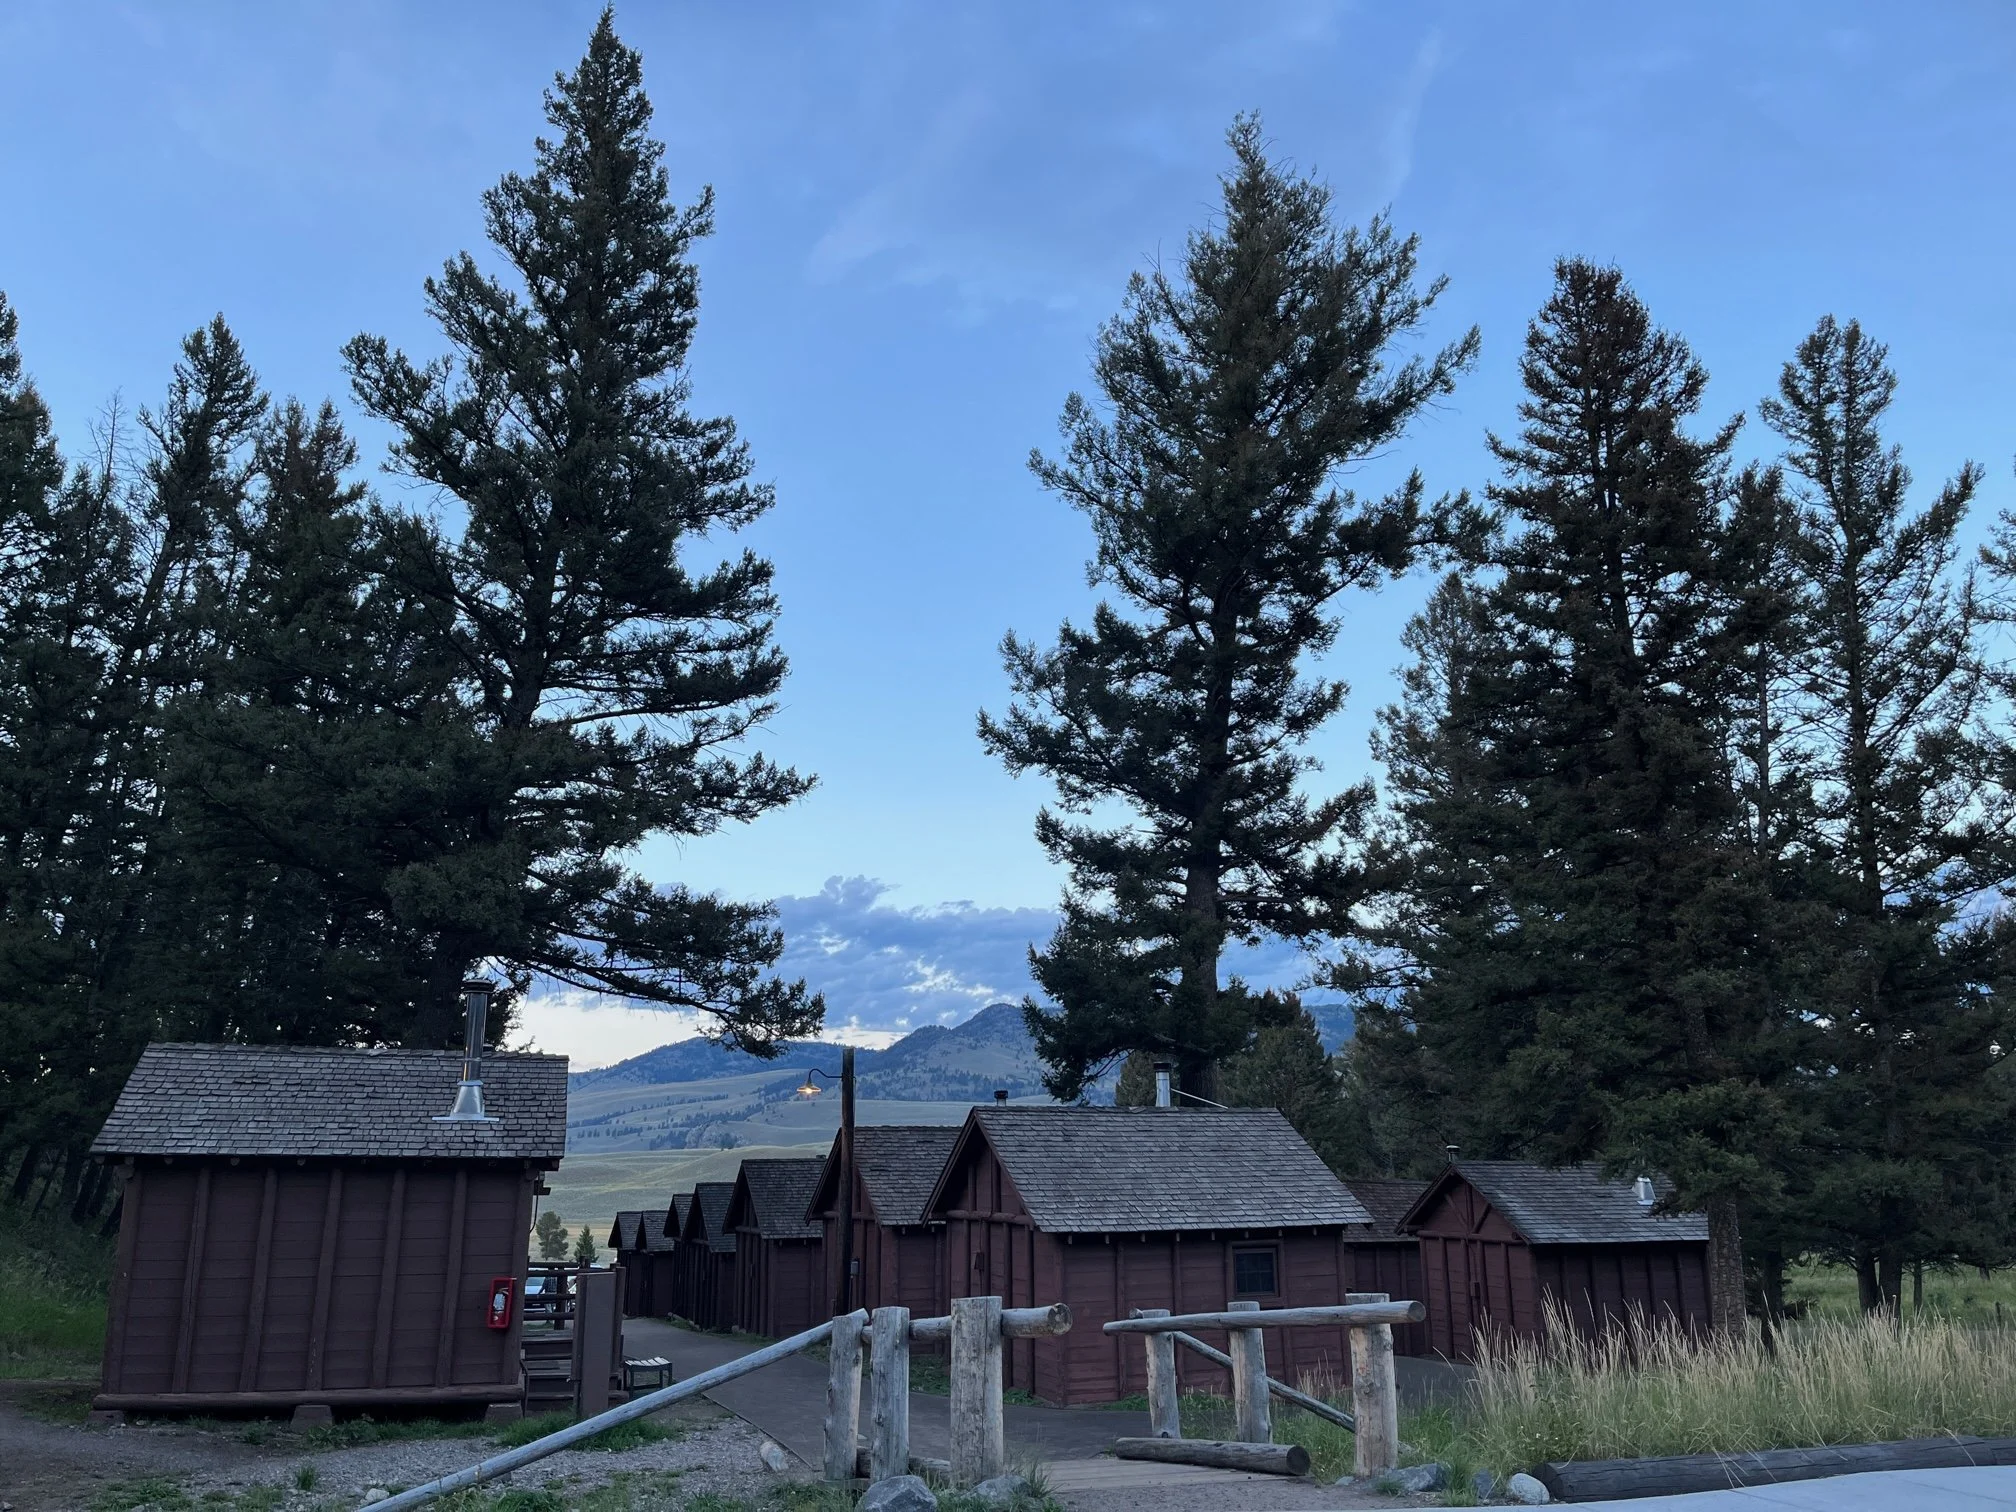
The adorable Roosevelt cabins at sunset
These historic cabins were once in various parts of the park, but were brought here as guest cottages when the Lodge was being expanded.
These cabins are rustic and use wood stoves for heat, but they are adorable and memorable—perfect for a family vacation!
For more on the cabin layouts, amenities, and nearby lodge, check out my full review on the Roosevelt cabins.
Day 7: Tower-Roosevelt
Enjoy a lazy morning around your cabin as you nibble on your complementary continental breakfast bag. (Ours had yogurt, fruit, tea, and coffee.)
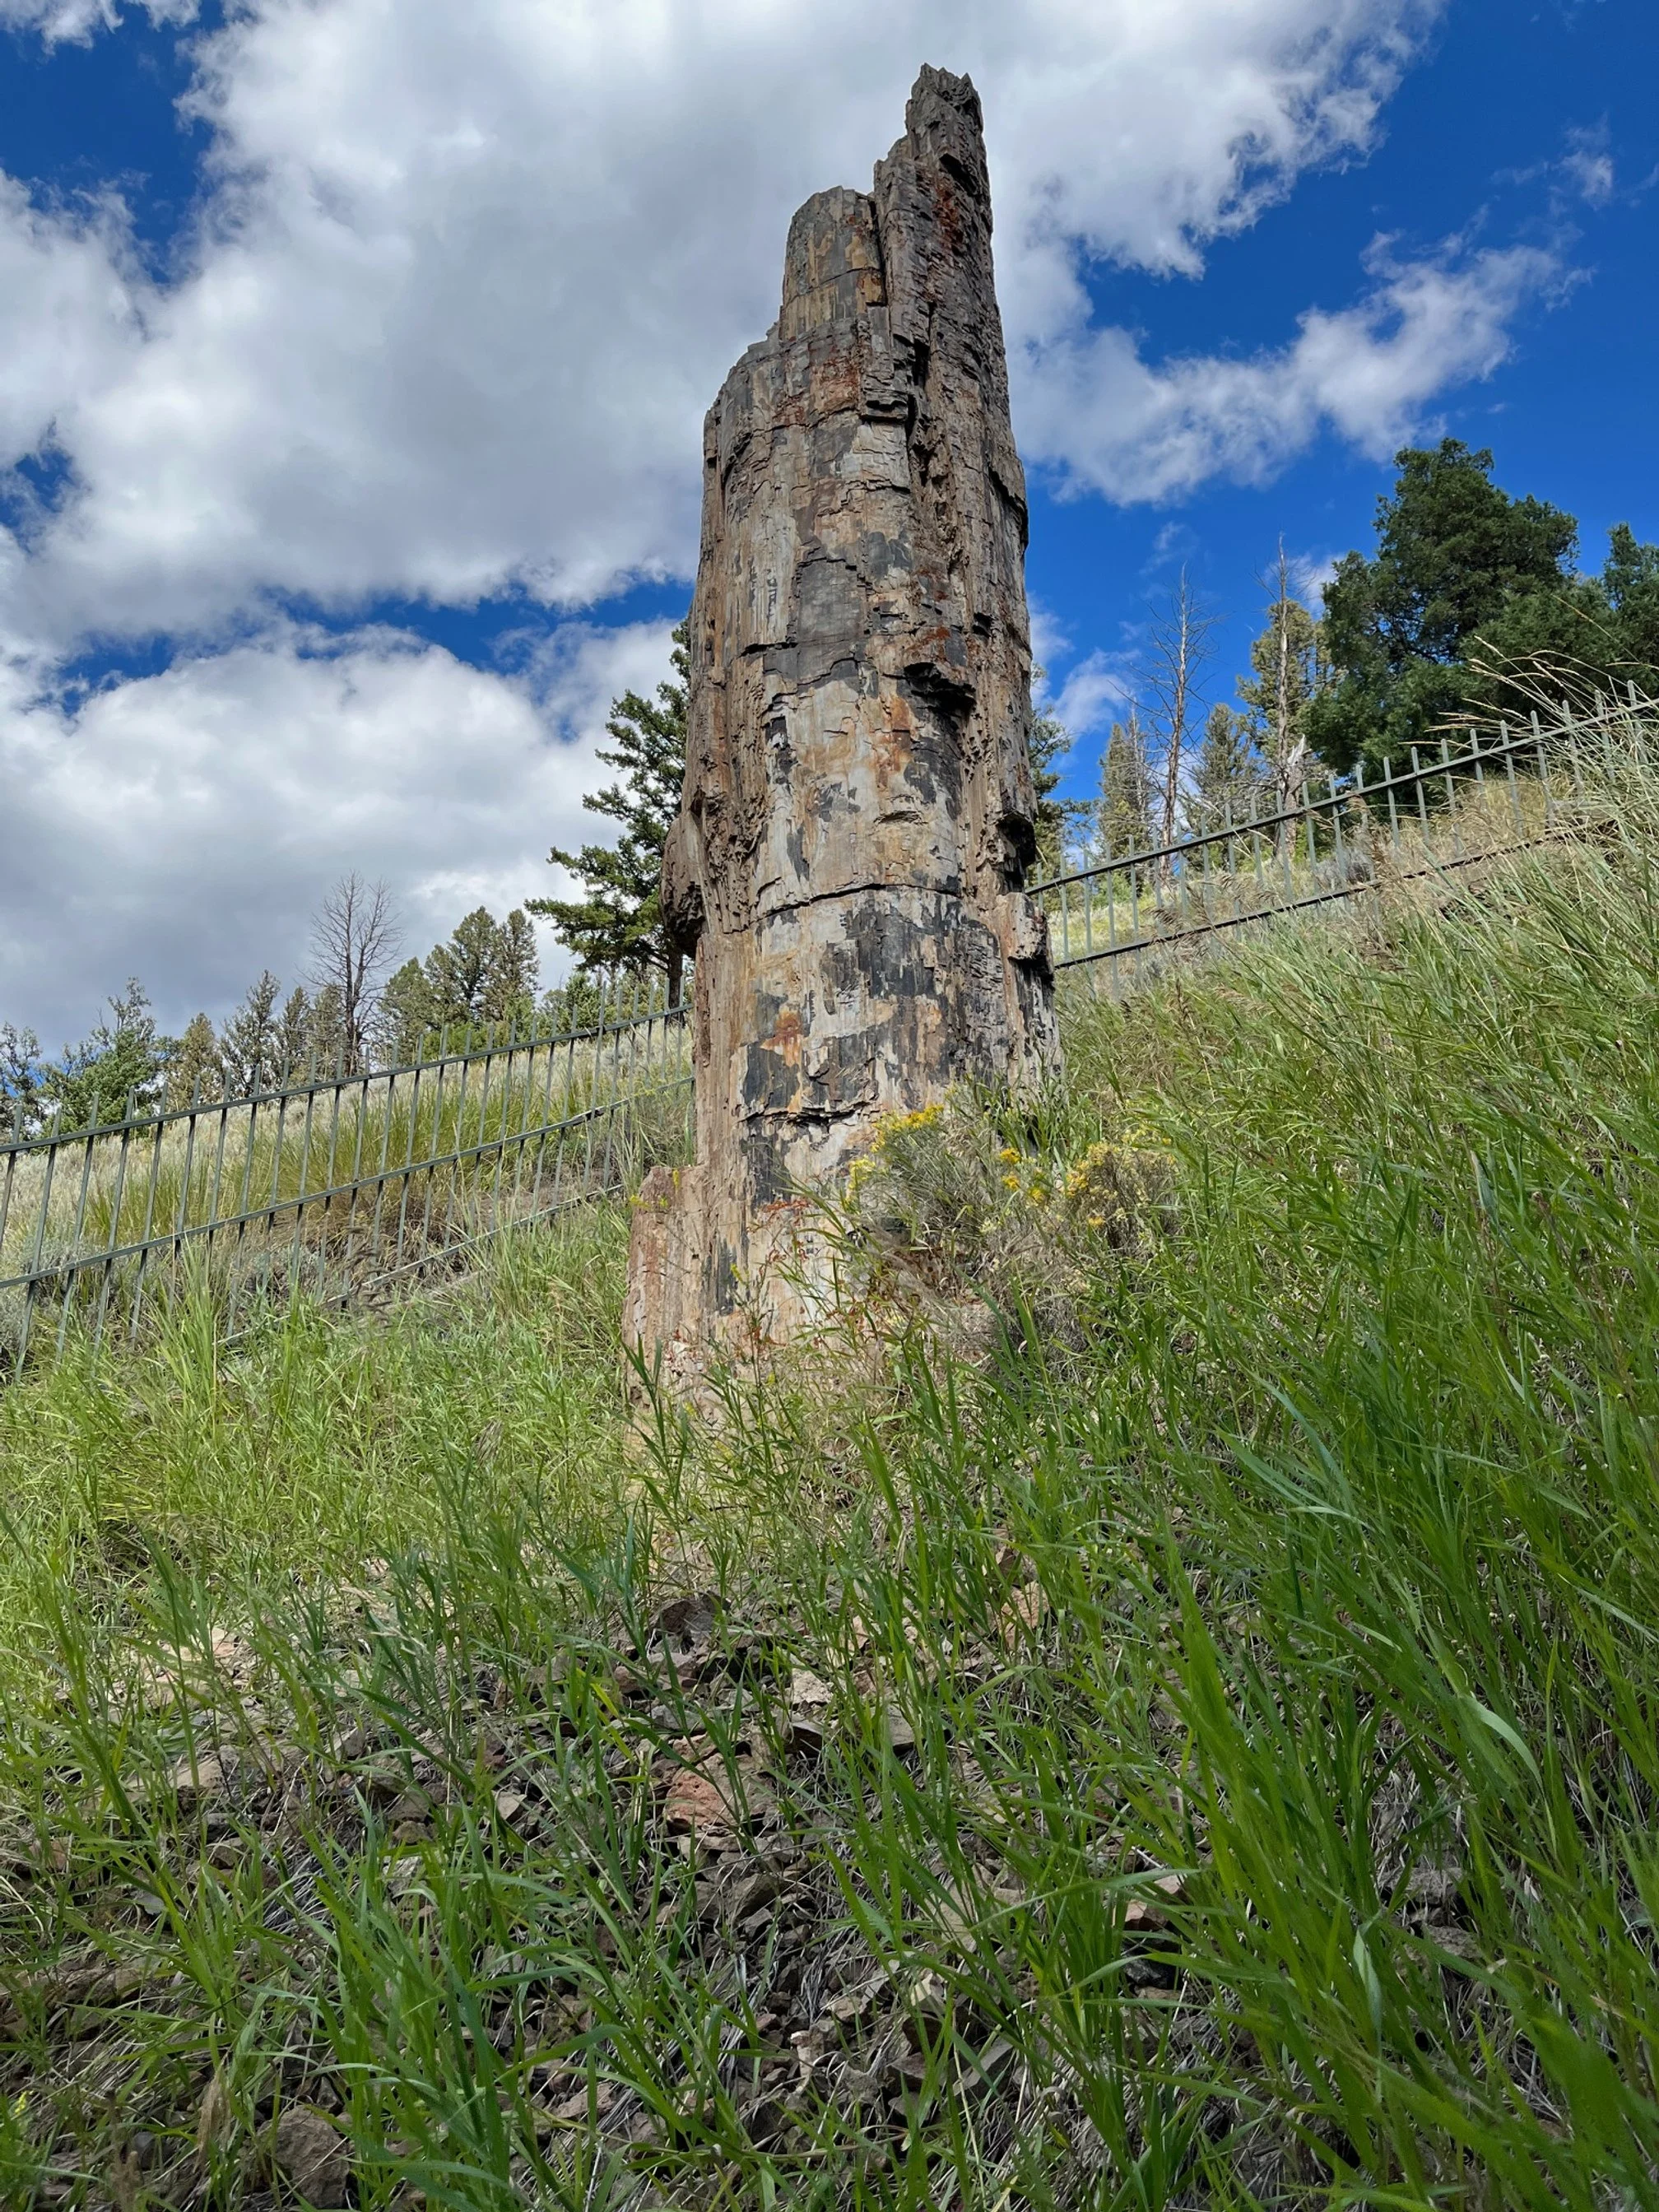
Petrified Tree
After a week of intensive sightseeing and hiking, it’s important to take a moment to recharge, and there’s no better, or more tranquil, place to do it than overlooking the rolling hills at Tower-Roosevelt.
Explore the lodge and browse in the small mercantile near the cabins before heading out on a few short adventures nearby.
The Petrified Tree is at odds with all of the greenery around it, and is worth crawling down the small gravel road to see it.
If you’ve been to Petrified Forest National Park, you’ll have a specific idea as to what a petrified tree looks like: colorful, shiny, and laying on the ground, probably.
However, this petrified tree is weathered and gnarled—and still standing upright!
Parking is limited here, but you’ll be able to find a spot as it isn’t a highly trafficked area.
Tower Falls
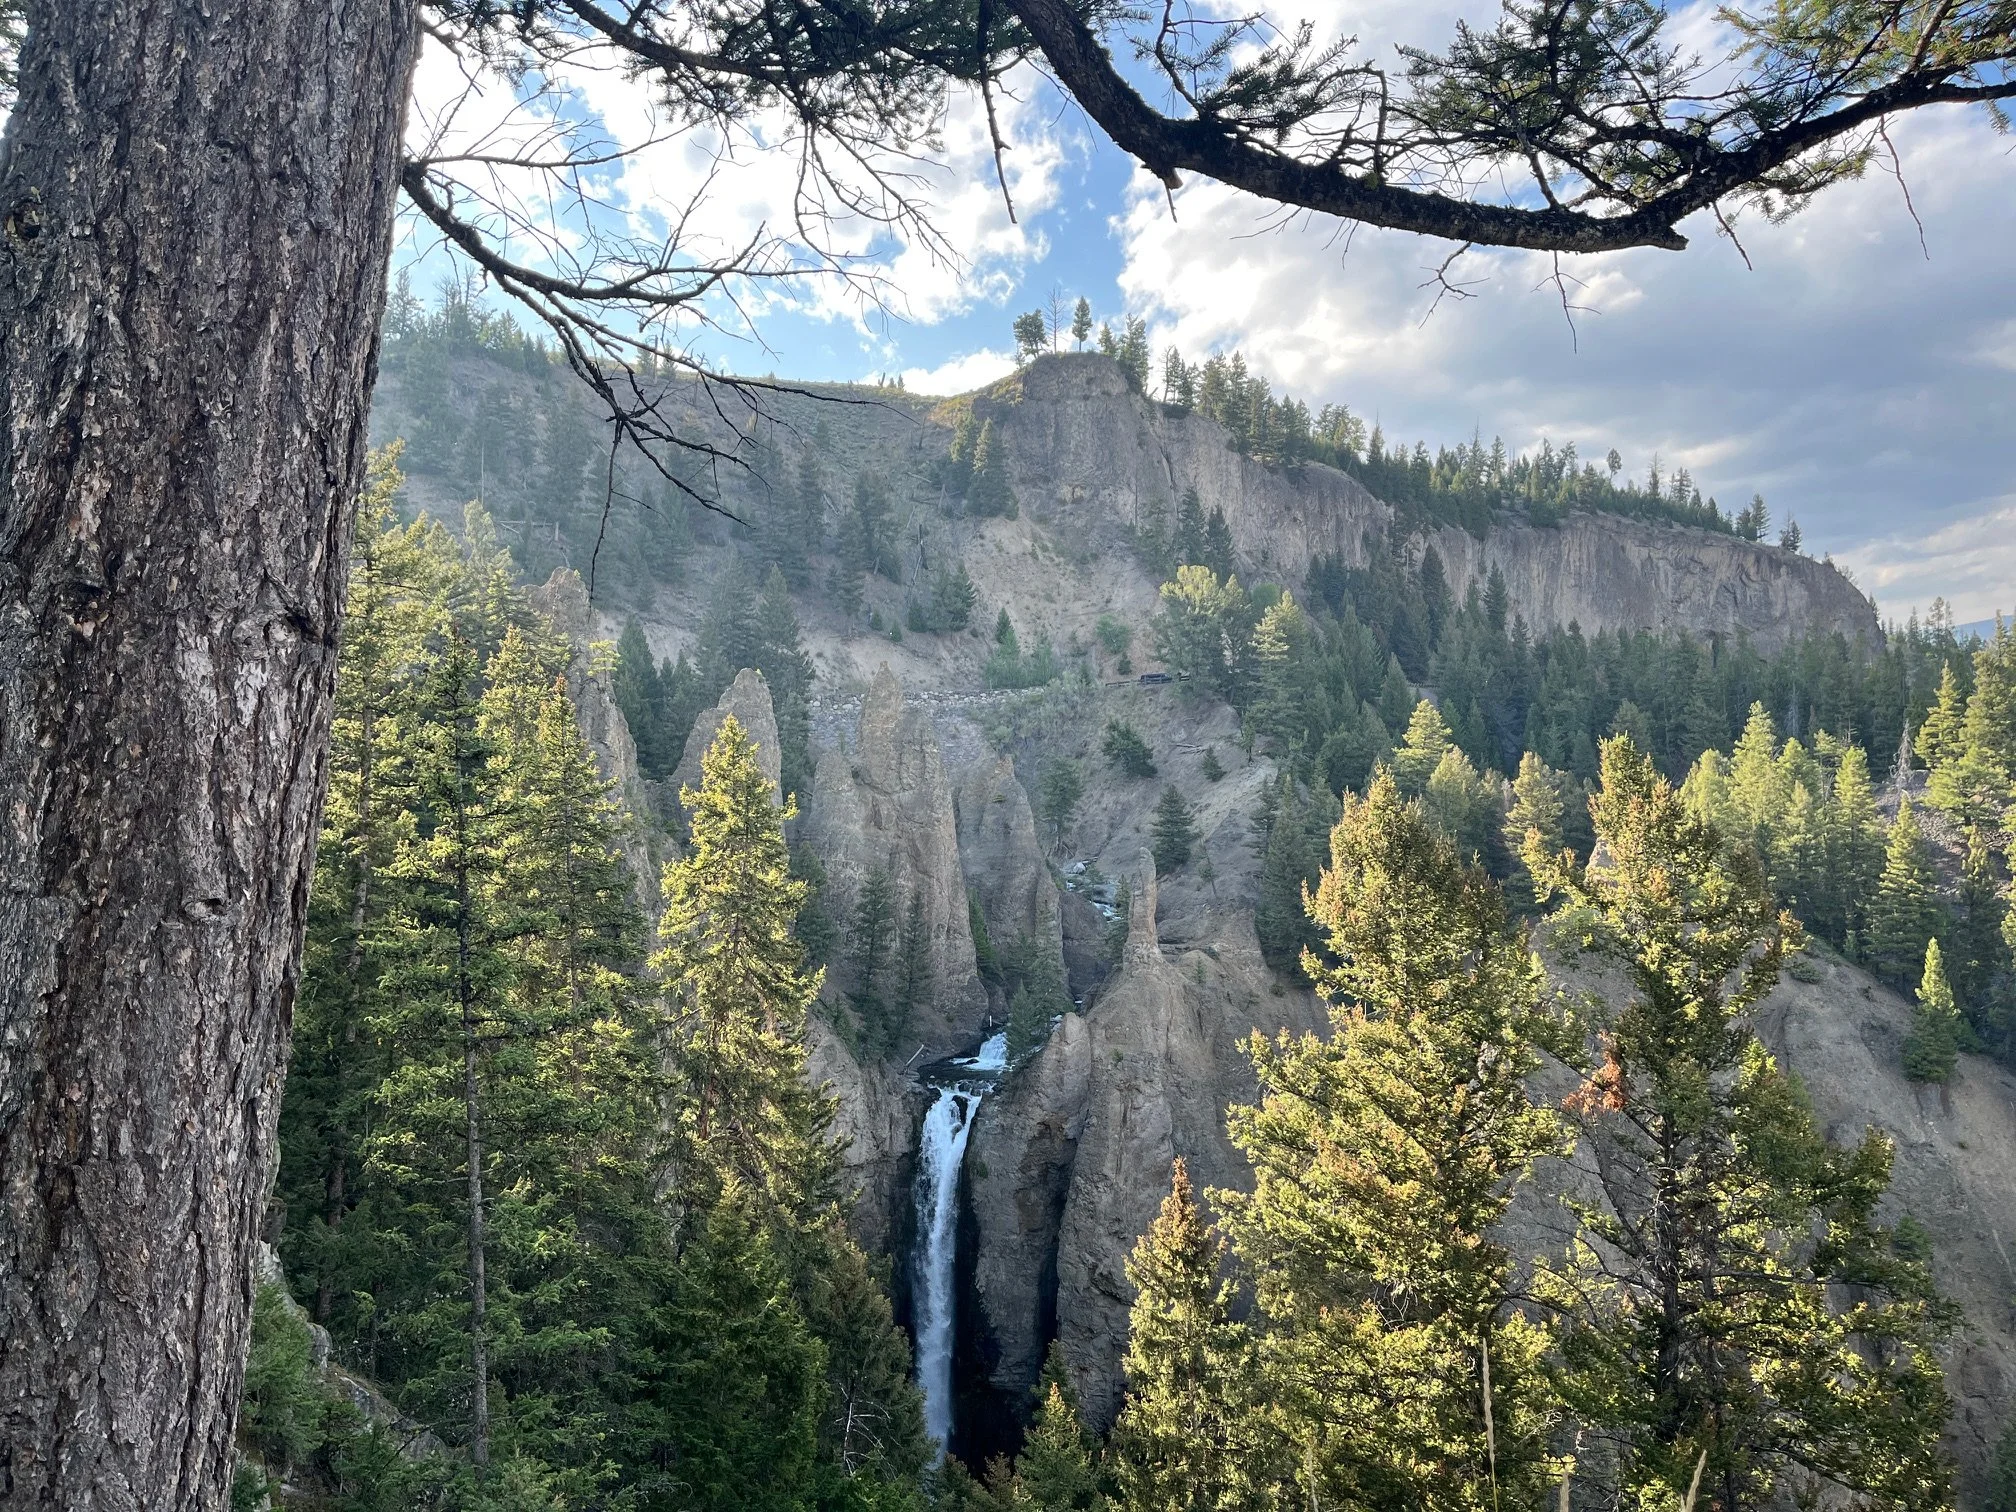
The beautiful Tower Falls from the overlook
Next, head back past Tower-Roosevelt to the majestic Tower Falls.
If you’re feeling tired, you can easily walk to the overlook just beyond the gift shop.
If you’d rather take on a more strenuous hike, there are 2 options.
You can do the short but steep hike to the bottom of the falls for a better (and usually less crowded view).
You’ll also find a path to the right of the overlook that leads down to the Yellowstone River. You won’t be able to see the falls from the end, though.
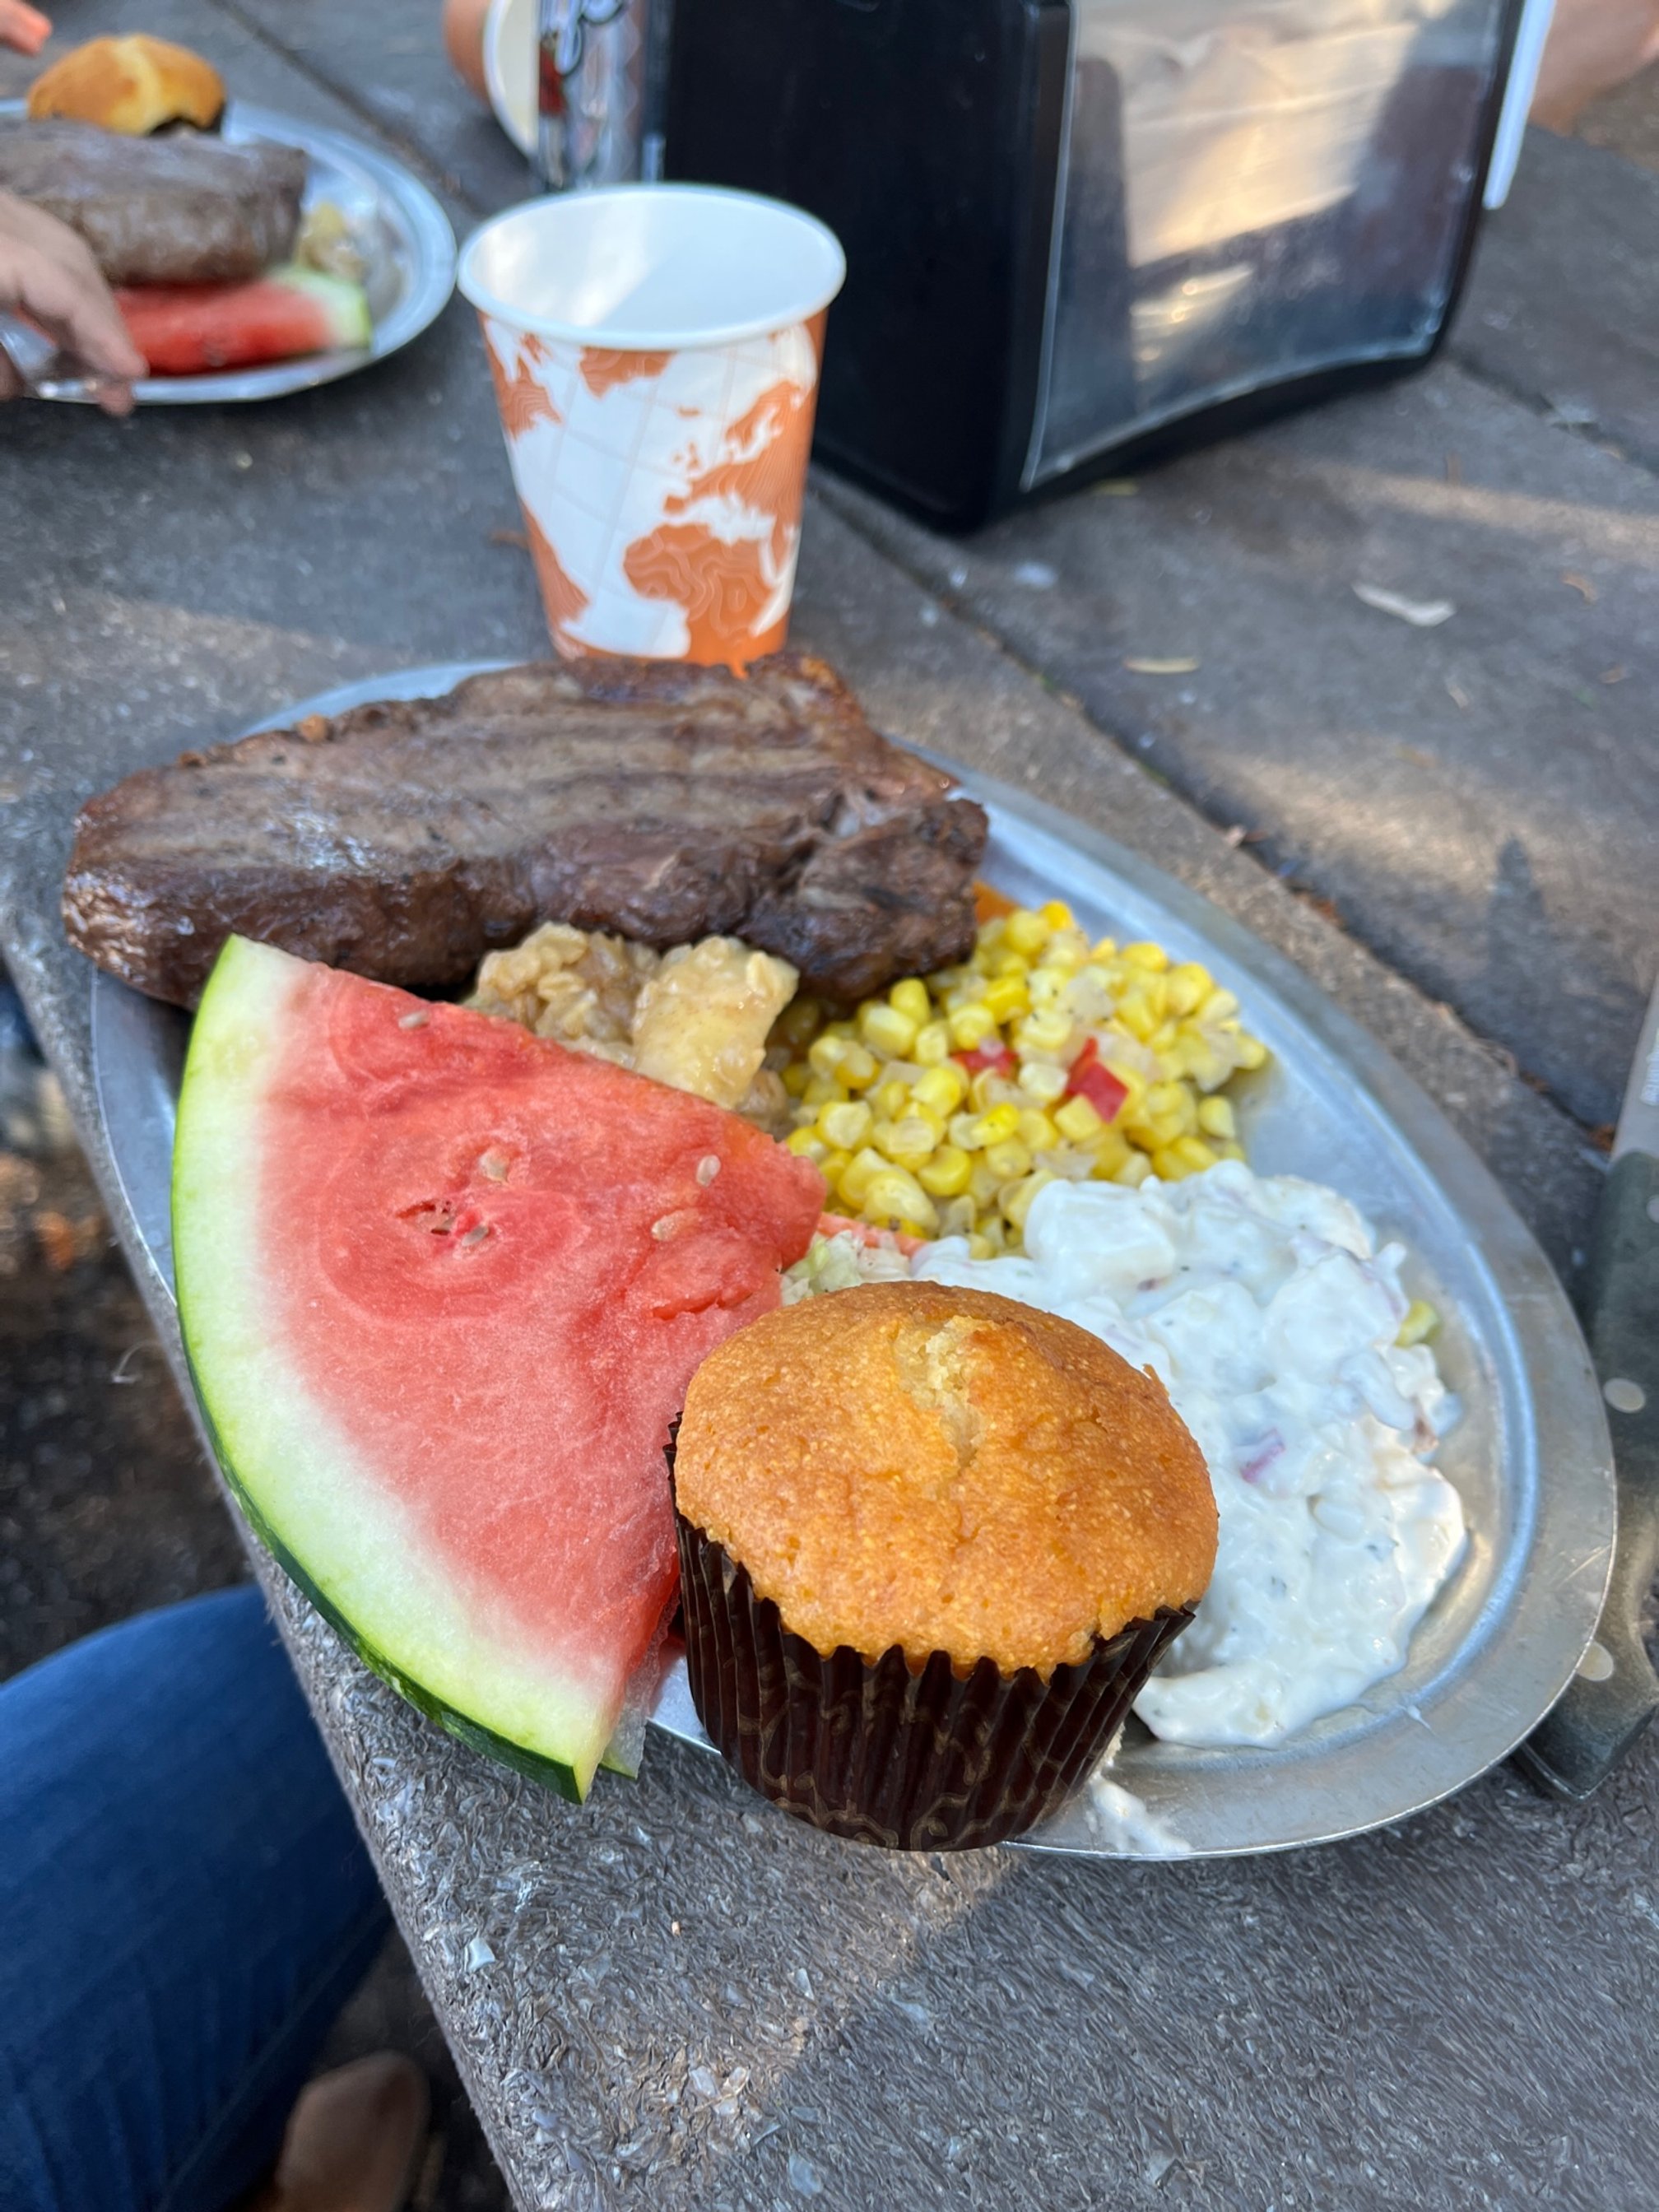
Old West Cookout
If there’s one paid activity that I would recommend on this entire itinerary, it would be the Old West Cookout and Trail Ride.
This incredible experience takes visitors to an outdoor kitchen and dining area either by horseback or in a historic stagecoach.
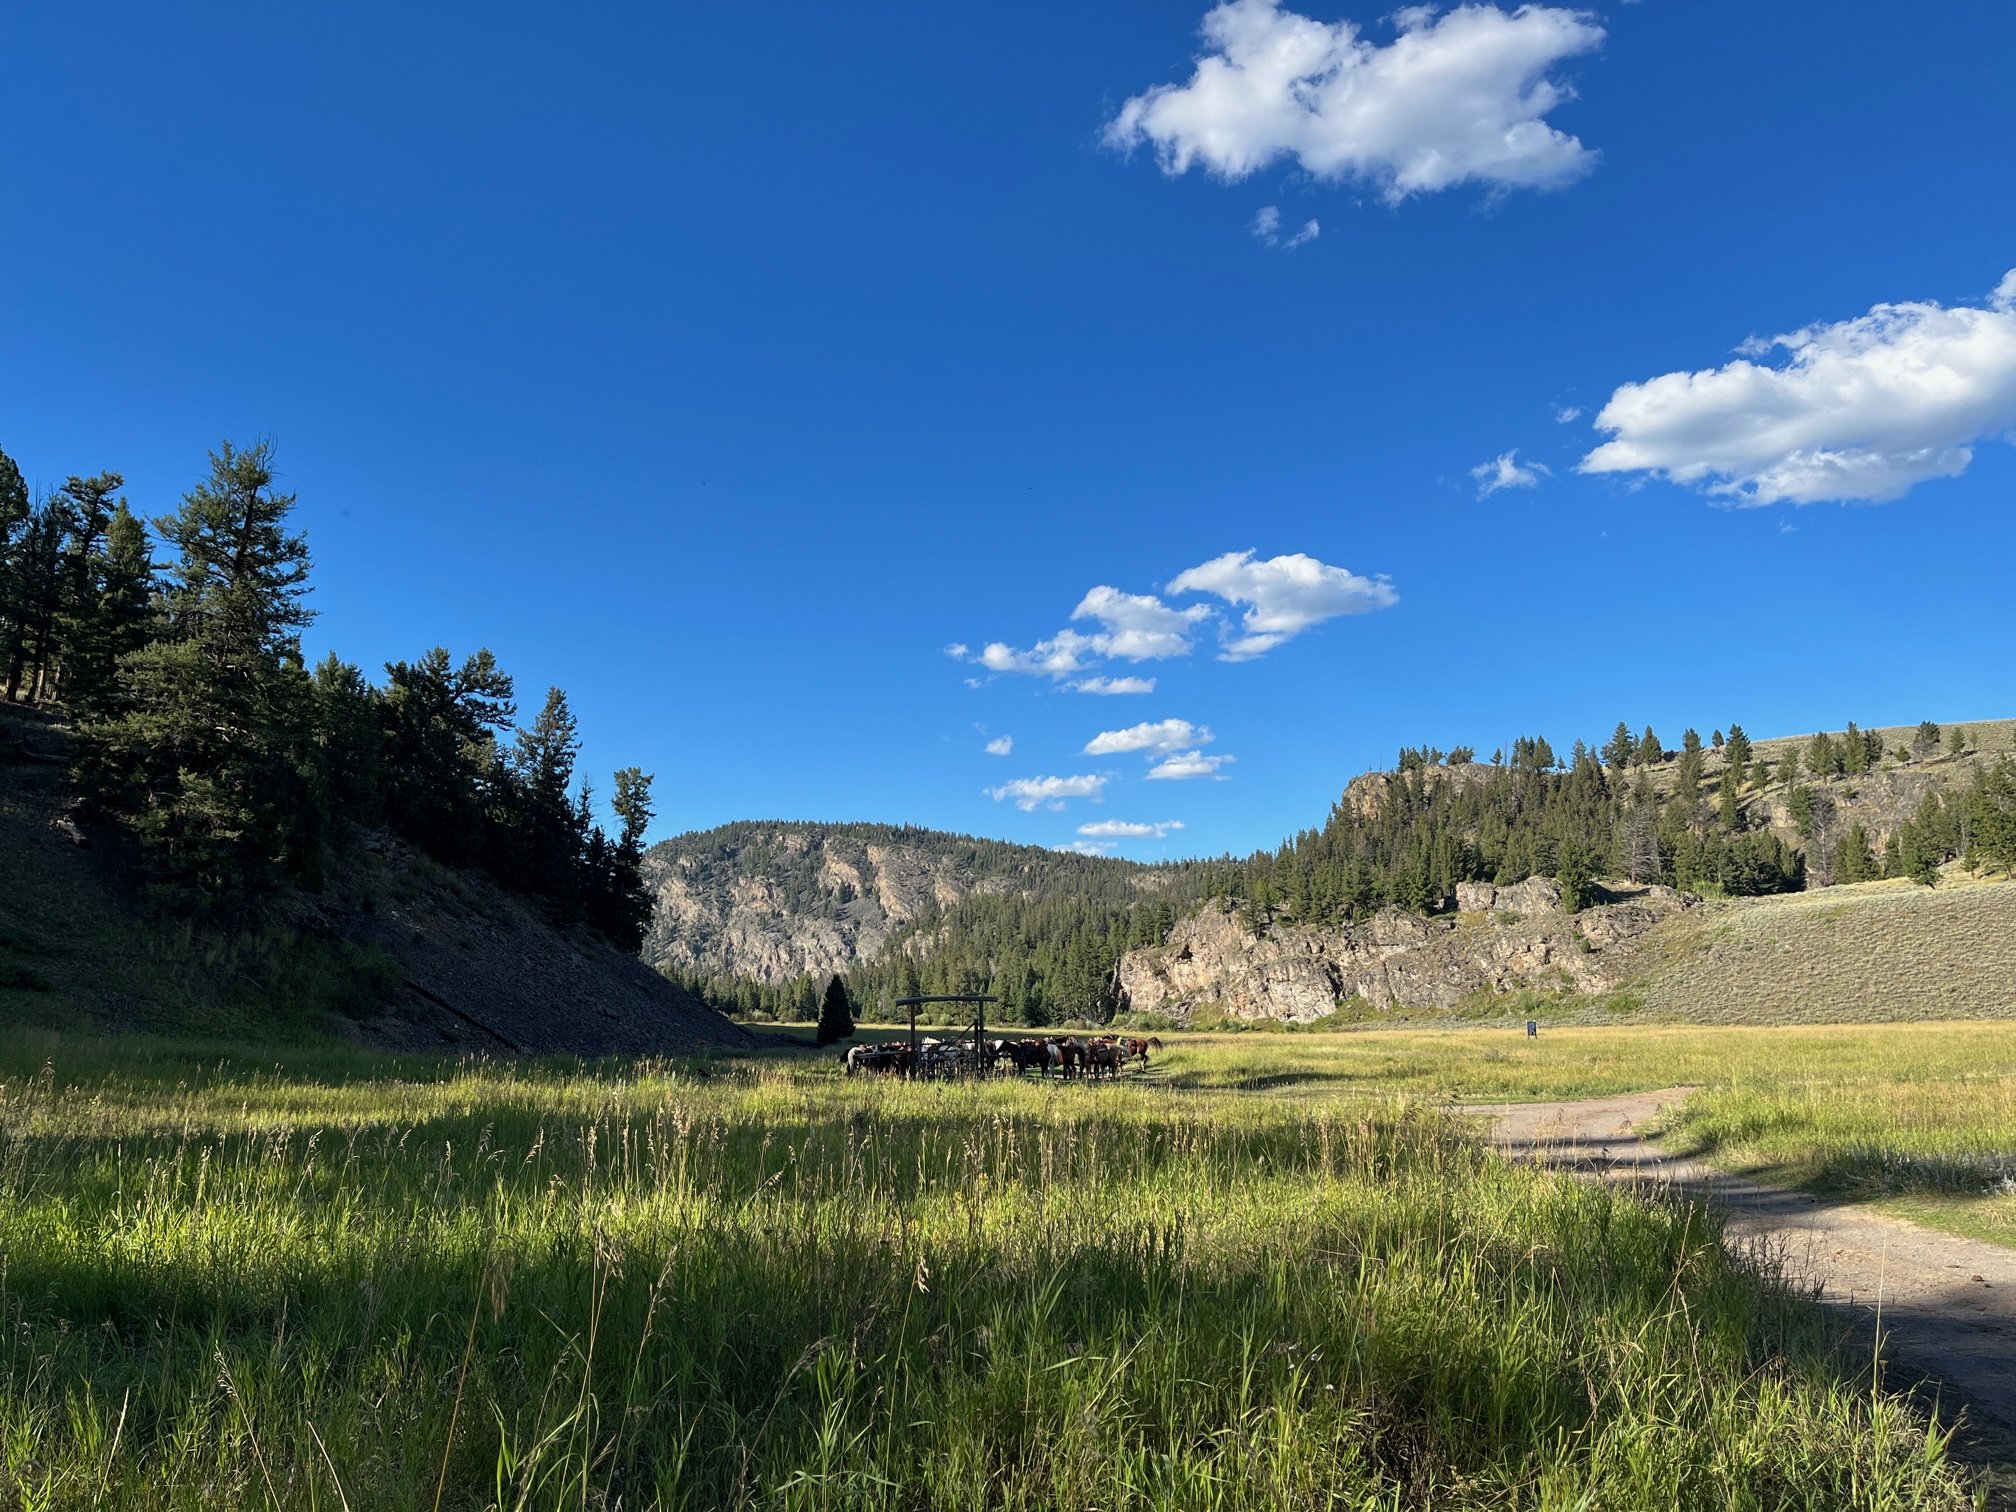
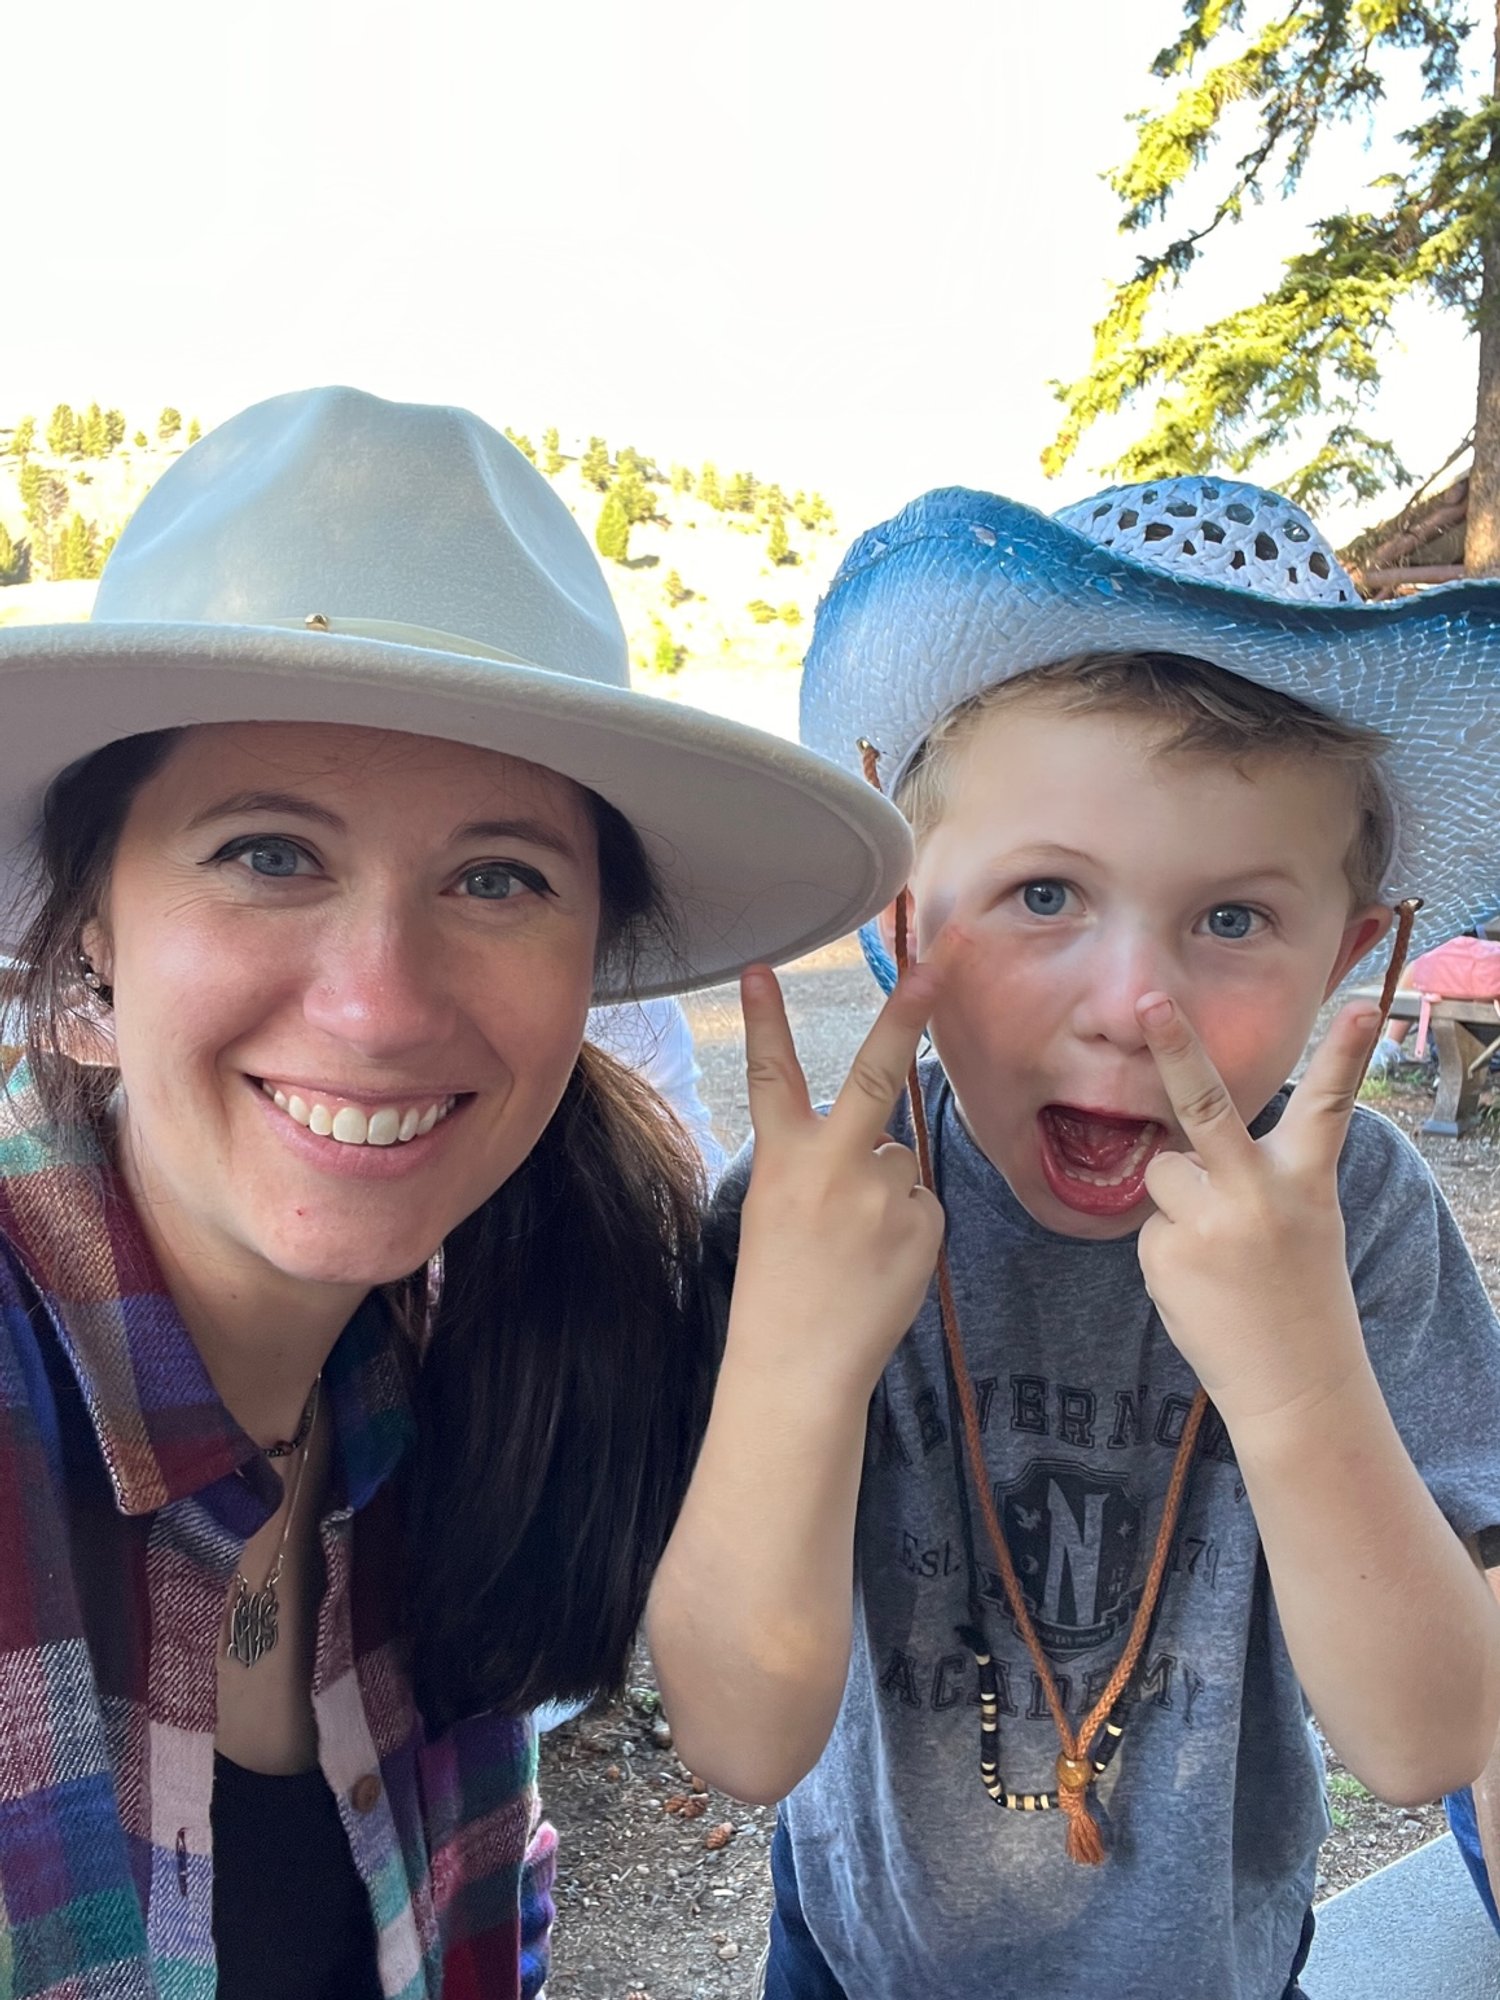
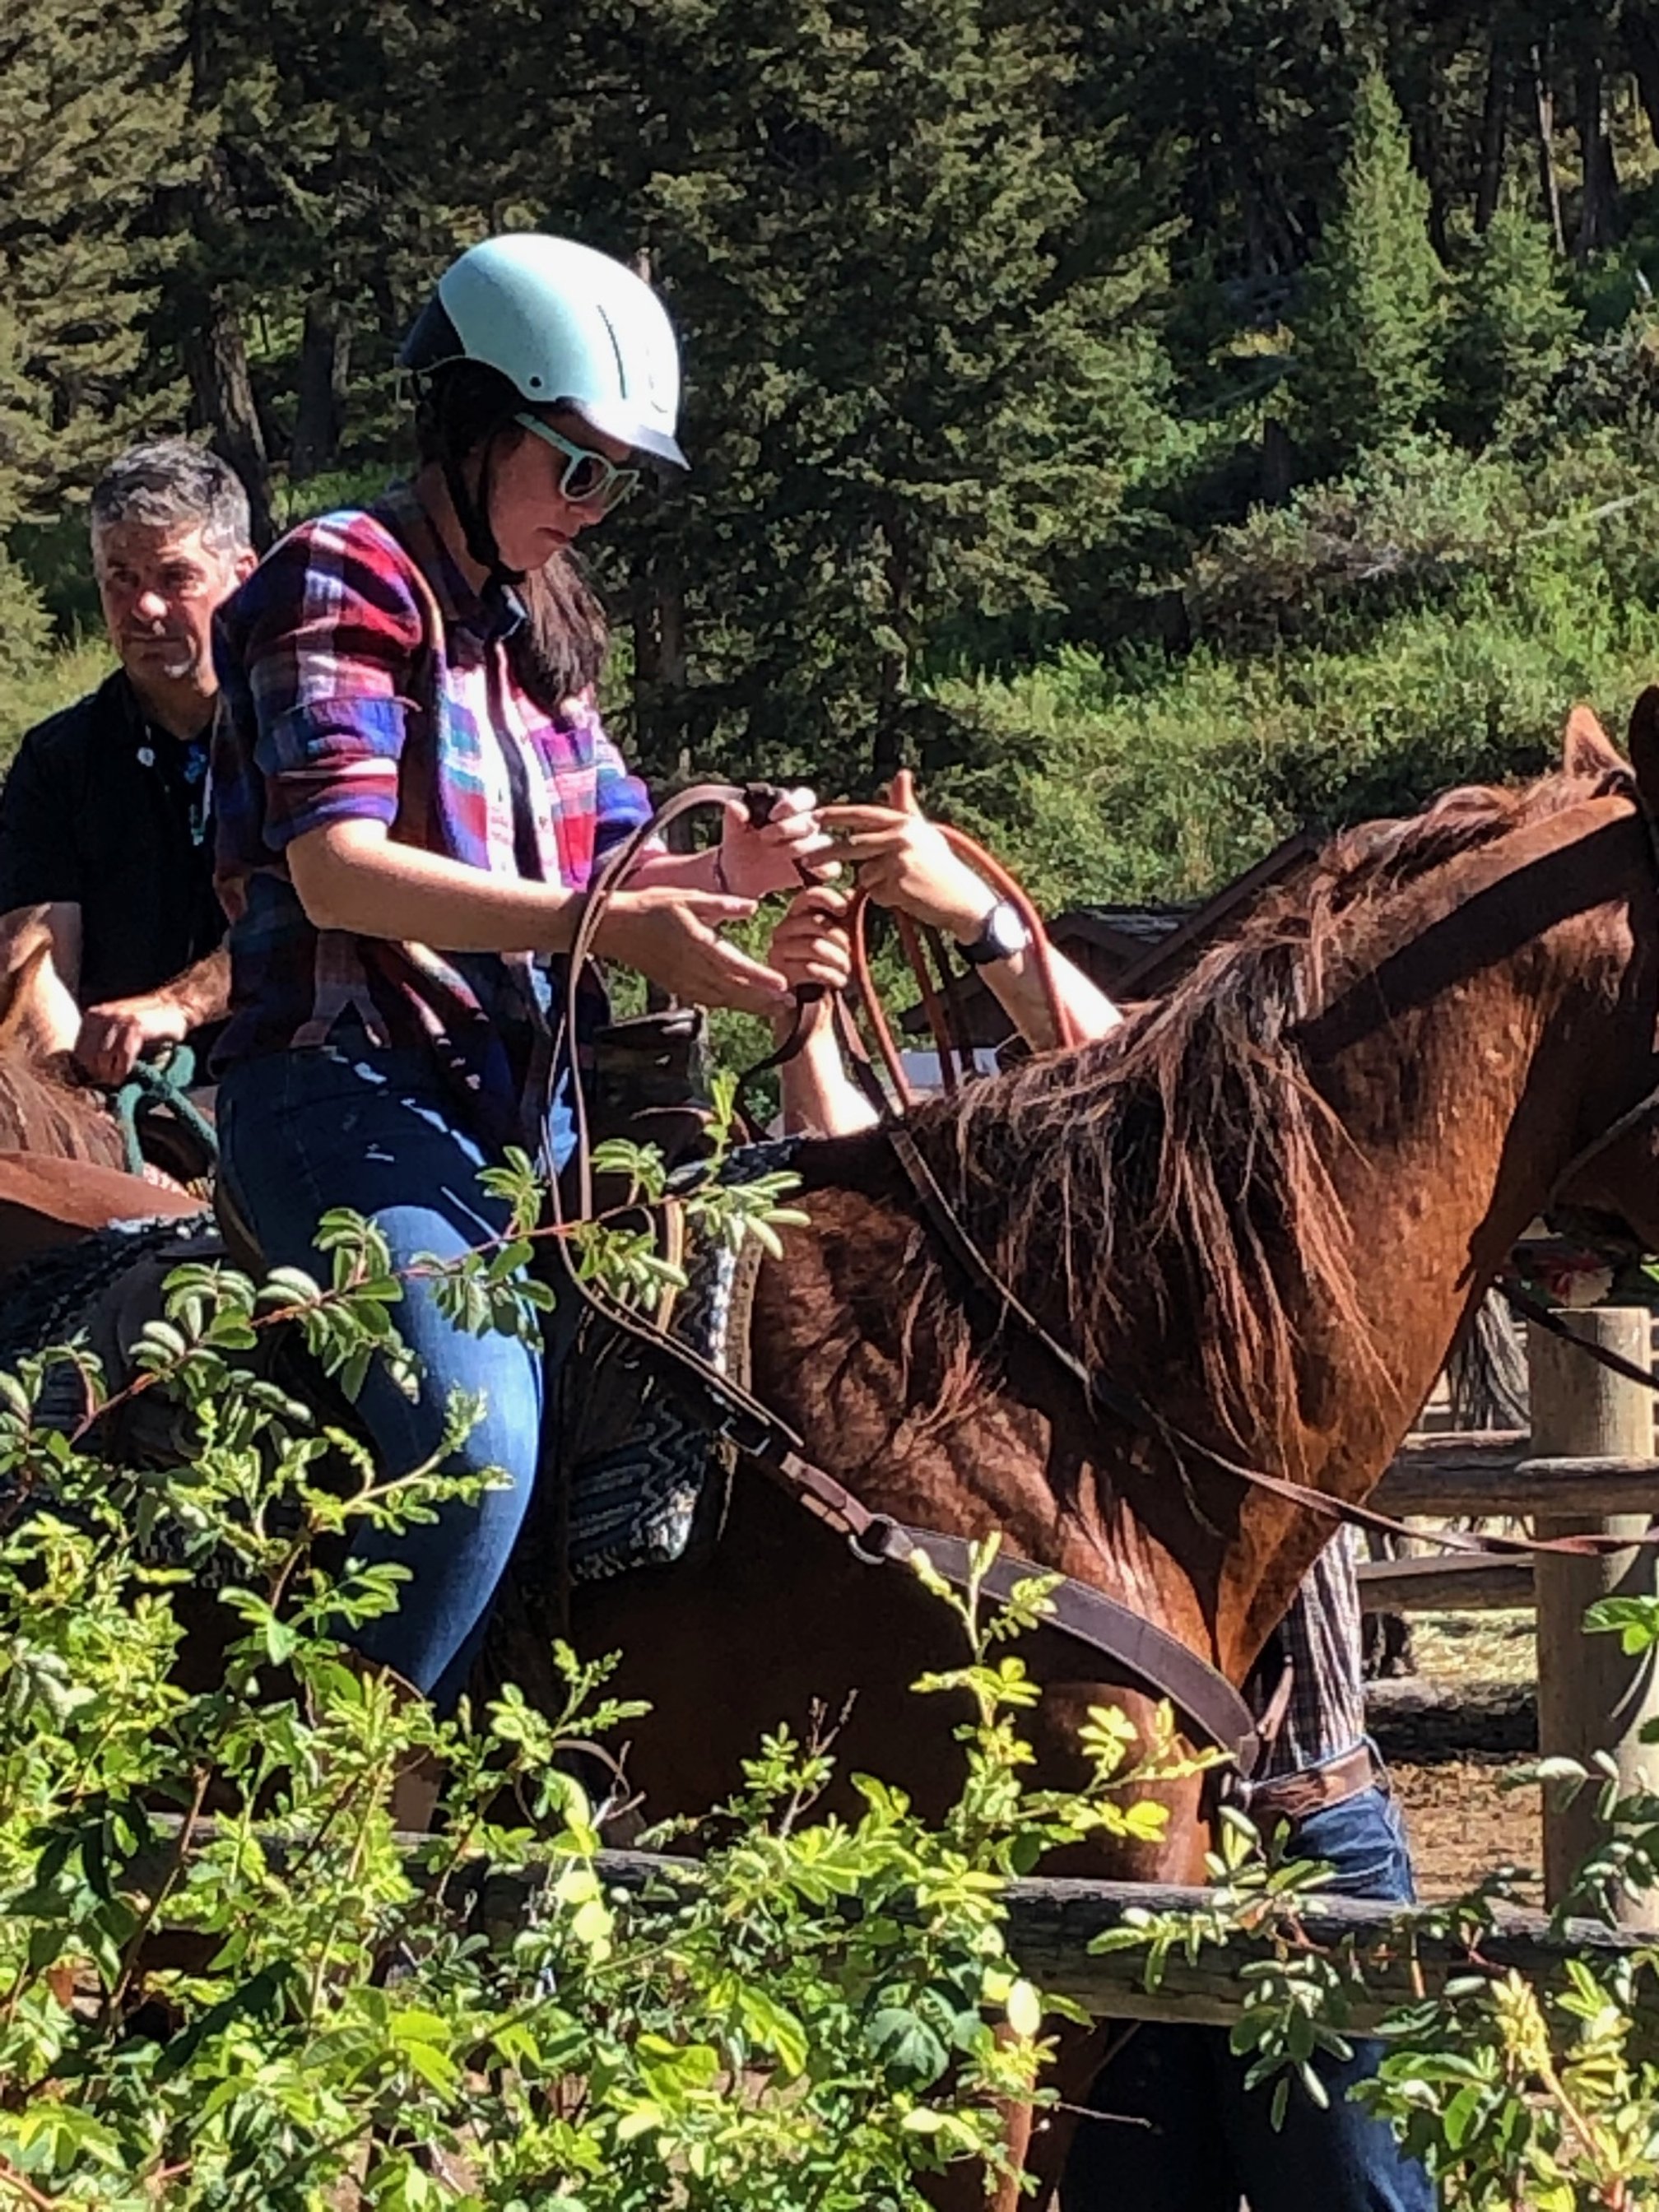
My dad, daughter, and I rode out, while my mom and son took the stagecoach.
Once in the secluded meadow, you’ll feast on grilled steaks, potato salad, cornbread, fresh fruit, and fruit cobbler while you listen to a fiddler playing old time favorites.
Read my full review on the Old West Cookout and Trail Ride here.
When you get back to the corral, you can walk back to your cabin via a short pathway between the corral and lodge.
Overnight: Tower-Roosevelt
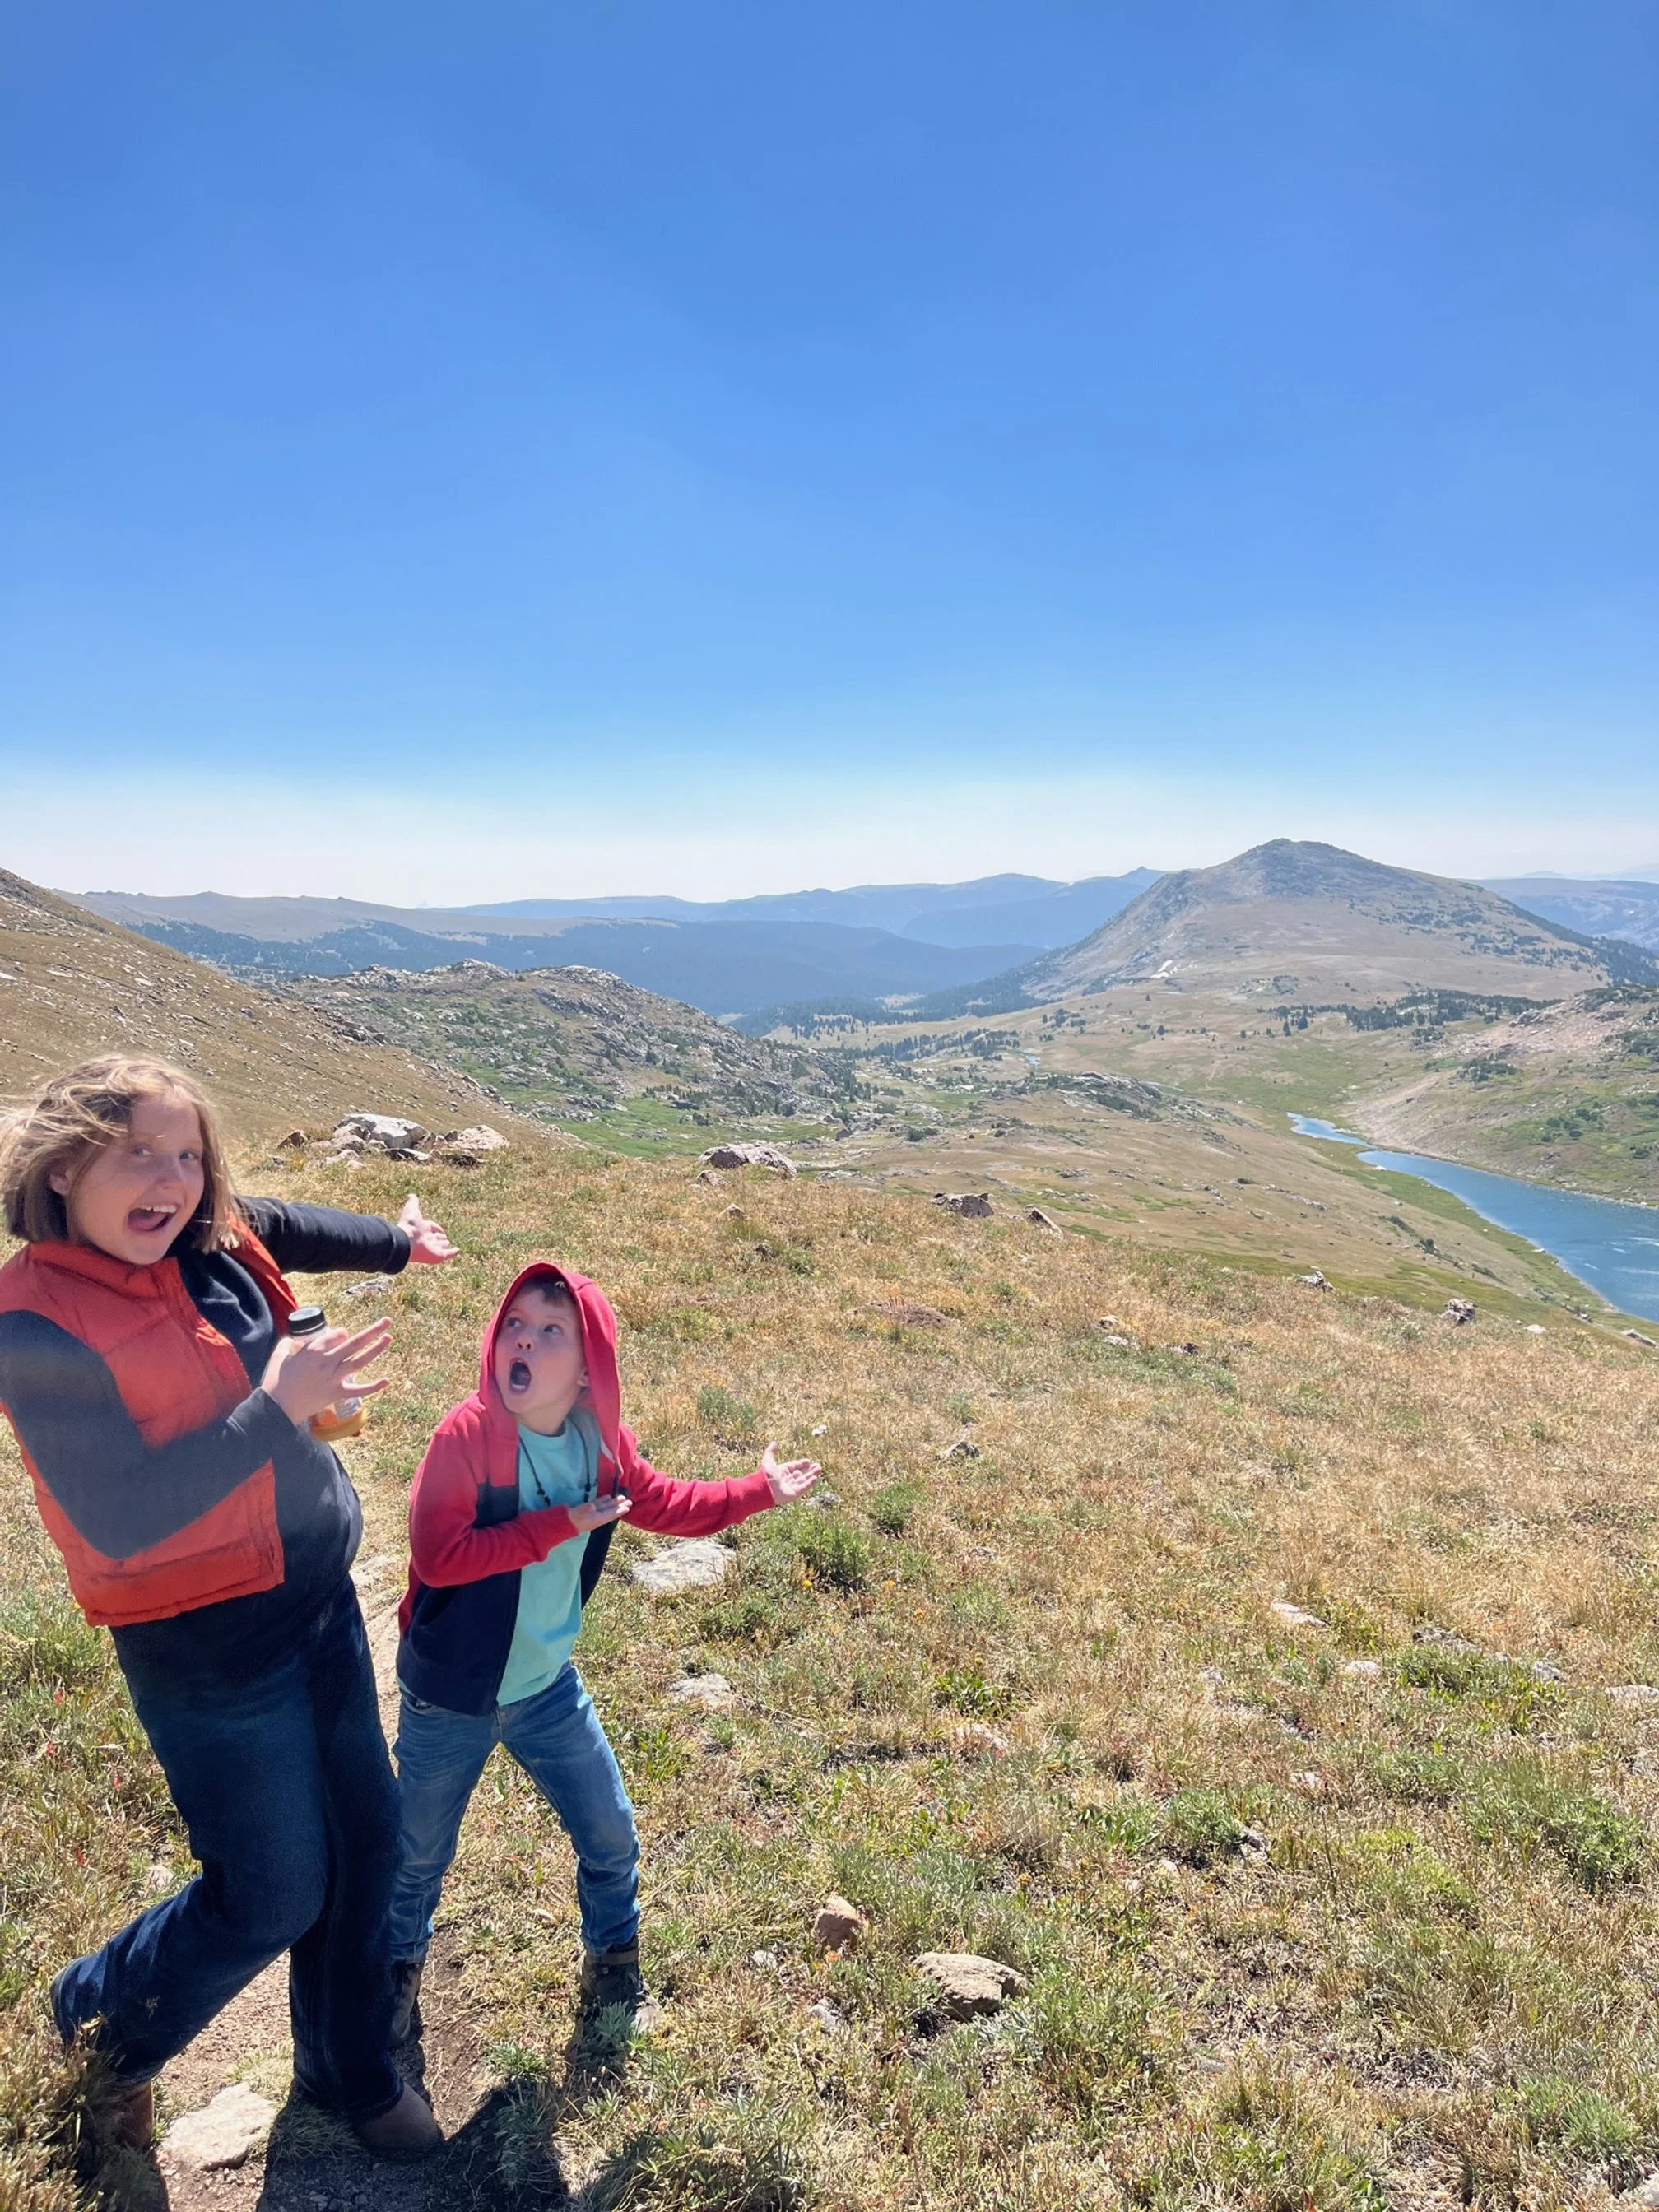
Day 8: Lamar Valley and Beartooth Highway
Given today’s packed schedule, you’ll want today to be another early morning.
Plus, you’re more likely to see the wildlife moving around on our first stop if you get there early.
After grabbing your complimentary breakfast from the lodge, pile in the car to head towards Lamar Valley.
While not guaranteed, you’re likely to see dozens of bison moving around on both sides of the road as the herds look for food.
Go slowly and constantly scan the rolling hills to see what’s up and moving.
Work your way through Lamar Valley—this can sometimes take much longer than expected due to the animal-induced traffic jams. Those bison move at their own pace!
Cooke City, Montana

Front door of the Cooke City General Store
Once you pass out of the park’s northeastern entrance, you’ll quickly come to 2 small towns: Silver Gate and Cooke City.
Of the two, Cooke City has more to see, and I’d recommend stopping at the tiny, historic Cooke City Mercantile.
This shop has been continuously in operation for well over 120 years, and it’s a great place to pick up old-fashioned candy, chips, t-shirts, stickers, and so much more.
The owner is a local resident and a real estate broker who works at the mercantile during the warmer months.
If you’re hungry, I’d suggest grabbing lunch at the Beartooth Cafe on Main Street.
They have delicious sandwiches, wraps, and gyros.
If it’s nice, you can sit outside, but it can get a bit dusty during drier months.
Beartooth Highway
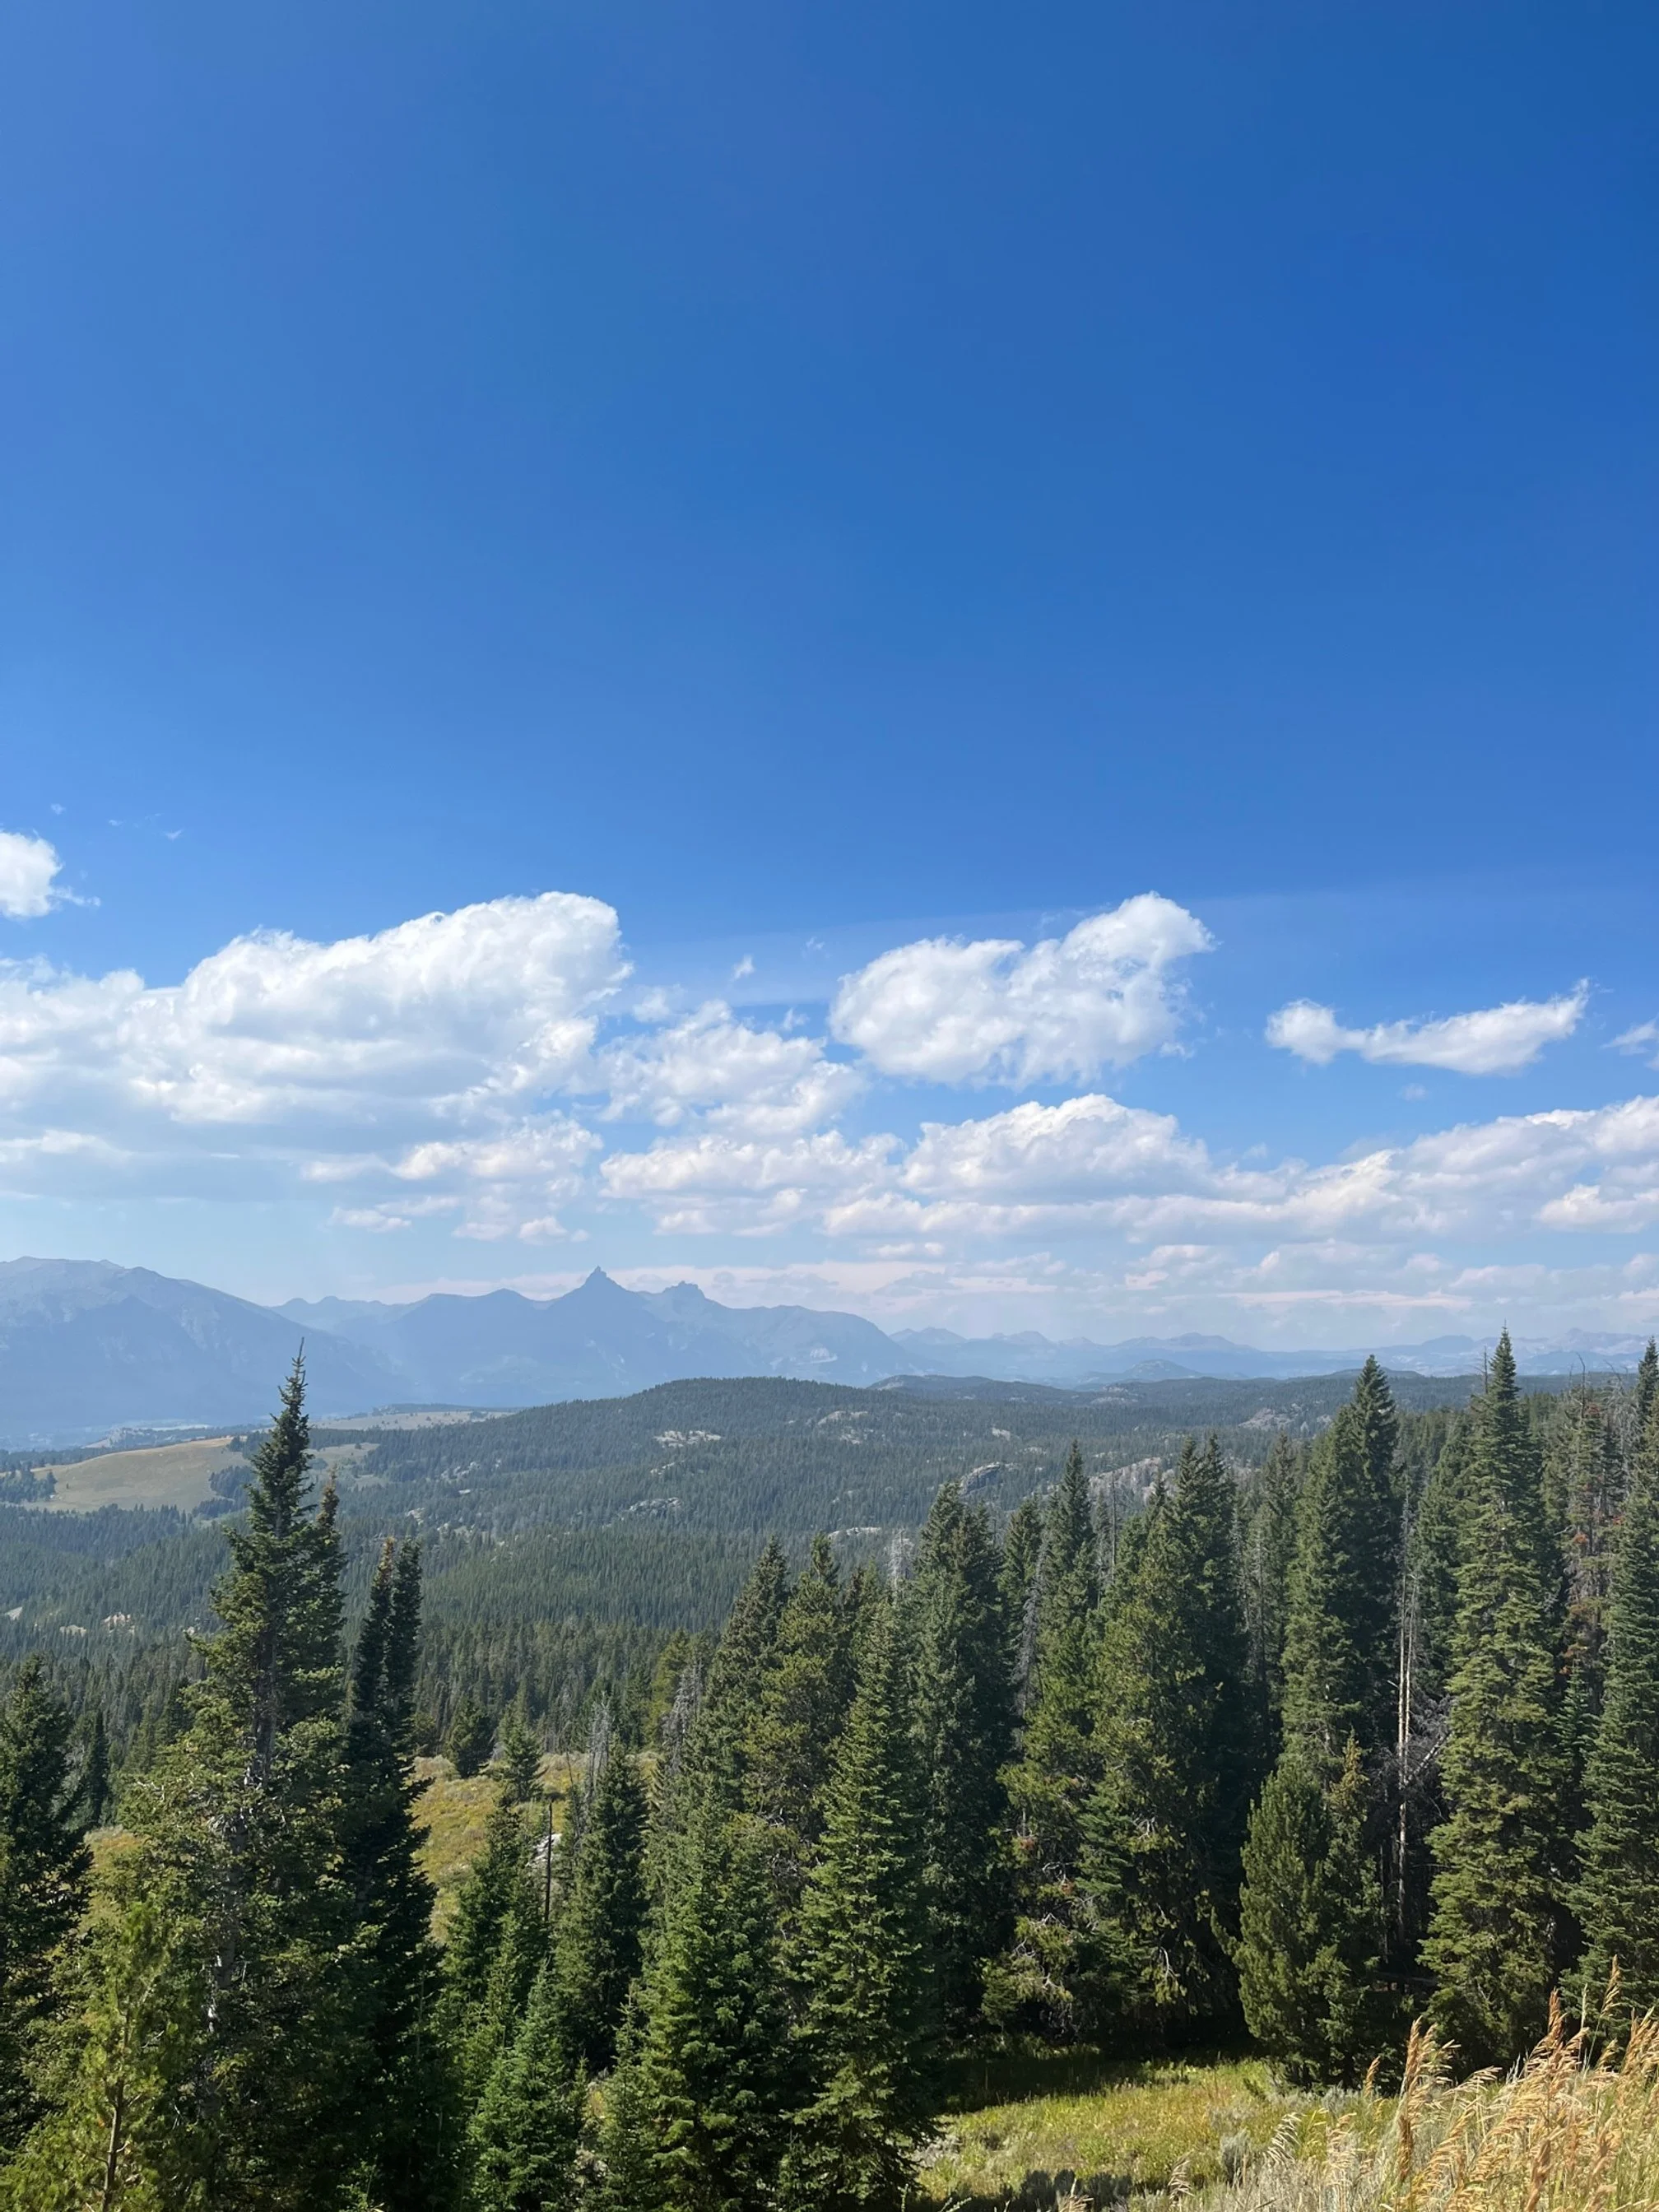
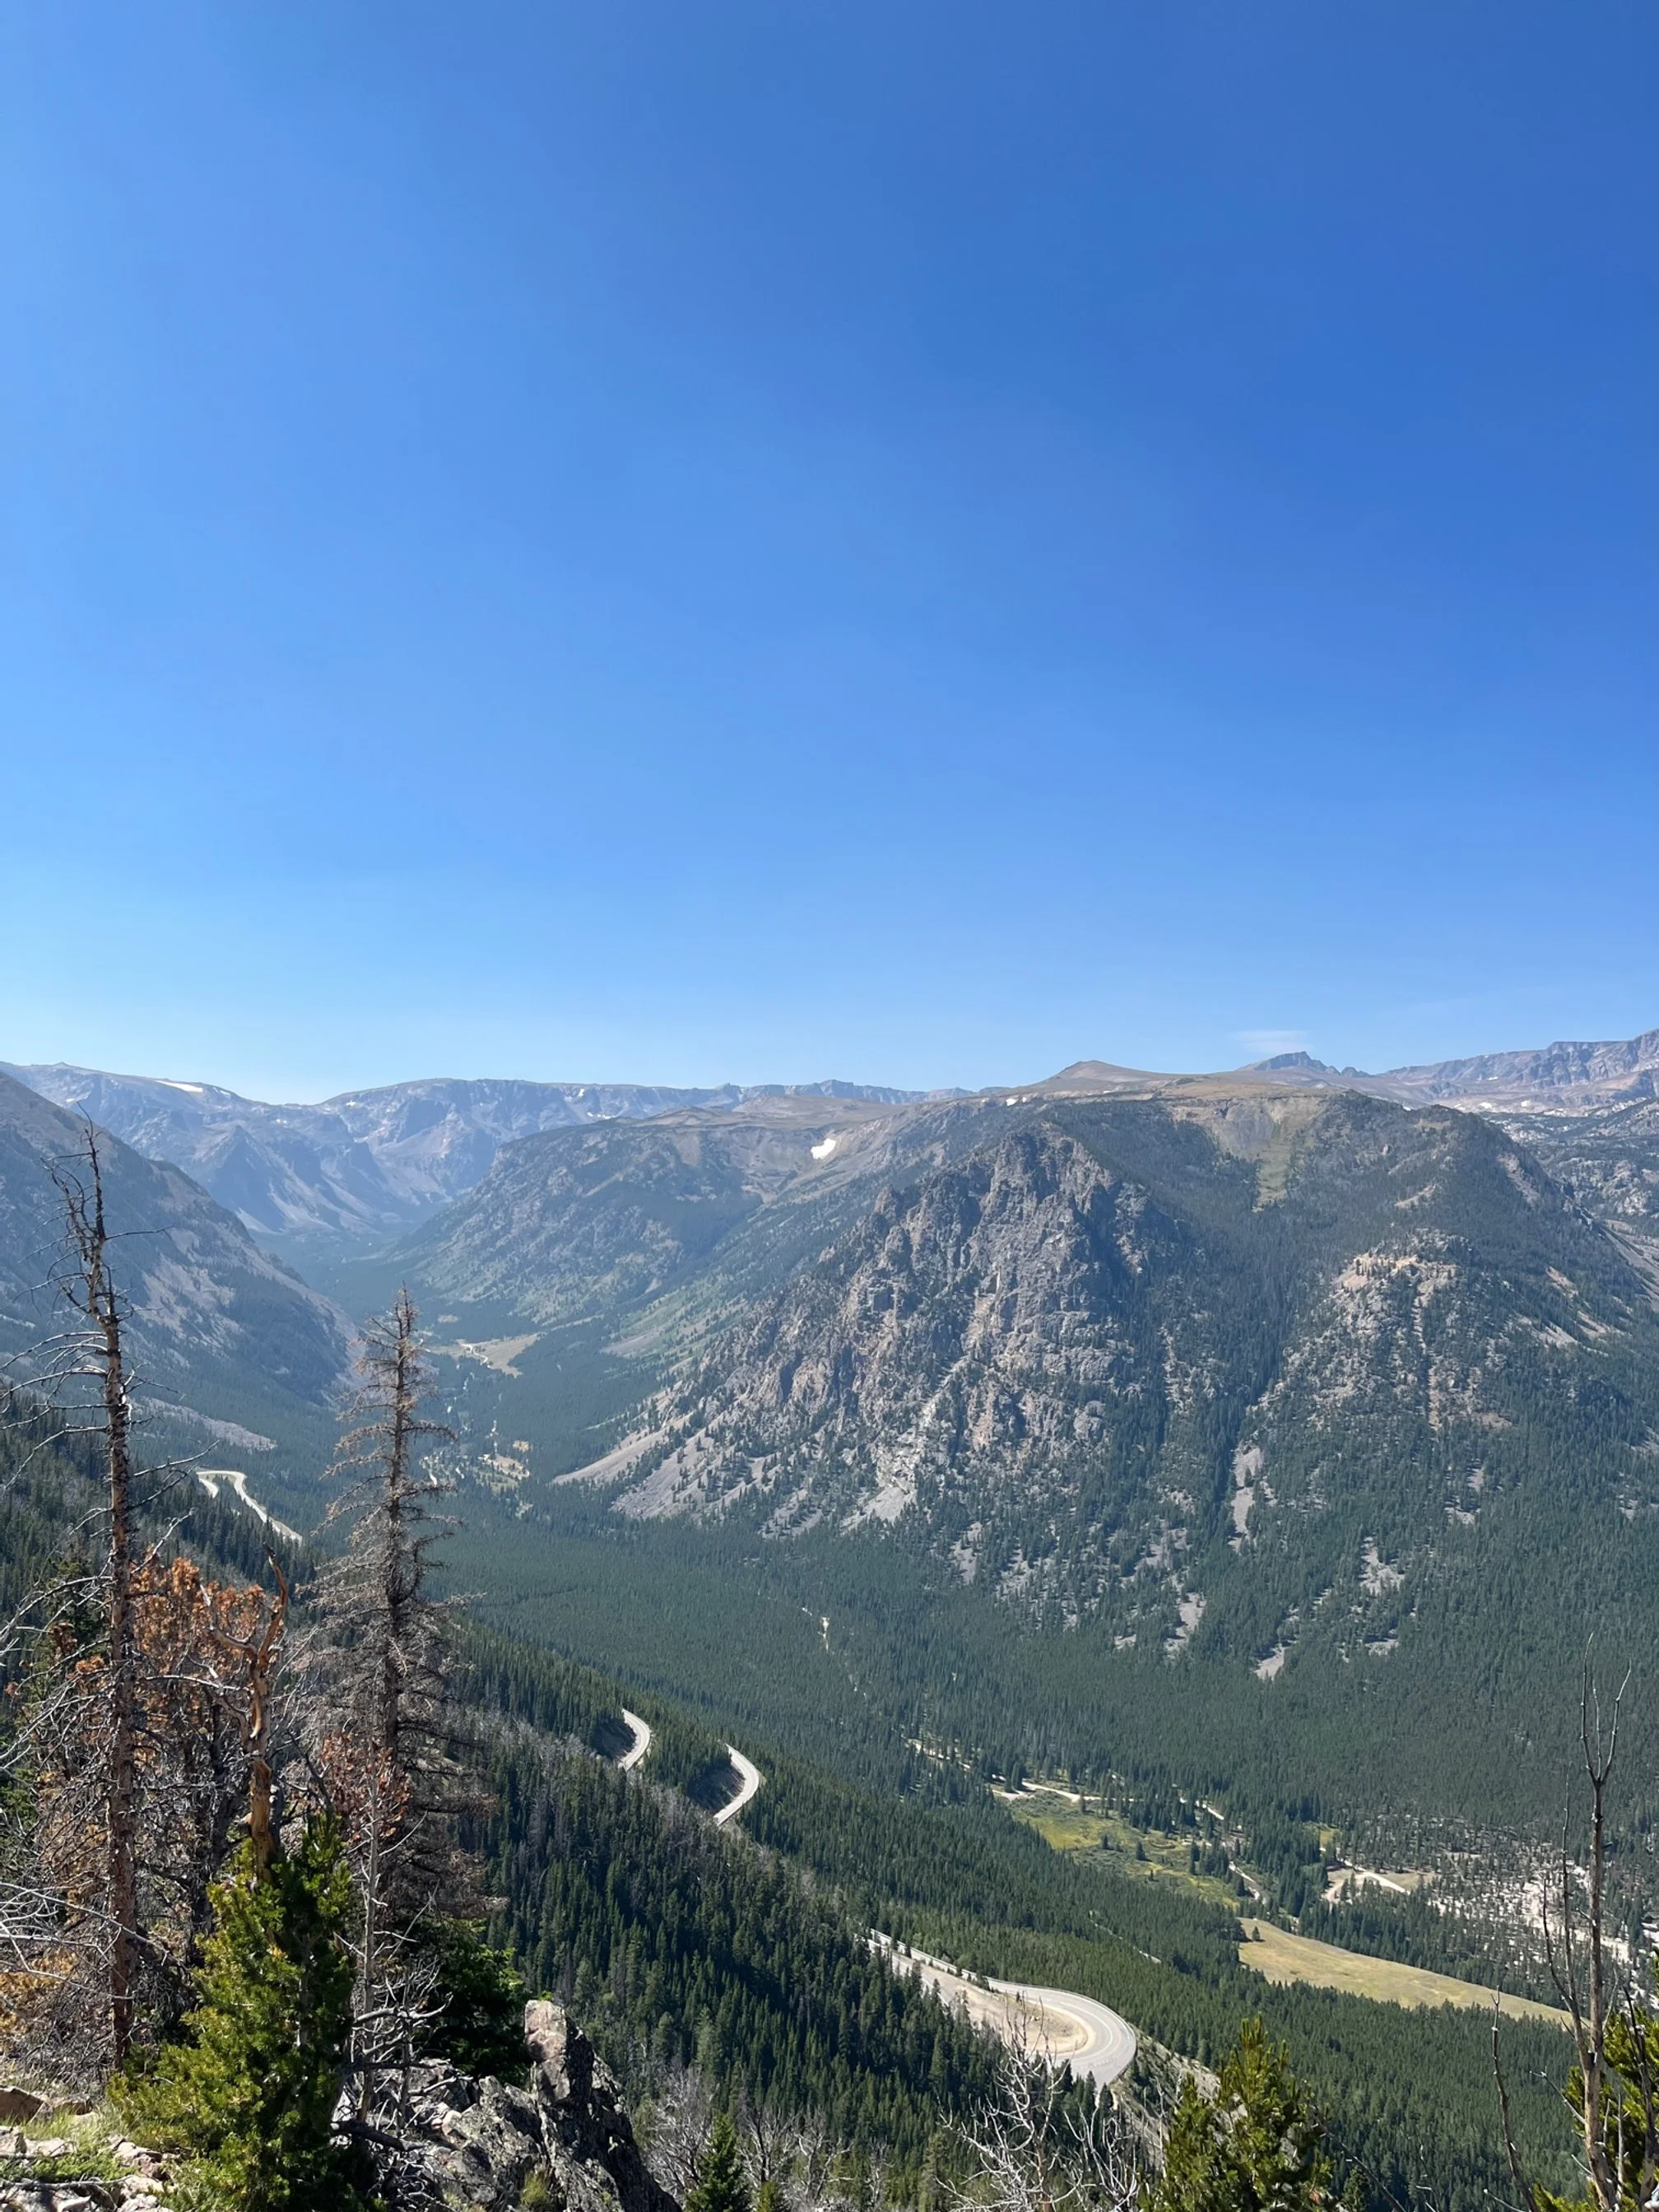
Then, head out of town to experience Beartooth Highway, widely known as one of the most beautiful drives in America.
Over the next 70 miles, you’ll work your way from Cooke City, Montana to Red Lodge, Montana, cruising by lakes, mountains, and alpine tundra in the Absaroka Wilderness.
Go slowly and make use of the many car pull-outs along the way. This drive is stunning, and there’s no need to rush any part of it.
Stop for snacks at the Top of the World resort (it’s really the only option on this stretch!), or have a picnic along the way.
If you do the entire drive straight through, it will take about 2 hours.
However, allot at least half a day, as you’ll want to get out at multiple overlooks and look around in Red Lodge before turning back.
See my complete Beartooth Highway guide here.
Overnight: Tower-Roosevelt
Once you’re back at the Roosevelt Lodge, you’re limited for options on dinner. However, the dining room at the lodge has a casual, family friendly dinner menu.
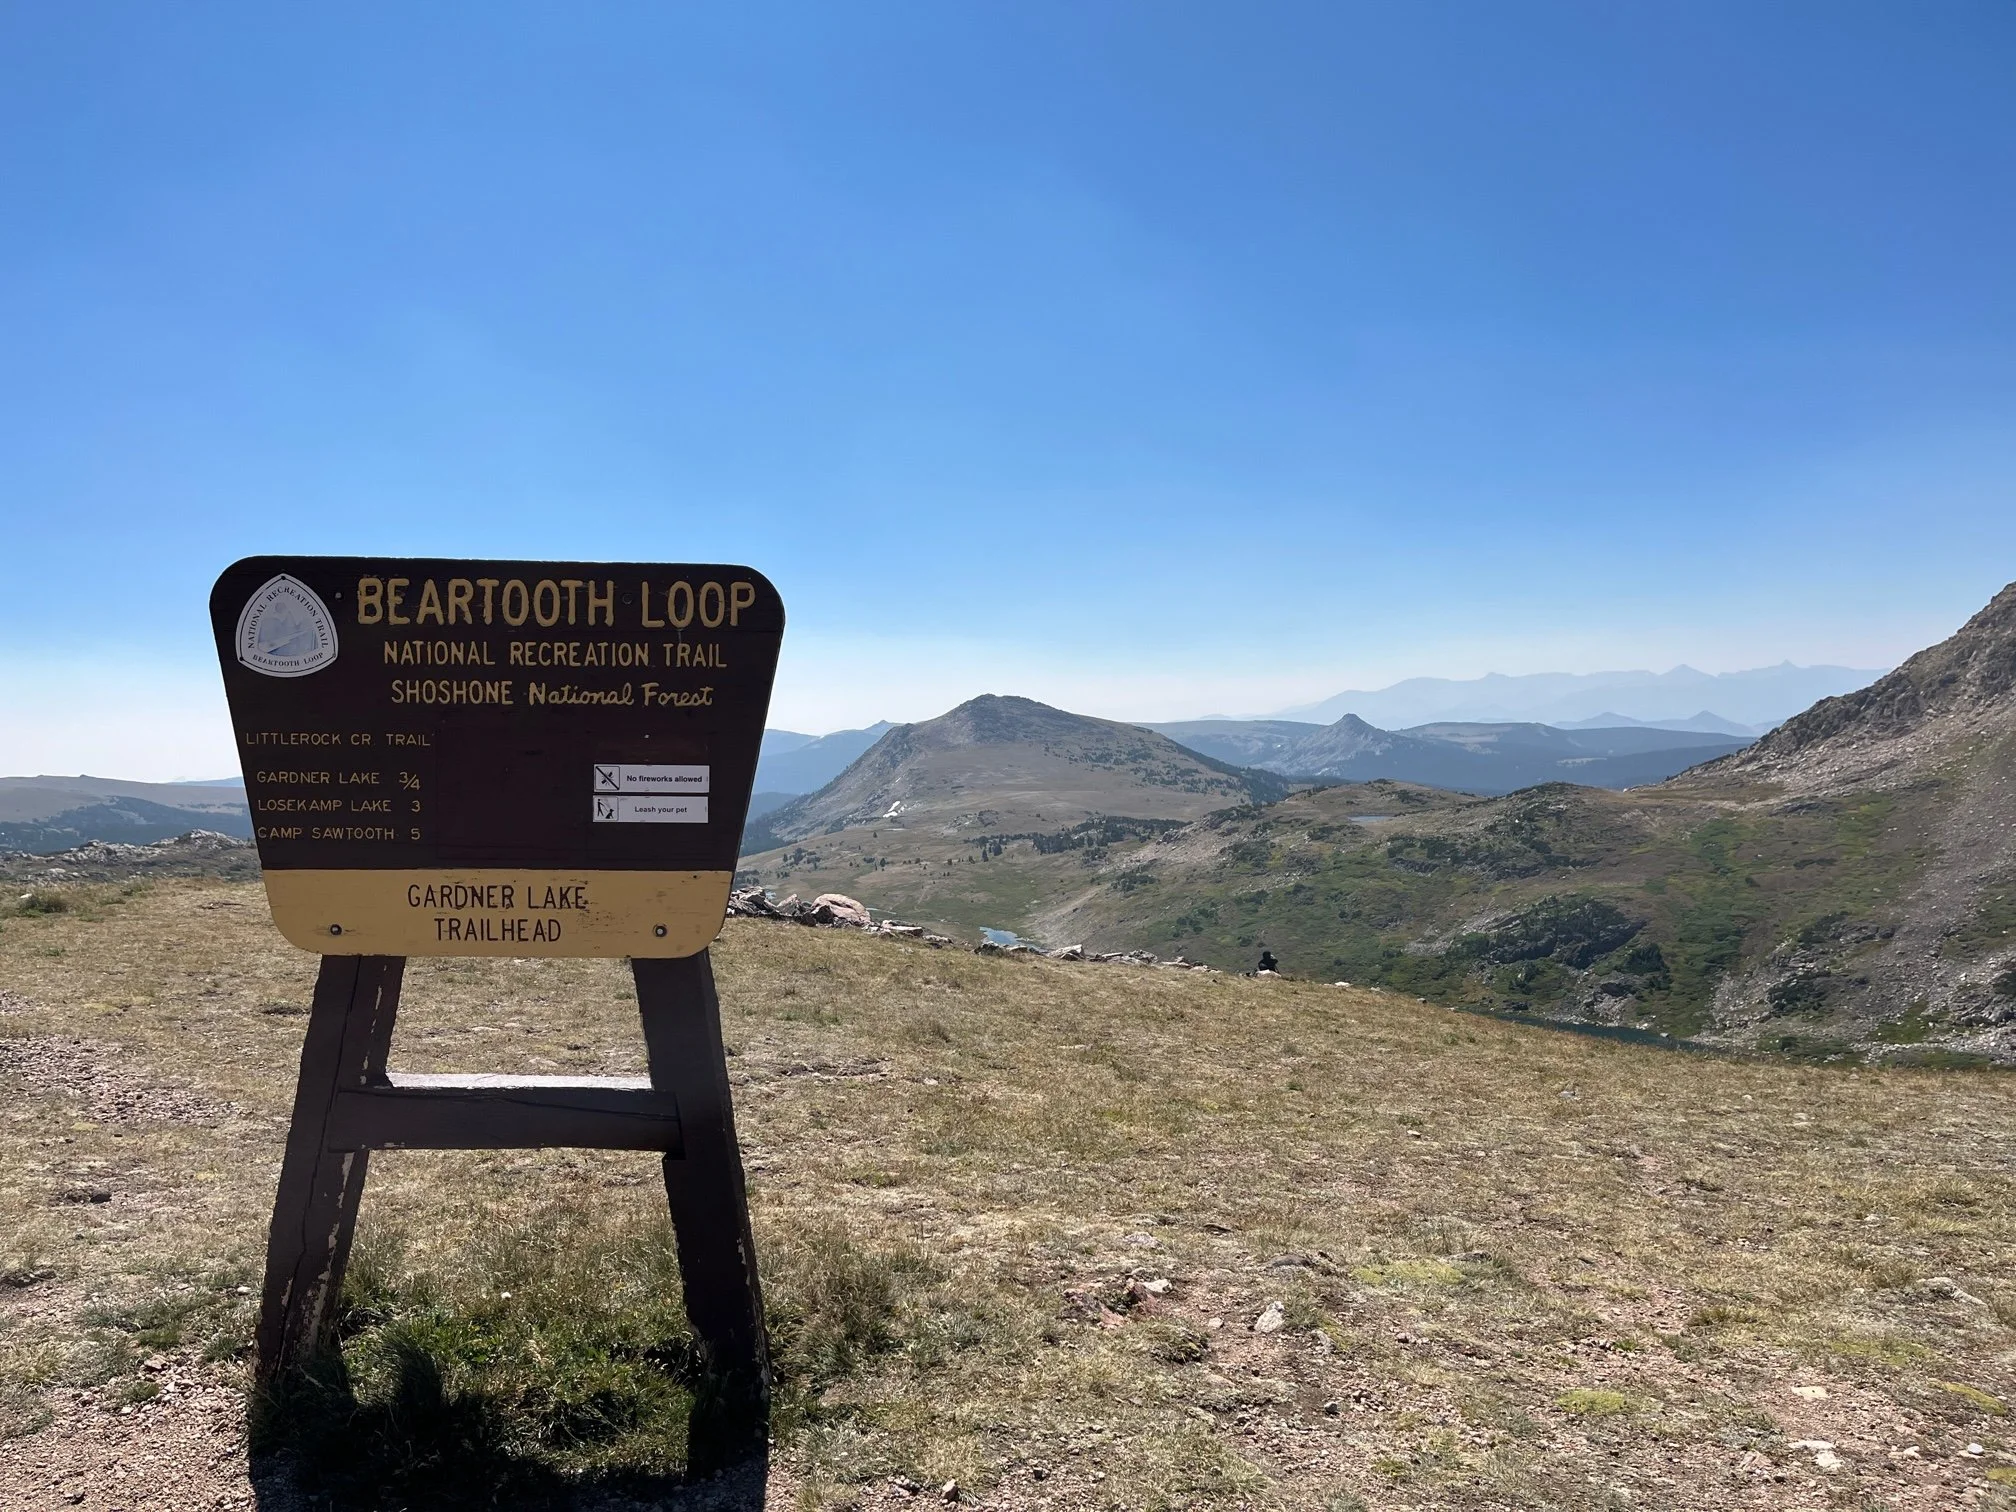
Day 9: Mount Washburn and Mud Volcano
We’re headed south again, as we pick up and move to our last area of the park.
Mount Washburn
Today, I’d suggest hiking Mount Washburn, one of the most popular and accessible mountain hikes within Yellowstone.
From Tower-Roosevelt, you’ll take Grand Loop road south towards Canyon Village.
As you climb towards Mount Washburn, keep a lookout for pronghorn in what I think is one of the prettiest stretches of road in the park.
Before you get to Dunraven Pass, you’ll see a large, paved parking lot clearly marked for the Mount Washburn trailhead.
While you are ascending to Mount Washburn’s peak, the elevation gain isn’t as bad as one might think, since you’re beginning the hike partially up the mountain.
Plan for 3-4 hours for the entire hike and pack plenty of snacks and water.
Dunraven Pass
After leaving the parking lot for Mount Washburn, you’ll go through Dunraven Pass, which is the highest road inside Yellowstone.
You’ll have long range views of the mountains and see evidence of recent forest fires along this section.
If you’re hungry, stop at Canyon Village to pick up a sandwich at the grill, yogurt at the market, or a hot plate at the Canyon Eatery.
Hayden Valley (Redux)
After you pass through the Canyon Village area, you’ll stay on Grand Loop Road through Hayden Valley.
We already passed through here on day 5, but going through multiple times increases your chances of seeing wildlife.
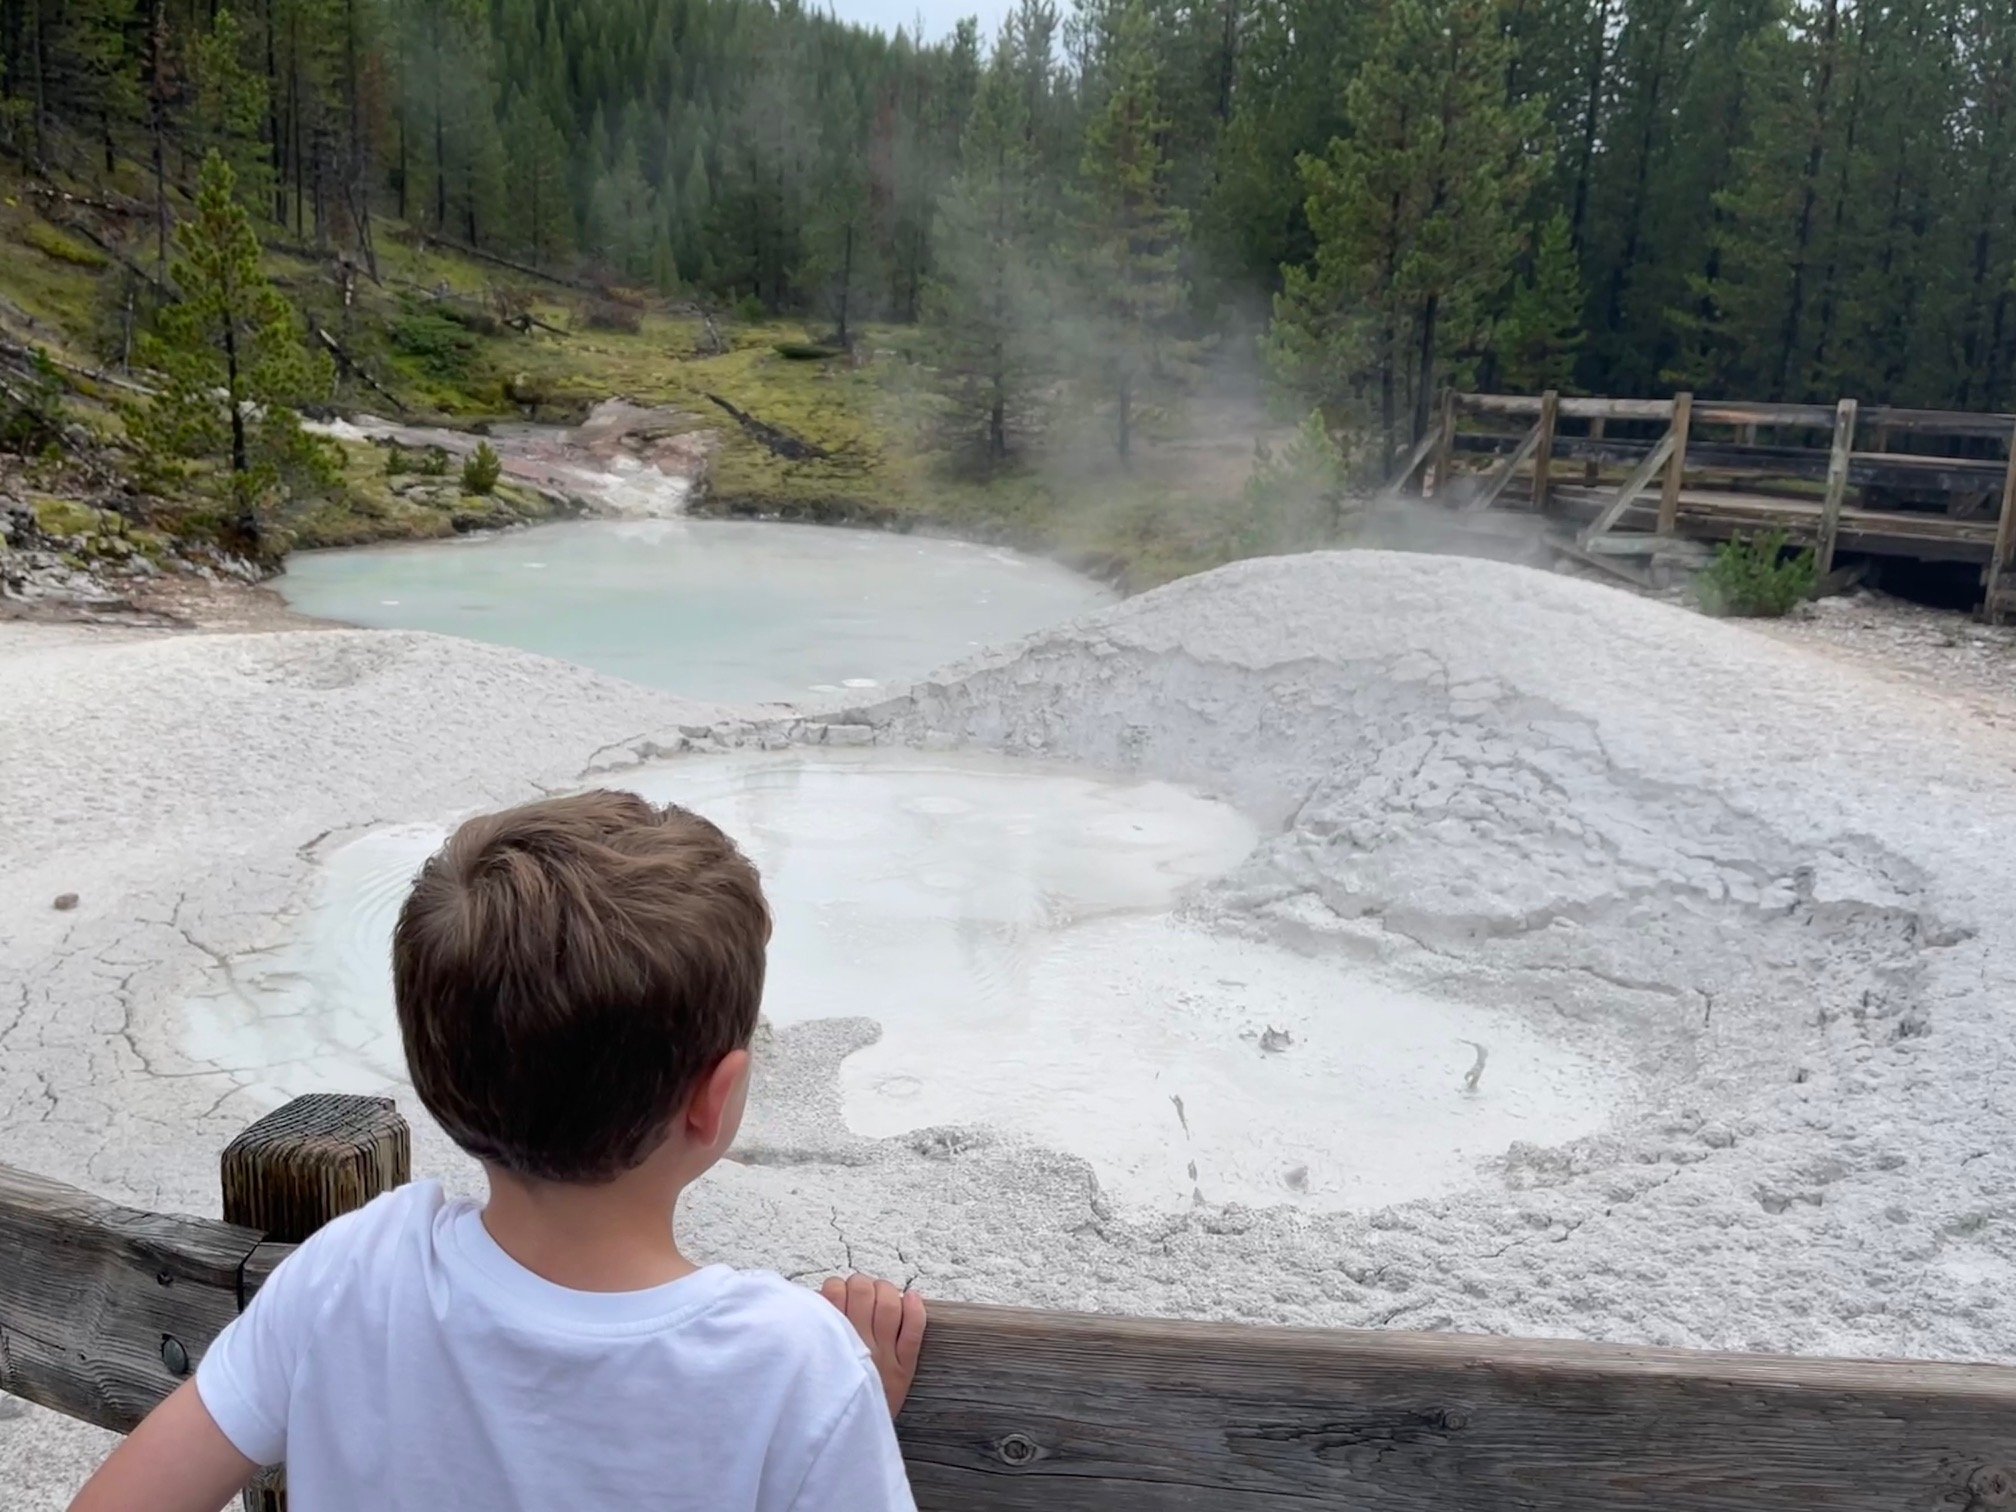
Mud Volcano Area
Our next stop is the Mud Volcano area, where you can see Sulphur Cauldron, Mud Volcano, and multiple other geothermal features.
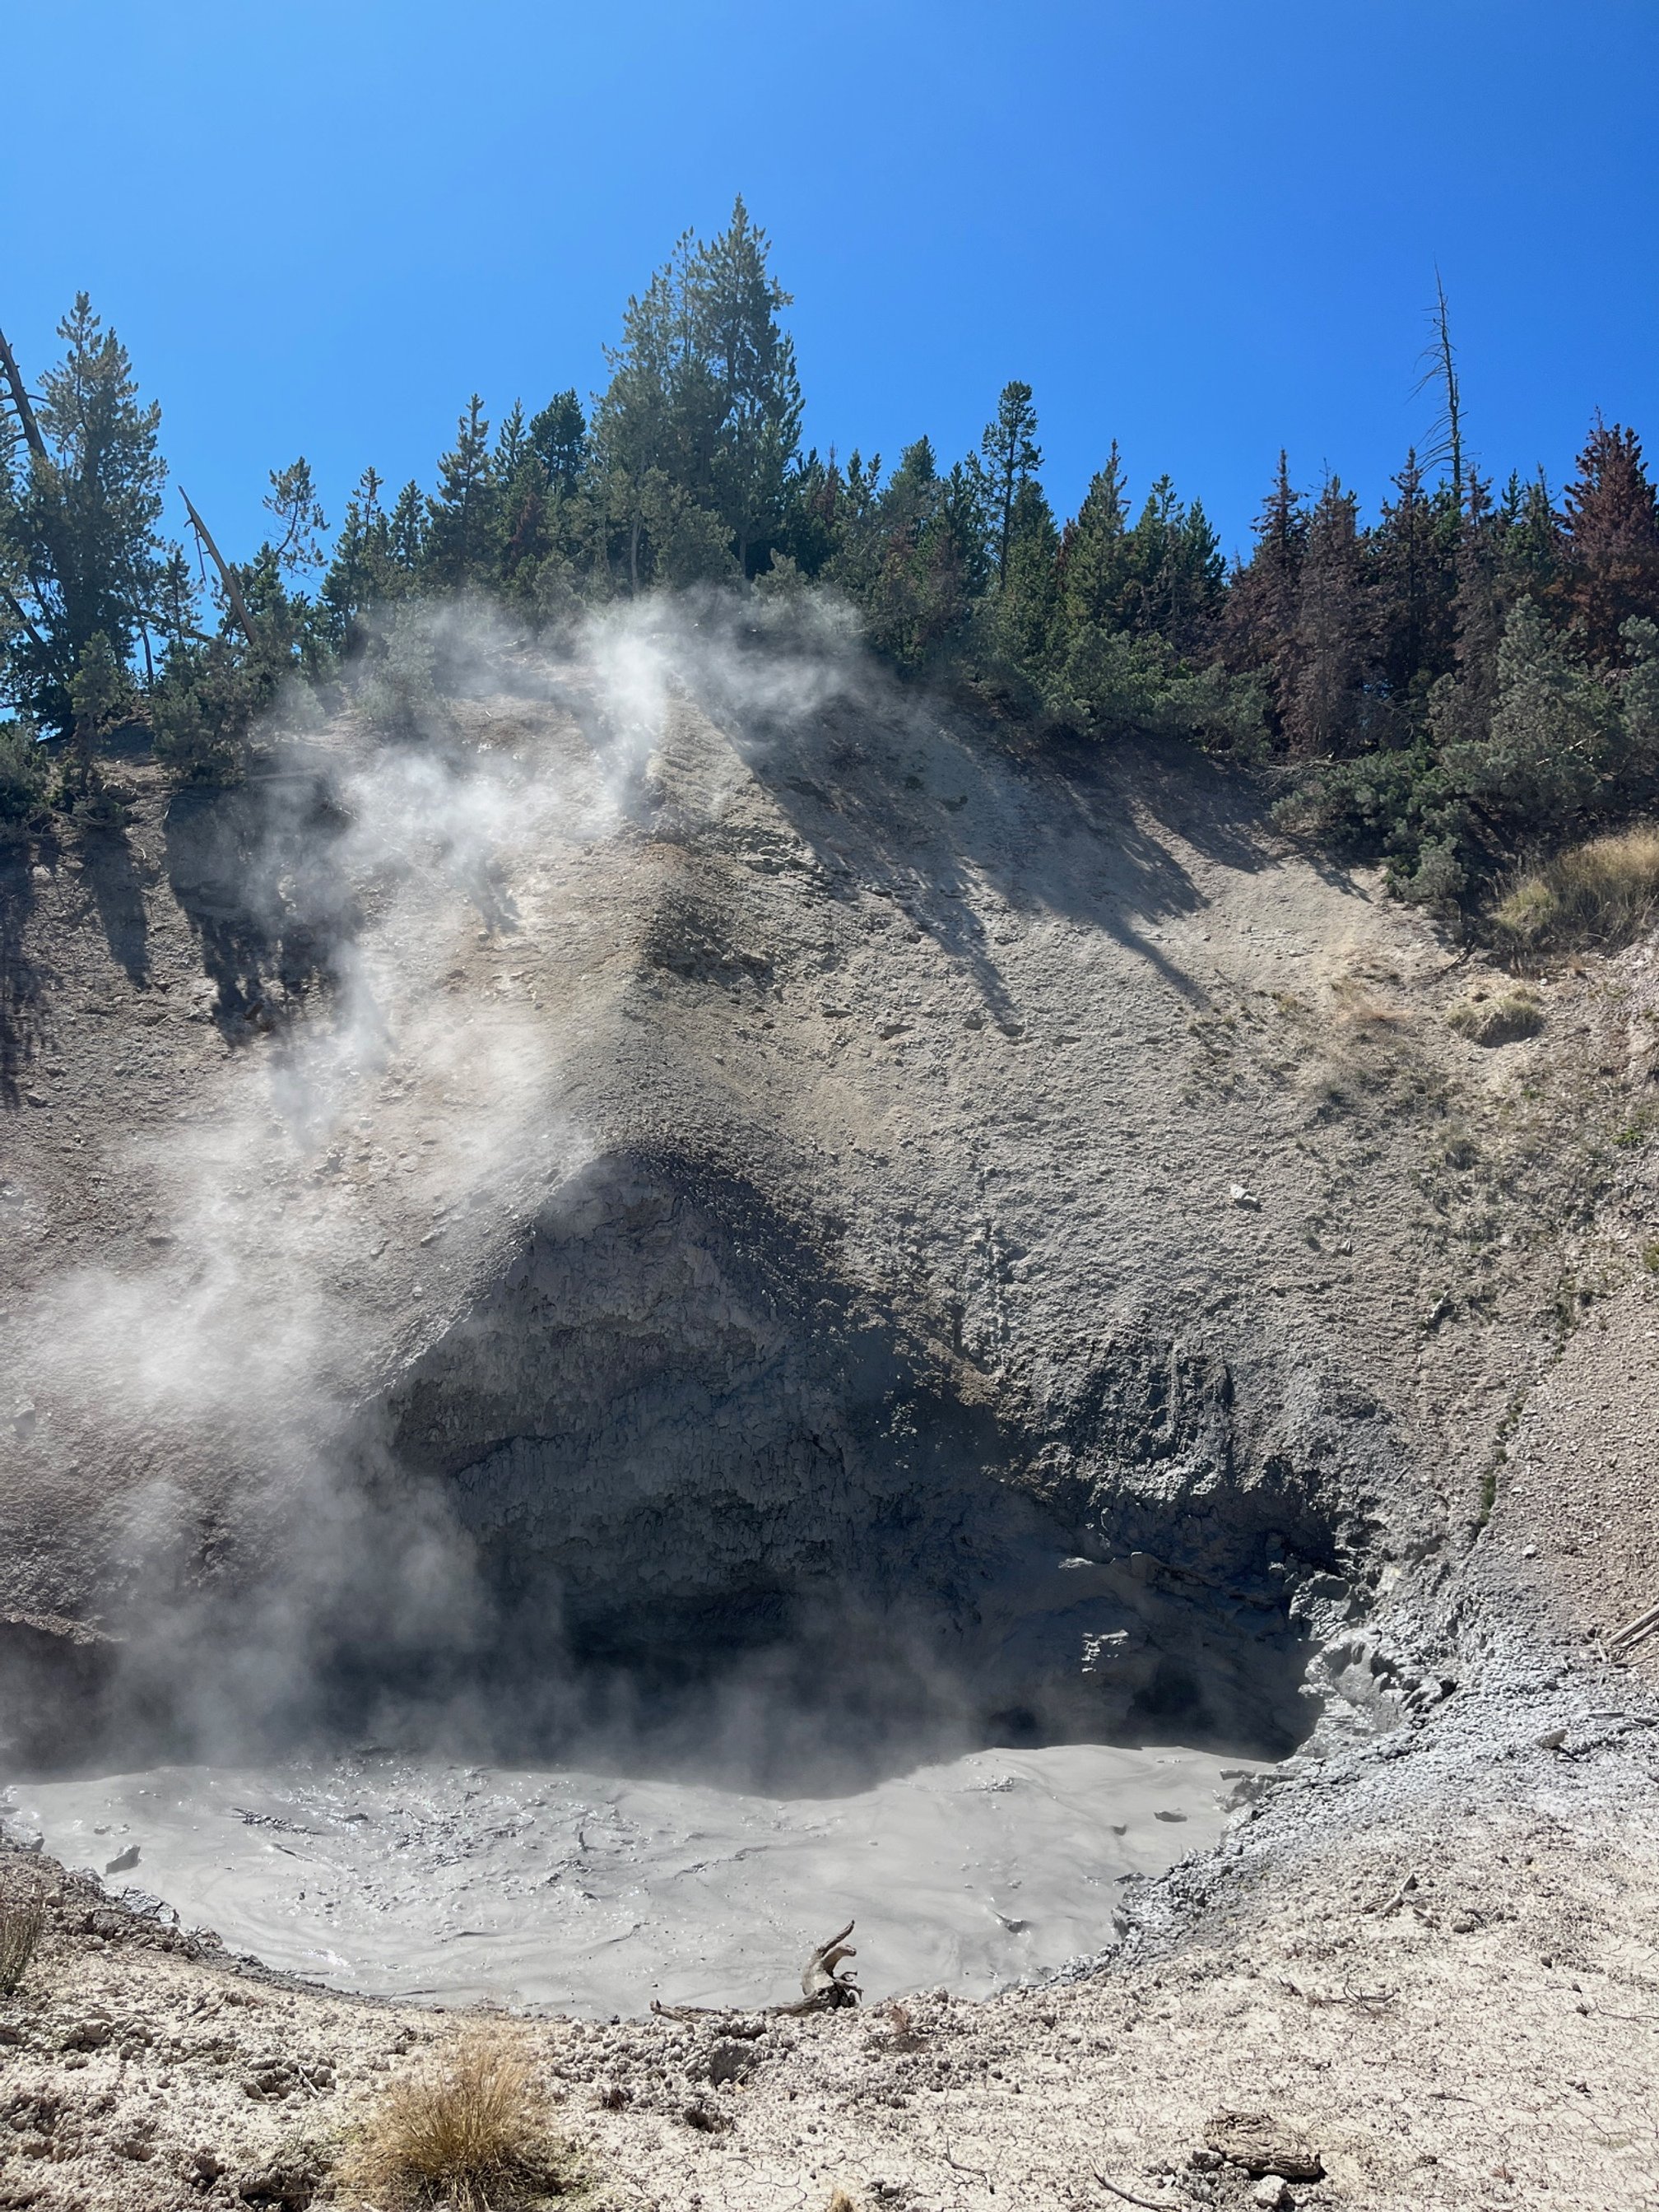
Mud Cauldron, which is slowly taking down the hillside
Sulphur Cauldron is on the opposite side of the road from Mud Cauldron, and you can walk between the two. Use caution when walking across the road and on the shoulder between the sites.
Of the 2 areas—Sulphur Cauldron and Mud Volcano—the latter has more to do, so plan your time accordingly.
I highly recommend the free ranger program that takes you around the Mud Volcano lower boardwalk. This is themed around the 5 senses, making it excellent for families with younger kids.
If you’re up for a longer exploration here, take the upper loop at Mud Volcano as well, which offers up additional stem vents and hot springs.
Of all of the features here, we loved Dragon’s Mouth on the lower loop best!
Here, a steam vent and hot springs are located deep in a cave, and the pressure from those features cause the water at the mouth of the cave to make waves. The sounds and overall look makes it feel like something out of a fantasy novel.
Overnight: Lake Yellowstone Hotel
Once you’re done at Mud Cauldron, continue south past Fishing Bridge to the Lake Yellowstone Hotel for your final night in the park.
Lake Yellowstone Hotel is beautiful, and, while it’s been renovated multiple times since it was built, it still has a Gilded Age feel to it.
You’ll remember this part of the park from Day 5, but you’ll have more time to appreciate the hotel this evening.
The hotel does offer dining, both in the main dining room and at the smaller coffee shop-style restaurant down the hall from the front desk.
Day 10: Leaving the Park
What an adventure it’s been, but all things (sadly) must come to an end.
As you wrap-up your time in Yellowstone National Park, you’ll have to consider which entrance you’ll be using to depart.
Since there are 2 entrances within easy driving distance of Lake Yellowstone Hotel, I’ve provided different Day 10 itineraries for you to choose from.
If leaving through east entrance to Cody, Wyoming
Cody is less than 2 hours from Lake Yellowstone Hotel, so you’ll have at least the morning to hang around Yellowstone.
If the day is nice, I’d spend my time near the Bridge Bay Marina.
Here, you can rent small john boats to putter around Lake Yellowstone, giving you a great day out on the water and a unique final look at this beautiful place.
Keep in mind that you can rent the boats for anywhere between 1 and 8 hours, and they provide required flotation devices.
You can take kids as young as 2 on the boats, making this a family friendly activity.
If you’d rather stay on land, there are a couple of shorter hikes near Bridge Bay Marina to fill your morning.
The 2.5 round trip hike to Natural Bridge is an easy option that ends in a 51-foot high cliff.
The Storm Point trail covers 2.3 miles (out and back) and takes you to the shore of Lake Yellowstone.
When you’re ready to head out, stop by the Fishing Bridge store to get a quick sandwich from the cafe, and head on to Cody via the east entrance.
If leaving through south entrance to Jackson and/or Grand Teton National Park
You’ll have one last chance to turn in your Junior Ranger book as you pass through Grant Village near West Thumb.
You can also pick up any last minute souvenirs at the Visitors Center here, too.
Head south on Highway 191/26/89 towards the south entrance.
On the way, you’ll have a couple options for the remainder of your time in Yellowstone.
Stop at the sign for the Continental Divide south of Grand Village.
If you’d like to do a hike, you’ll find the Riddle Lake trailhead here, too. This trail is flat, easy, and good for the entire family, clocking in at around 2 miles roundtrip.
A bit closer to the entrance, you’ll see Lewis Lake and Lewis Falls just south of the lake.
If you’d like to stop for lunch or a snack, there are several picnic tables in the Lewis Lake campground area.
The falls aren’t the biggest in the park—they’re about 30 feet from cascade to river—but they’re worth a quick stop off. You can view them from the road, or take the trail closer to the base of the falls.
From here, you can take the highway directly south to the Jackson Hole Airport, or if you have time to linger in this area, you should check out my 1 day in Grand Teton National Park itinerary!
More resources to help you plan your Yellowstone trip: